100 Days Of DevOps
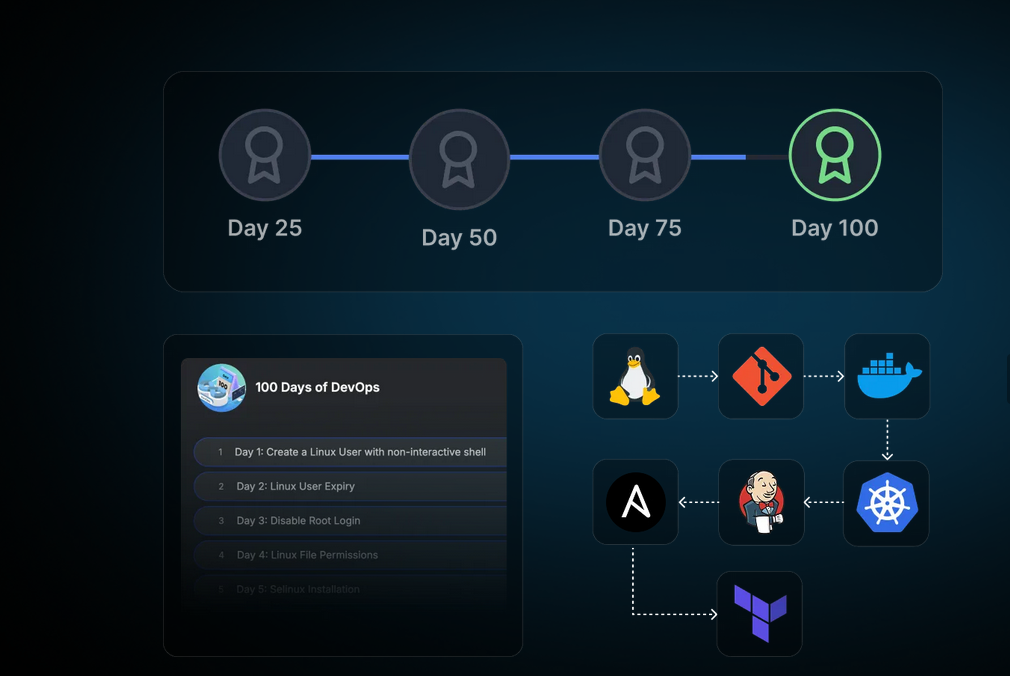
Day 1 : Linux User Setup with Non-Interactive Shell
Creating non interactive shell and user setup
Create a user with non-interactive shell for your organization on a specific server. This is essential for service accounts and automated processes that don’t require interactive login capabilities.
1
sudo useradd -s /sbin/nologin kristy
Day 2: Temporary User Setup with Expiry
Temporary user setup with Expiry
1
2
3
sudo useradd -e 2026-12-24 kristy

sudo passwd kristy
Day 3: Secure Root SSH Access
Secure Root ssh access
1
sudo nano /etc/ssh/sshd_config
PermitRootLogin no- You have to do it for every single host!
Day 4:Script Execution Permissions
In a bid to automate backup processes, the xFusionCorp Industries sysadmin team has developed a new bash script named xfusioncorp.sh. While the script has been distributed to all necessary servers, it lacks executable permissions on App Server 1 within the Stratos Datacenter.
Your task is to grant executable permissions to the /tmp/xfusioncorp.sh script on App Server 1. Additionally, ensure that all users have the capability to execute it.
1
2
3
4
5
6
7
8
9
10
11
12
13
14
15
16
17
thor@jumphost ~$ ssh tony@stapp01.stratos.xfusioncorp.com
The authenticity of host 'stapp01.stratos.xfusioncorp.com (172.17.0.4)' can't be established.
ED25519 key fingerprint is SHA256:8eDx2ZriNxW9+pNci7Zq6oECY1W13b28pRzv/AA3cxE.
[tony@stapp01 tmp]$ ls -la /tmp
total 36
drwxrwxrwt 1 root root 4096 Dec 12 08:44 .
drwxr-xr-x 1 root root 4096 Dec 12 08:45 ..
drwxrwxrwt 2 root root 4096 Dec 12 08:42 .ICE-unix
drwxrwxrwt 2 root root 4096 Dec 12 08:42 .X11-unix
drwxrwxrwt 2 root root 4096 Dec 12 08:42 .XIM-unix
drwxrwxrwt 2 root root 4096 Dec 12 08:42 .font-unix
drwx------ 3 root root 4096 Dec 12 08:42 systemd-private-1435520e8a0746a589dc0f038604b67c-dbus-broker.service-OQFfiu
drwx------ 3 root root 4096 Dec 12 08:42 systemd-private-1435520e8a0746a589dc0f038604b67c-systemd-logind.service-QuuNiN
-rwxr-xr-x 1 root root   40 Dec 12 08:42 xfusioncorp.sh
[tony@stapp01 tmp]$ ./xfusioncorp.sh
Welcome To KodeKloud
Day 5: SElinux Installation and Configuration
Following a security audit, the xFusionCorp Industries security team has opted to enhance application and server security with SELinux. To initiate testing, the following requirements have been established for App server 2 in the Stratos Datacenter:
Install the required
SELinuxpackages.Permanently disable SELinux for the time being; it will be re-enabled after necessary configuration changes.
No need to reboot the server, as a scheduled maintenance reboot is already planned for tonight.
Disregard the current status of SELinux via the command line; the final status after the reboot should be
disabled.
1
2
3
4
5
6
7
8
9
10
11
12
13
14
15
16
17
18
19
20
21
22
23
24
25
26
27
28
29
30
31
[root@stapp02 ~] sudo yum install policycoreutils policycoreutils-python selinux-policy selinux-policy-targeted setroubleshoot-server
[root@stapp02 ~] sudo sed -i 's/^SELINUX=.*/SELINUX=disabled/' /etc/selinux/config
[root@stapp02 ~] vi /etc/selinux/config
[root@stapp02 ~] cat /etc/selinux/config

# This file controls the state of SELinux on the system.
# SELINUX= can take one of these three values:
#     enforcing - SELinux security policy is enforced.
#     permissive - SELinux prints warnings instead of enforcing.
#     disabled - No SELinux policy is loaded.
# See also:
# https://access.redhat.com/documentation/en-us/red_hat_enterprise_linux/9/html/using_selinux/changing-selinux-states-and-modes_using-selinux#changing-selinux-modes-at-boot-time_changing-selinux-states-and-modes
#
# NOTE: Up to RHEL 8 release included, SELINUX=disabled would also
# fully disable SELinux during boot. If you need a system with SELinux
# fully disabled instead of SELinux running with no policy loaded, you
# need to pass selinux=0 to the kernel command line. You can use grubby
# to persistently set the bootloader to boot with selinux=0:
#
#    grubby --update-kernel ALL --args selinux=0
#
# To revert back to SELinux enabled:
#
#    grubby --update-kernel ALL --remove-args selinux
#
SELINUX=disabled
# SELINUXTYPE= can take one of these three values:
#     targeted - Targeted processes are protected,
#     mls - Multi Level Security protection.
SELINUXTYPE=targeted
Day 6: Create a Cron Job
The Nautilus system admins team has prepared scripts to automate several day-to-day tasks. They want them to be deployed on all app servers in Stratos DC on a set schedule. Before that they need to test similar functionality with a sample cron job. Therefore, perform the steps below:
a. Install cronie package on all Nautilus app servers and start crond service.
b. Add a cron */5 * * * * echo hello > /tmp/cron_text for root user.
- Login into each server using ssh (check day01)
- Install
croniepackage into centos:1
sudo yum install cronie -y
Start crond service
1
2
sudo systemctl enable crond
sudo systemctl start crond
Create cron schedule:
1
2
sudo crontab -e
*/5 * * * * echo hello > /tmp/cron_text
Verify crontab:
1
sudo crontab -l
and wait 5 minutes to check cron_text in /tmp/
Automation Script
1
2
3
4
5
6
7
8
9
10
11
12
13
14
15
16
17
18
19
20
21
22
23
24
25
26
27
28
29
30
31
32
33
34
35
36
37
38
39
40
41
42
43
44
45
46
47
48
49
50
51
52
53
54
55
56
57
58
59
60
61
#!/bin/sh

# setup_cron_job.sh
# Script to setup cron job on CentOS for Nautilus app servers

set -e  # Exit on any error

echo "=== Setting up Cron Job on CentOS ==="

# Step 1: Install cronie package
echo "Installing cronie package..."
if ! rpm -q cronie &>/dev/null; then
    sudo yum install cronie -y
    echo "✓ cronie package installed successfully"
else
    echo "✓ cronie package already installed"
fi

# Step 2: Start and enable crond service
echo "Starting and enabling crond service..."
sudo systemctl start crond
sudo systemctl enable crond

# Verify service is running
if systemctl is-active --quiet crond; then
    echo "✓ crond service is running"
else
    echo "✗ Failed to start crond service"
    exit 1
fi

# Step 3: Add cron job for root user
echo "Adding cron job for root user..."

# Define the cron job
CRON_JOB="*/5 * * * * echo hello > /tmp/cron_text"

# Check if cron job already exists
if sudo crontab -l 2>/dev/null | grep -q "echo hello > /tmp/cron_text"; then
    echo "✓ Cron job already exists"
else
    # Add the cron job
    (sudo crontab -l 2>/dev/null || true; echo "$CRON_JOB") | sudo crontab -
    echo "✓ Cron job added successfully"
fi

# Step 4: Verify the setup
echo "Verifying cron job setup..."
echo "Current cron jobs for root user:"
sudo crontab -l

echo ""
echo "=== Setup Complete ==="
echo "The cron job will run every 5 minutes and write 'hello' to /tmp/cron_text"
echo "To monitor: sudo tail -f /var/log/cron"
echo "To check output: cat /tmp/cron_text (after 5+ minutes)"

# Optional: Show service status
echo ""
echo "Crond service status:"
sudo systemctl status crond --no-pager -l
Day 7: Linux SSH Authentication
Linux SSH Authentication
The system admins team of xFusionCorp Industries has set up some scripts on jump host that run on regular intervals and perform operations on all app servers in Stratos Datacenter. To make these scripts work properly we need to make sure the thor user on jump host has password-less SSH access to all app servers through their respective sudo users (i.e tony for app server 1). Based on the requirements, perform the following: Set up a password-less authentication from user thor on jump host to all app servers through their respective sudo users.
Login to jump host as thor
1
ssh thor@jump_host
Generate SSH key (press Enter for all prompts)
1
ssh-keygen -t rsa -b 2048
Copy key to respective sudo users on app servers
1
2
3
ssh-copy-id tony@stapp01
ssh-copy-id steve@stapp02
ssh-copy-id banner@stapp03
Verify password-less access
1
2
3
ssh tony@stapp01.stratos.xfusioncorp.com
ssh steve@stapp02.stratos.xfusioncorp.com
ssh banner@stapp03.stratos.xfusioncorp.com
Day 8: Install Ansible
During the weekly meeting, the Nautilus DevOps team discussed about the automation and configuration management solutions that they want to implement. While considering several options, the team has decided to go with Ansible for now due to its simple setup and minimal pre-requisites. The team wanted to start testing using Ansible, so they have decided to use jump host as an Ansible controller to test different kind of tasks on rest of the servers.
Install ansible version 4.7.0 on Jump host using pip3 only. Make sure Ansible binary is available globally on this system, i.e all users on this system are able to run Ansible commands.
Check pip3 version
1
pip3 --version
Install pip3 (if not already installed)
1
sudo yum install -y python3-pip
Install Ansible 4.7.0 globally using pip3
1
sudo pip3 install ansible==4.7.0
Verify Ansible version
1
ansible --version
Check Ansible binary location
1
which ansible
Verify PATH includes Ansible binary directory
1
echo $PATH
Run Ansible (basic command check)
1
ansible
Day 9: MariaDB Troubleshooting
There is a critical issue going on with the Nautilus application in Stratos DC. The production support team identified that the application is unable to connect to the database. After digging into the issue, the team found that mariadb service is down on the database server.
Look into the issue and fix the same.
Check OS Information (Verify Environment)
1
2
3
cat /etc/release
cat /etc/releases
cat /etc/os-release
Check MariaDB Service Status
Confirms whether MariaDB is running, stopped, or failed.
1
2
sudo systemctl status mariadb
sudo systemctl status mariadb.service
Attempt to Start MariaDB
Initial attempt to bring the database service online.
1
sudo systemctl start mariadb
Check MariaDB Error Logs (Root Cause Analysis)
Used when the service fails to start. Shows InnoDB and permission errors.
1
sudo tail /var/log/mariadb/mariadb.log
Fix MariaDB Data Directory Ownership
MariaDB runs as mysql user and must own its data directory.
1
sudo chown -R mysql:mysql /var/lib/mysql
Fix Data Directory Permissions
Ensures MariaDB can read/write database files.
1
sudo chmod 755 /var/lib/mysql
Create MySQL Socket Directory
MariaDB needs this directory to create its socket file.
1
sudo mkdir -p /var/run/mysqld
Set Correct Ownership for Socket Directory
Allows MariaDB to bind to the socket.
1
sudo chown mysql:mysql /var/run/mysqld
Restart MariaDB After Fix
Applies permission changes and restarts the service.
1
sudo systemctl restart mariadb
Verify MariaDB Is Running
Final confirmation that the issue is resolved.
1
sudo systemctl status mariadb.service
Day 10: Linux Bash Scripts
The production support team of xFusionCorp Industries is working on developing some bash scripts to automate different day to day tasks. One is to create a bash script for taking websites backup. They have a static website running on App Server 3 in Stratos Datacenter, and they need to create a bash script named news_backup.sh which should accomplish the following tasks. (Also remember to place the script under /scripts directory on App Server 3).
a. Create a zip archive named xfusioncorp_news.zip of /var/www/html/news directory.
b. Save the archive in /backup/ on App Server 3. This is a temporary storage, as backups from this location will be clean on weekly basis. Therefore, we also need to save this backup archive on Nautilus Backup Server.
c. Copy the created archive to Nautilus Backup Server server in /backup/ location.
d. Please make sure script won’t ask for password while copying the archive file. Additionally, the respective server user (for example, tony in case of App Server 1) must be able to run it.
e. Do not use sudo inside the script. Note:
The zip package must be installed on given App Server before executing the script. This package is essential for creating the zip archive of the website files. Install it manually outside the script.
Here is a clean, concise cheat sheet created from your command history.
It’s written so you can revise quickly or paste into notes.
1. Basic Navigation & Checks
1
2
3
4
5
6
ls
whoami
cd ..
ls
cd scripts/
ls -la
2. Generate SSH Key (Passwordless SCP)
1
ssh-keygen -t rsa -b 2048
SSH keys are stored in:
1
2
cd /home/banner/.ssh/
ls
3. Copy SSH Key to Nautilus Backup Server
1
ssh-copy-id clint@stbkp01.stratos.xfusioncorp.com
Verify passwordless login:
1
ssh clint@stbkp01.stratos.xfusioncorp.com
4. Create Backup Script
Navigate to scripts directory:
1
2
cd ../../../scripts/
ls
Create and edit script:
1
vi beta_backup.sh
Make script executable:
1
chmod +x beta_backup.sh
5. Install Required Package (Outside Script)
1
sudo yum install zip
sudo is not used inside the script, only during setup.
Day 11: Install and Configure Tomcat Server
Install and Setup Tomcat Server
The Nautilus application development team recently finished the beta version of one of their Java-based applications, which they are planning to deploy on one of the app servers in Stratos DC. After an internal team meeting, they have decided to use the tomcat application server. Based on the requirements mentioned below complete the task:
- Install tomcat server on
App Server 1. - Configure it to run on port
3001. - There is a
ROOT.warfile on Jump host at location/tmp.
Deploy it on this tomcat server and make sure the webpage works directly on base URL i.e curl http://stapp01:3001
1. Install Tomcat on App Server 1 (stapp01)
Login to App Server 1:
1
ssh tony@stapp01
Install Tomcat:
1
sudo yum install -y tomcat
2. Configure Tomcat to Run on Port 3001
Edit Tomcat server configuration:
1
sudo vi /etc/tomcat/server.xml
Find the Connector section (default port 8080):
1
2
3
<Connector port="8080" protocol="org.apache.coyote.http11.Http11NioProtocol"
           connectionTimeout="20000"
           redirectPort="8443" />
Change 8080 → 3001:
1
2
3
<Connector port="3001" protocol="org.apache.coyote.http11.Http11NioProtocol"
           connectionTimeout="20000"
           redirectPort="8443" />
Save and exit.
3. Copy ROOT.war from Jump Host to App Server 1
Exit to Jump Host (if needed):
1
exit
Copy the WAR file:
1
scp /tmp/ROOT.war tony@stapp01:/tmp/
Login back to App Server 1:
1
ssh tony@stapp01
Move WAR file to Tomcat deployment directory:
1
sudo mv /tmp/ROOT.war /usr/share/tomcat/webapps/
Important:
Deploying asROOT.warensures the app runs on the base URL.
4. Start and Enable Tomcat
1
2
sudo systemctl start tomcat
sudo systemctl enable tomcat
Verify Tomcat is listening on port 3001:
1
sudo netstat -tulnp | grep 3001
5. Verify Application Deployment
Test from App Server 1:
1
curl http://localhost:3001
Or from Jump Host:
1
curl http://stapp01:3001
If the webpage content loads, the deployment is successful.
Day 12: Linux Network Services
Our monitoring tool has reported an issue in Stratos Datacenter. One of our app servers has an issue, as its Apache service is not reachable on port 3004 (which is the Apache port). The service itself could be down, the firewall could be at fault, or something else could be causing the issue.
Use tools like telnet, netstat, etc. to find and fix the issue. Also make sure Apache is reachable from the jump host without compromising any security settings.
Once fixed, you can test the same using command curl http://stapp01:3004 command from jump host.
Note: Please do not try to alter the existing index.html code, as it will lead to task failure.
1. Verify issue from jump host
1
2
curl http://stapp01:3004
telnet stapp01 3004
Purpose:
Confirms whether the service is reachable externally
Identifies network vs service-level issues
Then
ssh tony@stapp012. Check Apache service status
1
sudo systemctl status httpd
If stopped:
1
2
sudo systemctl start httpd
sudo systemctl enable httpd
3. Identify what is using port 3004
1
2
3
4
5
6
7
8
9
sudo netstat -tulnp | grep 3004

Active Internet connections (only servers)
Proto Recv-Q Send-Q Local Address           Foreign Address         State       PID/Program name
tcp        0      0 127.0.0.11:36025        0.0.0.0:*               LISTEN      -
tcp        0      0 127.0.0.1:3004          0.0.0.0:*               LISTEN      430/sendmail: accep
tcp        0      0 0.0.0.0:22              0.0.0.0:*               LISTEN      298/sshd
tcp6       0      0 :::22                   :::*                    LISTEN      298/sshd
udp        0      0 127.0.0.11:56145        0.0.0.0:*                           -
or
1
sudo ss -tulnp | grep 3004
Sendmail is running on port 3004
4. Resolve port conflict (sendmail case)
1
2
sudo systemctl stop sendmail
sudo systemctl disable sendmail
Verify port is free:
1
sudo netstat -tulnp | grep 3004
5. Start Apache after freeing the port
1
2
sudo systemctl start httpd
sudo systemctl enable httpd
Verify Apache is listening:
1
sudo netstat -tulnp | grep 3004
Expected:
1
0.0.0.0:3004 LISTEN httpd
6. Local validation on app server
1
curl http://localhost:3004
7. Check firewall service availability
1
sudo systemctl status firewalld
If firewalld is not installed, proceed to iptables checks.
8. Inspect iptables rules
1
sudo iptables -L -n
Key things to check:
INPUT chain policy
REJECT or DROP rules
Explicit allow rules for required ports
9. Allow Apache port via iptables (if needed)
1
sudo iptables -I INPUT 4 -p tcp --dport 3004 -j ACCEPT
This inserts the rule before the final REJECT rule.
10. Final external test (pass condition)
From jump host:
1
curl http://stapp01:3004
Day 13: IPtables Installation And Configuration
IPtables Installation And Configuration
We have one of our websites up and running on our Nautilus infrastructure in Stratos DC. Our security team has raised a concern that right now Apache’s port i.e 5000 is open for all since there is no firewall installed on these hosts. So we have decided to add some security layer for these hosts and after discussions and recommendations we have come up with the following requirements:
- Install
iptablesand all its dependencies on each app host. - Block incoming port
5000on all apps for everyone except forLBRhost. - Make sure the rules remain, even after system reboot.
You have to jump to every application server and run this bash script there
Step 1:
1
vi configure_firewall.sh
Bash Script
1
2
3
4
5
6
7
8
9
10
11
#!/bin/bash
LBR_IP="172.16.238.14"
APP_PORT="5000"

sudo yum install -y iptables iptables-services
sudo iptables -F
sudo iptables -A INPUT -p tcp --dport ${APP_PORT} -s ${LBR_IP} -j ACCEPT
sudo iptables -A INPUT -p tcp --dport ${APP_PORT} -j REJECT
sudo service iptables save
sudo iptables -L -n --line-numbers
Step 2:
1
chmod +x configure_firewall.sh
Step 3:
1
sudo ./configure_firewall.sh
Day 14: Linux Process Troubleshooting
Linux Process Troubleshooting
The production support team of xFusionCorp Industries has deployed some of the latest monitoring tools to keep an eye on every service, application, etc. running on the systems. One of the monitoring systems reported about Apache service unavailability on one of the app servers in Stratos DC.
Identify the faulty app host and fix the issue. Make sure Apache service is up and running on all app hosts. They might not have hosted any code yet on these servers, so you don’t need to worry if Apache isn’t serving any pages. Just make sure the service is up and running. Also, make sure Apache is running on port 6100 on all app servers.
Check Apache service status
1
sudo systemctl status httpd
If stopped:
1
2
sudo systemctl start httpd
sudo systemctl enable httpd
Identify what is using port 6100
1
sudo netstat -tulnp | grep 6100
Example output:
1
2
3
Active Internet connections (only servers)
Proto Recv-Q Send-Q Local Address           Foreign Address         State       PID/Program name
tcp        0      0 127.0.0.1:6100          0.0.0.0:*               LISTEN      430/sendmail: accep
or
1
sudo ss -tulnp | grep 6100
Sendmail is running on port 6100.
Resolve port conflict (sendmail case)
1
2
sudo systemctl stop sendmail
sudo systemctl disable sendmail
Verify port is free:
1
sudo netstat -tulnp | grep 6100
(No output means the port is free.)
Start Apache after freeing the port
1
2
sudo systemctl start httpd
sudo systemctl enable httpd
Verify Apache is listening:
1
sudo netstat -tulnp | grep 6100
Expected:
1
0.0.0.0:6100 LISTEN httpd
Local validation on app server
1
curl http://localhost:6100
Day 15: Setup SSL for Nginx
The system admins team of xFusionCorp Industries needs to deploy a new application on App Server 2 in Stratos Datacenter. They have some pre-requites to get ready that server for application deployment. Prepare the server as per requirements shared below:
- Install and configure
nginxonApp Server 2. - On
App Server 2there is a self signed SSL certificate and key present at location/tmp/nautilus.crtand/tmp/nautilus.key. Move them to some appropriate location and deploy the same in Nginx. - Create an
index.htmlfile with contentWelcome!under Nginx document root. - For final testing try to access the
App Server 2link (either hostname or IP) fromjump hostusing curl command. For examplecurl -Ik https://<app-server-ip>/.
Install & Enable Nginx
1
2
3
4
sudo yum install -y nginx
sudo systemctl start nginx
sudo systemctl enable nginx
systemctl status nginx
Prepare SSL Directory
1
sudo mkdir -p /etc/nginx/ssl
Move SSL Certificate & Key
1
2
sudo mv /tmp/nautilus.crt /etc/nginx/ssl/
sudo mv /tmp/nautilus.key /etc/nginx/ssl/
Set Secure Permissions
1
2
sudo chmod 600 /etc/nginx/ssl/nautilus.key
sudo chmod 644 /etc/nginx/ssl/nautilus.crt
Configure Nginx for HTTPS
1
sudo vi /etc/nginx/nginx.conf
Key SSL directives:
1
2
ssl_certificate /etc/nginx/ssl/nautilus.crt;
ssl_certificate_key /etc/nginx/ssl/nautilus.key;
Create Application Page
1
sudo vi /usr/share/nginx/html/index.html
Content:
1
Welcome!
(If needed, remove and recreate)
1
2
sudo rm /usr/share/nginx/html/index.html
sudo vi /usr/share/nginx/html/index.html
Validate & Reload Nginx
1
2
sudo nginx -t
sudo systemctl reload nginx
Test HTTPS from Jump Host
Check headers (SSL + HTTP/2)
1
curl -Ik https://<app-server-ip>/
Check page content
1
curl -k https://<app-server-ip>/
Expected Output:
1
Welcome!
Day 16: Install and Configure Nginx as an LBR
Day by day traffic is increasing on one of the websites managed by the Nautilus production support team. Therefore, the team has observed a degradation in website performance. Following discussions about this issue, the team has decided to deploy this application on a high availability stack i.e on Nautilus infra in Stratos DC. They started the migration last month and it is almost done, as only the LBR server configuration is pending. Configure LBR server as per the information given below:
- Install
nginxonLBRserver - Configure load-balancing with the an http context making use of all App Servers. Ensure that you update only the main
Nginxconfiguration file located at/etc/nginx/nginx.conf - Make sure you do not update the apache port that is already defined in the apache configuration on all app servers, also make sure apache server is up and running on all app servers
- Once done, you can access the website using StaticApp button on the top bar
1. Verify Apache (httpd) Service on App Servers
Login to each app server and ensure the Apache service is running and listening on the correct port.
1
sudo ss -tlnup
Sample Output
1
2
3
Netid   State   Recv-Q  Send-Q  Local Address:Port   Peer Address:Port   Process
tcp     LISTEN  0       511     0.0.0.0:3000         0.0.0.0:*           users:(("httpd",pid=1690,fd=3))
tcp     LISTEN  0       128     0.0.0.0:22           0.0.0.0:*           users:(("sshd",pid=1102,fd=3))
Apache is running on port: 3000
2. Install and Start NGINX on Load Balancer Server
Login to the LBR server and install NGINX.
1
2
3
sudo yum install nginx -y
sudo systemctl enable nginx
sudo systemctl start nginx
3. Configure NGINX Load Balancer
Edit the NGINX configuration file:
1
sudo vi /etc/nginx/nginx.conf
3.1 Add Upstream Backend Servers
Inside the http block (before the server block), add:
1
2
3
4
5
upstream stapp {
    server stapp01:3000;
    server stapp02:3000;
    server stapp03:3000;
}
3.2 Configure Proxy Pass
Inside the server { listen 80; } block:
1
2
3
4
5
6
7
8
9
10
11
12
13
14
location / {
    proxy_pass http://stapp;
    proxy_set_header Host $host;
    proxy_set_header X-Real-IP $remote_addr;
    proxy_set_header X-Forwarded-For $proxy_add_x_forwarded_for;
    proxy_set_header X-Forwarded-Proto $scheme;

    proxy_http_version 1.1;
    proxy_set_header Upgrade $http_upgrade;
    proxy_set_header Connection "upgrade";

    proxy_connect_timeout 5s;
    proxy_read_timeout 60s;
}
3.3 Validate and Restart NGINX
1
2
sudo nginx -t
sudo systemctl restart nginx
4. Full NGINX Load Balancer Configuration
1
2
3
4
5
6
7
8
9
10
11
12
13
14
15
16
17
18
19
20
21
22
23
24
25
26
27
28
29
30
31
32
33
34
35
36
37
38
39
40
41
42
43
44
45
46
47
48
49
50
51
52
53
54
55
56
57
58
59
60
61
62
63
user nginx;
worker_processes auto;
error_log /var/log/nginx/error.log;
pid /run/nginx.pid;

include /usr/share/nginx/modules/*.conf;

events {
    worker_connections 1024;
}

http {
    log_format main '$remote_addr - $remote_user [$time_local] "$request" '
                    '$status $body_bytes_sent "$http_referer" '
                    '"$http_user_agent" "$http_x_forwarded_for"';

    access_log /var/log/nginx/access.log main;

    sendfile on;
    tcp_nopush on;
    tcp_nodelay on;
    keepalive_timeout 65;
    types_hash_max_size 4096;

    include /etc/nginx/mime.types;
    default_type application/octet-stream;
    include /etc/nginx/conf.d/*.conf;

    upstream stapp {
        server stapp01:3000;
        server stapp02:3000;
        server stapp03:3000;
    }

    server {
        listen 80;
        listen [::]:80;
        server_name _;

        include /etc/nginx/default.d/*.conf;

        error_page 404 /404.html;
        location = /404.html {}

        error_page 500 502 503 504 /50x.html;
        location = /50x.html {}

        location / {
            proxy_pass http://stapp;
            proxy_set_header Host $host;
            proxy_set_header X-Real-IP $remote_addr;
            proxy_set_header X-Forwarded-For $proxy_add_x_forwarded_for;
            proxy_set_header X-Forwarded-Proto $scheme;

            proxy_http_version 1.1;
            proxy_set_header Upgrade $http_upgrade;
            proxy_set_header Connection "upgrade";

            proxy_connect_timeout 5s;
            proxy_read_timeout 60s;
        }
    }
}
Day 17: Install and Configure PostgreSQL
The Nautilus application development team has shared that they are planning to deploy one newly developed application on Nautilus infra in Stratos DC. The application uses PostgreSQL database, so as a pre-requisite we need to set up PostgreSQL database server as per requirements shared below:
PostgreSQL database server is already installed on the Nautilus database server.
- Create a database user
kodekloud_timand set its password toLQfKeWWxWD. - Create a database
kodekloud_db2and grant full permissions to userkodekloud_timon this database.
Please do not try to restart PostgreSQL server service.
1. Verify psql Binary Location
1
which psql
Output:
1
/usr/bin/psql
2. Switch to PostgreSQL Superuser
Login as the postgres user using sudo:
1
sudo -u postgres psql
Note:
The warning below is normal and can be ignored:
1
could not change directory to "/home/peter": Permission denied
3. Create a New PostgreSQL User
1
2
CREATE USER kodekloud_tim
WITH ENCRYPTED PASSWORD 'LQfKeWWxWD';
User created successfully.
4. Create a New Database
1
CREATE DATABASE kodekloud_db2;
Database created.
5. Grant Privileges on Database to User
1
2
3
GRANT ALL PRIVILEGES
ON DATABASE kodekloud_db2
TO kodekloud_tim;
Permissions granted.
6. Verify Users and Databases (Optional)
1
2
\du        -- list users
\l         -- list databases
Day 18: Configure LAMP server
xFusionCorp Industries is planning to host a WordPress website on their infra in Stratos Datacenter. They have already done infrastructure configuration—for example, on the storage server they already have a shared directory /vaw/www/html that is mounted on each app host under /var/www/html directory. Please perform the following steps to accomplish the task:
a. Install httpd, php and its dependencies on all app hosts.
b. Apache should serve on port 5004 within the apps.
c. Install/Configure MariaDB server on DB Server.
d. Create a database named kodekloud_db10 and create a database user named kodekloud_roy identified as password B4zNgHA7Ya. Further make sure this newly created user is able to perform all operation on the database you created.
e. Finally you should be able to access the website on LBR link, by clicking on the App button on the top bar. You should see a message like App is able to connect to the database using user kodekloud_roy
Install Apache & PHP
1
sudo yum install -y httpd php php-mysqli
Start & Enable Apache
1
2
sudo systemctl start httpd
sudo systemctl enable httpd
Verify PHP Installation
1
php -v
Change Apache Port to 5004
1
sudo sed -i 's/^Listen .*/Listen 5004/' /etc/httpd/conf/httpd.conf
Restart Apache
1
sudo systemctl restart httpd
Verify Apache is Listening on 5004
1
sudo ss -tulnp | grep httpd
Optional: Bash Script (App Server Automation)
1
2
3
4
5
6
7
8
9
10
#!/bin/bash
set -e

sudo yum install -y httpd php php-mysqli
sudo systemctl start httpd
sudo systemctl enable httpd
sudo sed -i 's/^Listen .*/Listen 5004/' /etc/httpd/conf/httpd.conf
sudo systemctl restart httpd
php -v
sudo ss -tulnp | grep httpd
Usage:
1
2
3
vi setup_apache_5004.sh
chmod +x setup_apache_5004.sh
./setup_apache_5004.sh
DATABASE SERVER SETUP
Host: stdb01.stratos.xfusioncorp.com
SSH to DB Server
1
ssh peter@stdb01.stratos.xfusioncorp.com
Install MariaDB Server
1
sudo yum install -y mariadb-server
###Start & Enable MariaDB
1
2
sudo systemctl start mariadb
sudo systemctl enable mariadb
Secure MariaDB
1
sudo mysql_secure_installation
Set root password, remove anonymous users, disallow remote root login, remove test DB.
Login to MySQL
1
mysql -u root -p
Create Database
1
CREATE DATABASE kodekloud_db10;
Create Database User
1
CREATE USER 'kodekloud_roy'@'%' IDENTIFIED BY 'B4zNgHA7Ya';
Grant Privileges
1
2
GRANT ALL PRIVILEGES ON kodekloud_db10.* TO 'kodekloud_roy'@'%';
FLUSH PRIVILEGES;
Verify Grants
1
SHOW GRANTS FOR 'kodekloud_roy'@'%';
Day 19: Install and Configure Web Application
xFusionCorp Industries is planning to host two static websites on their infra in Stratos Datacenter. The development of these websites is still in-progress, but we want to get the servers ready. Please perform the following steps to accomplish the task:
a. Install httpd package and dependencies on app server 1.
b. Apache should serve on port 5000.
c. There are two website’s backups /home/thor/news and /home/thor/demo on jump_host. Set them up on Apache in a way that news should work on the link http://localhost:5000/news/ and demo should work on link http://localhost:5000/demo/ on the mentioned app server.
d. Once configured you should be able to access the website using curl command on the respective app server, i.e curl http://localhost:5000/news/ and curl http://localhost:5000/demo/
Install Apache (httpd)
1
2
3
sudo yum install -y httpd
sudo systemctl enable httpd
sudo systemctl start httpd
Configure Apache to Listen on Port 5000
Edit Apache configuration:
1
sudo vi /etc/httpd/conf/httpd.conf
Update the listening port:
1
Listen 5000
Restart Apache:
1
sudo systemctl restart httpd
Copy Website Data from Jump Host (thor)
Direct copying to /var/www/html is not permitted, so data is first copied to /tmp.
1
2
scp -r /home/thor/news tony@stapp01.stratos.xfusioncorp.com:/tmp/
scp -r /home/thor/demo tony@stapp01.stratos.xfusioncorp.com:/tmp/
Move Website Data to Apache Document Root
Login to the app server and move the files using sudo:
1
2
3
ssh tony@stapp01.stratos.xfusioncorp.com
sudo mv /tmp/news /var/www/html/
sudo mv /tmp/demo /var/www/html/
Set Correct Ownership and Permissions
1
2
sudo chown -R apache:apache /var/www/html/news /var/www/html/demo
sudo chmod -R 755 /var/www/html/news /var/www/html/demo
Verify:
1
ls -ld /var/www/html/news /var/www/html/demo
Verify Website Access Using curl
1
2
curl http://localhost:5000/news/
curl http://localhost:5000/demo/
Here is your Markdown cheat sheet, strictly following the same format and style you shared 👇 (Headings, steps, code blocks — all aligned)
Day 20: Configure Nginx + PHP-FPM Using Unix Sock
The Nautilus application development team is planning to launch a new PHP-based application, which they want to deploy on Nautilus infra in Stratos DC. The development team had a meeting with the production support team and they have shared some requirements regarding the infrastructure. Below are the requirements they shared:
a. Install nginx on app server 1 , configure it to use port 8097 and its document root should be /var/www/html. b. Install php-fpm version 8.3 on app server 1, it must use the unix socket /var/run/php-fpm/default.sock (create the parent directories if don’t exist). c. Configure php-fpm and nginx to work together. d. Once configured correctly, you can test the website using curl http://stapp01:8097/index.php command from jump host.
NOTE: We have copied two files, index.php and info.php, under /var/www/html as part of the PHP-based application setup. Please do not modify these files.
Install NGINX
1
2
3
sudo yum install -y nginx
sudo systemctl enable nginx
sudo systemctl start nginx
Configure NGINX to Listen on Port 8097
Edit nginx configuration:
1
sudo vi /etc/nginx/nginx.conf
Add or update the server block inside http {}:
1
2
3
4
5
6
7
8
9
10
11
12
13
14
15
16
17
18
19
20
21
22
23
24
25
26
 server {
        listen       8097;
        listen       [::]:8097;
        server_name  _;
        root         /var/www/html;

        # Load configuration files for the default server block.
        # include /etc/nginx/default.d/*.conf;


        location ~ \.php$ {
        try_files $uri =404;
        fastcgi_pass unix:/var/run/php-fpm/default.sock;
        fastcgi_index index.php;
        fastcgi_param SCRIPT_FILENAME $document_root$fastcgi_script_name;
        include fastcgi_params;
        }

        error_page 404 /404.html;
        location = /404.html {
        }

        error_page 500 502 503 504 /50x.html;
        location = /50x.html {
        }
    }
Restart nginx:
1
sudo systemctl restart nginx
Install PHP-FPM 8.3
Install PHP and PHP-FPM:
1
sudo dnf module install php:8.3 -y
Configure PHP-FPM Socket
Create required directory:
1
sudo mkdir -p /var/run/php-fpm
Edit PHP-FPM pool configuration:
1
sudo vi /etc/php-fpm.d/www.conf
Update the following values:
1
listen = /var/run/php-fpm/default.sock
Set Correct Ownership and Permissions
1
sudo chown -R nginx:nginx /var/www/html
Start and Enable Services
1
2
3
4
5
sudo systemctl start php-fpm
sudo systemctl enable php-fpm

sudo systemctl start nginx
sudo systemctl enable nginx
Verify service status:
1
2
systemctl status nginx
systemctl status php-fpm
Verify Application Using curl (from Jump Host)
1
curl http://stapp01:8097/index.php
(Optional test)
1
curl http://stapp01:8097/info.php
You can check How to Configure PHP-FPM with NGINX for Secure PHP Processing
Day 21: Set Up Git Repository on Storage Server
The Nautilus development team has provided requirements to the DevOps team for a new application development project, specifically requesting the establishment of a Git repository. Follow the instructions below to create the Git repository on the Storage server in the Stratos DC:
Utilize
yumto install thegitpackage on theStorage Server.Create a bare repository named
/opt/media.git(ensure exact name usage).
1
2
3
4
5
6
7
8
9
10
11
12
13
14
15
16
17
18
19
[natasha@ststor01 ~]$ sudo yum install git

[natasha@ststor01 ~]$ git -h | grep bare
           [--no-optional-locks] [--no-advice] [--bare] [--git-dir=<path>]
[natasha@ststor01 ~]$ git init --bare /opt/media.git
fatal: cannot mkdir /opt/media.git: Permission denied

[natasha@ststor01 ~]$ sudo git init --bare /opt/media.git
hint: Using 'master' as the name for the initial branch. This default branch name
hint: is subject to change. To configure the initial branch name to use in all
hint: of your new repositories, which will suppress this warning, call:
hint:
hint:   git config --global init.defaultBranch <name>
hint:
hint: Names commonly chosen instead of 'master' are 'main', 'trunk' and
hint: 'development'. The just-created branch can be renamed via this command:
hint:
hint:   git branch -m <name>
Initialized empty Git repository in /opt/media.git/
Day 22: Clone Git Repository on Storage Server
The DevOps team established a new Git repository last week, which remains unused at present. However, the Nautilus application development team now requires a copy of this repository on the Storage Server in the Stratos DC. Follow the provided details to clone the repository:
The repository to be cloned is located at
/opt/cluster.gitClone this Git repository to the
/usr/src/kodekloudreposdirectory. Perform this task using the natasha user, and ensure that no modifications are made to the repository or existing directories, such as changing permissions or making unauthorized alterations.
1
2
3
4
5
6
7
8
9
10
11
12
13
14
15
16
17
18
thor@jumphost /opt$ ssh natasha@ststor01.stratos.xfusioncorp.com

[natasha@ststor01 ~]$ ls
[natasha@ststor01 ~]$ ls -ld /usr/src/kodekloudrepos
drwxr-xr-x 2 natasha natasha 4096 Dec 29 15:55 /usr/src/kodekloudrepos
[natasha@ststor01 ~]$ git clone /opt/cluster.git/ /usr/src/kodekloudrepos/cluster
Cloning into '/usr/src/kodekloudrepos/cluster'...
warning: You appear to have cloned an empty repository.
done.
[natasha@ststor01 ~]$ cd /usr/src/kodekloudrepos/cluster
[natasha@ststor01 cluster]$ git status
On branch master

No commits yet

nothing to commit (create/copy files and use "git add" to track)
[natasha@ststor01 cluster]$
Day 23: Fork a Git Repository
There is a Git server utilized by the Nautilus project teams. Recently, a new developer named Jon joined the team and needs to begin working on a project. To begin, he must fork an existing Git repository. Follow the steps below:
- Click on the
Gitea UIbutton located on the top bar to access the Gitea page. - Login to
Giteaserver using usernamejonand passwordJon_pass123. - Once logged in, locate the Git repository named
sarah/story-blogandforkit under thejonuser.
Note: For tasks requiring web UI changes, screenshots are necessary for review purposes. Additionally, consider utilizing screen recording software such as loom.com to record and share your task completion process.
Just go to the git repo and fork it to your account
Day 24: Git Create Branches
Nautilus developers are actively working on one of the project repositories, /usr/src/kodekloudrepos/beta. Recently, they decided to implement some new features in the application, and they want to maintain those new changes in a separate branch. Below are the requirements that have been shared with the DevOps team:
On Storage server in Stratos DC create a new branch
xfusioncorp_betafrom master branch in/usr/src/kodekloudrepos/betagit repo.Please do not try to make any changes in the code.
1
2
3
4
5
6
7
8
cd /usr/src/kodekloudrepos/beta/
ls
git branch
sudo su
git branch
git switch master
git branch xfusioncorp_beta
git branch
Day 25: Git Merge Branches
The Nautilus application development team has been working on a project repository /opt/cluster.git. This repo is cloned at /usr/src/kodekloudrepos on storage server in Stratos DC. They recently shared the following requirements with DevOps team:
Create a new branch nautilus in /usr/src/kodekloudrepos/cluster repo from master and copy the /tmp/index.html file (present on storage server itself) into the repo. Further, add/commit this file in the new branch and merge back that branch into master branch. Finally, push the changes to the origin for both of the branches.
Check Existing Branches
1
git branch
Only the master branch exists, and it is currently checked out.
Create a New Branch
1
git branch nautilus
A new branch named nautilus is created from master.
Switch to the New Branch
1
git checkout nautilus
You are now working on the nautilus branch.
Copy Required File into Repository
1
cp /tmp/index.html .
The file is copied into the repository root.
Verify Files in Repository
1
ls
index.html is now present in the repo.
Stage Changes
1
git add .
All changes (including index.html) are staged.
Commit Changes in Nautilus Branch
1
git commit -m "adding file"
The file is successfully committed to the nautilus branch.
Switch Back to Master Branch
1
git checkout master
You are now back on master.
Merge Nautilus Branch into Master
1
git merge nautilus
The nautilus branch changes are merged into master using a fast-forward merge.
Push Master Branch to Origin
1
git push
Day 26: Git Manage Remotes
The xFusionCorp development team added updates to the project that is maintained under /opt/official.git repo and cloned under /usr/src/kodekloudrepos/official. Recently some changes were made on Git server that is hosted on Storage server in Stratos DC. The DevOps team added some new Git remotes, so we need to update remote on /usr/src/kodekloudrepos/official repository as per details mentioned below: a. In /usr/src/kodekloudrepos/official repo add a new remote dev_official and point it to /opt/xfusioncorp_official.git repository. b. There is a file /tmp/index.html on same server; copy this file to the repo and add/commit to master branch.
c. Finally push master branch to this new remote origin.
Check Existing Git Remotes
1
git remote -v
Add New Remote Repository
1
git remote add dev_official /opt/xfusioncorp_official.git
Verify Remote Was Added
1
git remote -v
Copy File Into Repository
1
cp /tmp/index.html .
Stage Changes
1
git add .
Commit Changes to Master Branch
1
git commit -m "adding file"
Check Current Branch
1
git branch
Push Master Branch to New Remote
1
git push dev_official master
Quick Tip
- Always explicitly specify the branch when pushing to a new remote:
1
git push <remote-name> <branch-name>
Day 27: Git Revert Some Changes
The Nautilus application development team was working on a git repository /usr/src/kodekloudrepos/apps present on Storage server in Stratos DC. However, they reported an issue with the recent commits being pushed to this repo. They have asked the DevOps team to revert repo HEAD to last commit. Below are more details about the task:
In /usr/src/kodekloudrepos/apps git repository, revert the latest commit ( HEAD ) to the previous commit . Use revert apps message (please use all small letters for commit message) for the new revert commit.
Navigate to Repository
1
cd /usr/src/kodekloudrepos/apps
Check Current Commit History
1
git log --oneline
- Shows commit hash, HEAD, and messages. Example output:
1
2
269aa04 (HEAD -> master) add data.txt file
3d81254 initial commit
Revert the Latest Commit
1
git revert HEAD
- Creates a new commit that undoes the changes of the latest commit.
- Safe for shared repositories since it preserves history.
Change Revert Commit Message
If you want a custom message instead of the default Revert "...":
1
git commit --amend -m "revert apps"
- Updates the last commit message.
- Example after amend:
1
2
3
111d333 (HEAD -> master) revert apps
269aa04 add data.txt file
3d81254 initial commit
Verify Revert
1
git log --oneline
- Confirms the latest commit is your revert commit.
1
git status
- Ensures working directory is clean.
Notes / Tips
- Do NOT use
-moption for normal commits; it’s only for merge commits. - Use
git revertinstead ofgit resetif others are working on the repo. - If there are untracked files, Git will show them under
git status, but they do not affect the revert.
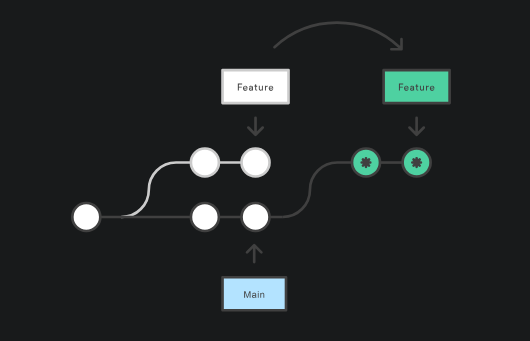
Day 28: Git Cherry Pick
The Nautilus application development team has been working on a project repository /opt/games.git. This repo is cloned at /usr/src/kodekloudrepos on storage server in Stratos DC. They recently shared the following requirements with the DevOps team:
There are two branches in this repository, master and feature. One of the developers is working on the feature branch and their work is still in progress, however they want to merge one of the commits from the feature branch to the master branch, the message for the commit that needs to be merged into master is Update info.txt. Accomplish this task for them, also remember to push your changes eventually.
Repository Location
- Remote repo:
/opt/games.git - Local clone:
/usr/src/kodekloudrepos/games
Step 1: Navigate to the Repository
1
cd /usr/src/kodekloudrepos/games
Step 2: Check Available Branches
1
git branch
Step 3: Identify the Required Commit
List commits on the feature branch:
1
git log feature --oneline
Look for the commit message:
1
Update info.txt
Copy the commit hash:
1
d6a24a9ab99c93bc1420434dd6ea28ae997a0763
Step 4: Switch to Master Branch
1
git checkout master
Step 5: Cherry-Pick the Commit
1
git cherry-pick d6a24a9ab99c93bc1420434dd6ea28ae997a0763
Successful output indicates the commit is applied:
1
[master <new-hash>] Update info.txt
Step 6: Verify Repository Status
1
git status
Expected output:
1
2
Your branch is ahead of 'origin/master' by 1 commit
nothing to commit, working tree clean
Step 7: Push Changes to Remote
1
git push origin master
Day 29: Manage Git Pull Requests
Max want to push some new changes to one of the repositories but we don’t want people to push directly to master branch, since that would be the final version of the code. It should always only have content that has been reviewed and approved. We cannot just allow everyone to directly push to the master branch. So, let’s do it the right way as discussed below:
SSH into storage server using user max, password Max_pass123 . There you can find an already cloned repo under Max user’s home.
Max has written his story about The 🦊 Fox and Grapes 🍇
Max has already pushed his story to remote git repository hosted on Gitea branch story/fox-and-grapes
Check the contents of the cloned repository. Confirm that you can see Sarah’s story and history of commits by running git log and validate author info, commit message etc.
Max has pushed his story, but his story is still not in the master branch. Let’s create a Pull Request(PR) to merge Max’s story/fox-and-grapes branch into the master branch
Click on the Gitea UI button on the top bar. You should be able to access the Gitea page.
UI login info:
Username:
maxPassword:
Max_pass123
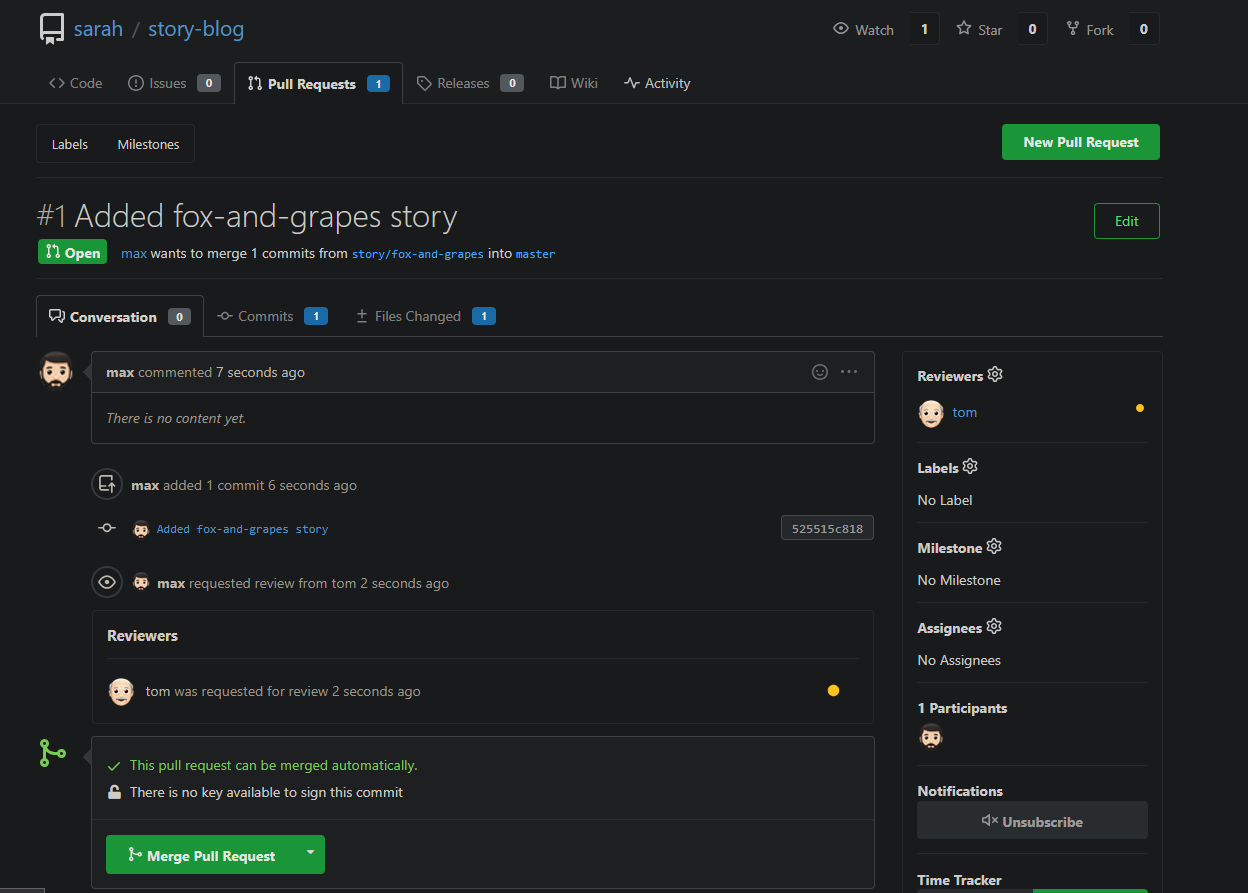
PR title : Added fox-and-grapes story
PR pull from branch: story/fox-and-grapes (source)
PR merge into branch: master (destination)
Before we can add our story to the master branch, it has to be reviewed. So, let’s ask tom to review our PR by assigning him as a reviewer
Add tom as reviewer through the Git Portal UI
Go to the newly created PR
Click on Reviewers on the right
Add tom as a reviewer to the PR
Now let’s review and approve the PR as user Tom
Login to the portal with the user tom
Logout of Git Portal UI if logged in as max
UI login info:
Username:
tomPassword:
Tom_pass123
PR title : Added fox-and-grapes story
Review and merge it.
Great stuff!! The story has been merged! 👏
Note: For these kind of scenarios requiring changes to be done in a web UI, please take screenshots so that you can share it with us for review in case your task is marked incomplete. You may also consider using a screen recording software such as loom.com to record and share your work.

Day 30: Git hard reset
The Nautilus application development team was working on a git repository /usr/src/kodekloudrepos/official present on Storage server in Stratos DC. This was just a test repository and one of the developers just pushed a couple of changes for testing, but now they want to clean this repository along with the commit history/work tree, so they want to point back the HEAD and the branch itself to a commit with message add data.txt file. Find below more details:
- In
/usr/src/kodekloudrepos/officialgit repository, reset the git commit history so that there are only two commits in the commit history i.einitial commitandadd data.txt file. - Also make sure to push your changes.
Navigate to repository directory
1
cd /usr/src/kodekloudrepos/official
Check repository status
1
git status
View commit history (one line format)
1
git log --oneline
Reset branch to specific commit (remove newer commits)
This is will remove all the commits till a34829d and move the HEAD to a34829d commit
1
git reset --hard a34829d
Verify commit history after reset
1
git log --oneline
Force push changes to remote repository
1
git push origin master --force
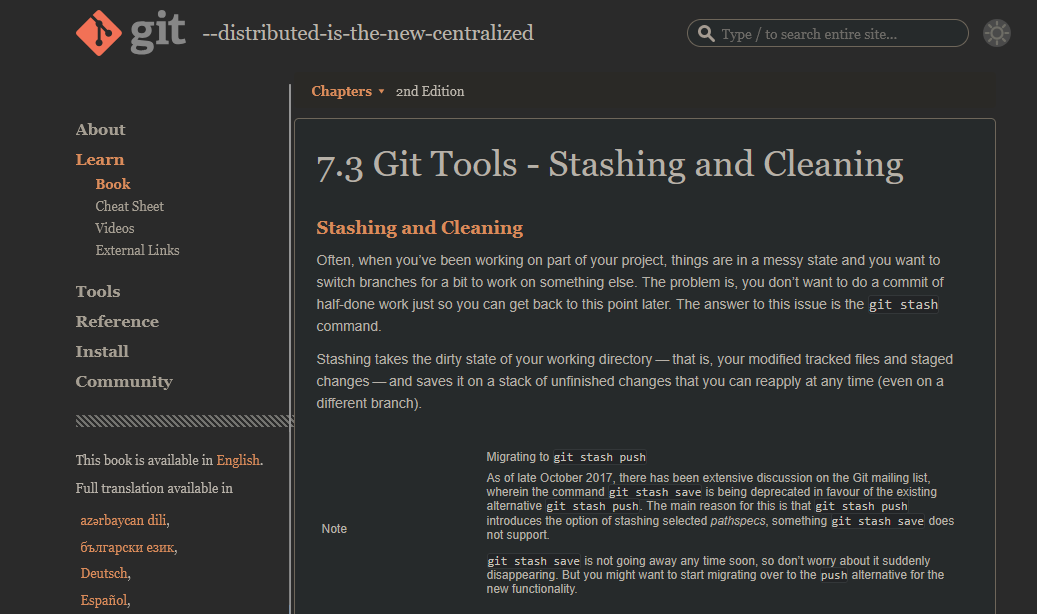
Day 31: Git Stash
The Nautilus application development team was working on a git repository /usr/src/kodekloudrepos/blog present on Storage server in Stratos DC. One of the developers stashed some in-progress changes in this repository, but now they want to restore some of the stashed changes. Find below more details to accomplish this task:
Look for the stashed changes under /usr/src/kodekloudrepos/blog git repository, and restore the stash with stash@{1} identifier. Further, commit and push your changes to the origin.
Git Stash Theory
Check repository status
1
git status
Check current branch
1
git branch
View commit history
1
git log --oneline
List available stashes
1
git stash list
Example output:
1
2
stash@{0}: WIP on master: ba196f3 initial commit
stash@{1}: WIP on master: ba196f3 initial commit
Apply a specific stash (stash@{1})
1
git stash apply stash@{1}
Verify restored changes
1
git status
Stage all changes
1
git add .
Commit restored stash changes
1
git commit -m "added welcome.txt from stash@{1}"
Push changes to remote (correct branch)
1
git push origin master
Day 32: Git Rebase
The Nautilus application development team has been working on a project repository /opt/beta.git. This repo is cloned at /usr/src/kodekloudrepos on storage server in Stratos DC. They recently shared the following requirements with DevOps team:
One of the developers is working on feature branch and their work is still in progress, however there are some changes which have been pushed into the master branch, the developer now wants to rebase the feature branch with the master branch without loosing any data from the feature branch, also they don’t want to add any merge commit by simply merging the master branch into the feature branch. Accomplish this task as per requirements mentioned.
Also remember to push your changes once done.
Check repository status
1
git status
View commit history
1
git log --oneline
List all branches
1
git branch
Switch to master branch
1
git checkout master
Fetch latest changes from remote
1
git fetch origin
Switch to feature branch
1
git checkout feature
Rebase feature branch onto master
1
git rebase origin/master
Resolve conflicts (if any)
1
2
git add .
git rebase --continue
Push rebased feature branch to remote (history rewritten)
1
git push origin feature --force
View commit graph for verification
1
git log --oneline --graph --decorate --all
Day 33: Resolve Git Merge Conflicts
Sarah and Max were working on writting some stories which they have pushed to the repository. Max has recently added some new changes and is trying to push them to the repository but he is facing some issues. Below you can find more details:
SSH into storage server using user max and password Max_pass123. Under /home/max you will find the story-blog repository. Try to push the changes to the origin repo and fix the issues. The story-index.txt must have titles for all 4 stories. Additionally, there is a typo in The Lion and the Mooose line where Mooose should be Mouse.
Click on the Gitea UI button on the top bar. You should be able to access the Gitea page. You can login to Gitea server from UI using username sarah and password Sarah_pass123 or username max and password Max_pass123.
Note: For these kind of scenarios requiring changes to be done in a web UI, please take screenshots so that you can share it with us for review in case your task is marked incomplete. You may also consider using a screen recording software such as loom.com to record and share your work.
1. Repository Access
- Logged into the storage server as user
max - Navigated to:
/home/max/story-blog
2. Pulled Latest Changes
1
git pull origin master
3. Fixed Issues
Corrected Typo
Updated the story file:
The Lion and the Mooose → The Lion and the Mouse
Remove the merge conflicts as well!
4. Configured Git Identity
1
2
git config user.name max
git config user.email max@ststor01.stratos.xfusioncorp.com
5. Committed Changes
1
2
git add .
git commit -m "fix: change spelling moose to mouse"
6. Pushed to Remote Repository
1
git push origin master
Git Log Verification (Logs Answer)
Output of git log after successful operations:
1
2
3
4
5
6
7
8
9
10
11
12
13
14
15
16
17
18
19
20
21
22
23
24
25
26
27
28
29
30
31
32
33
34
35
36
37
commit b8b703b0b4359617e43a1183c547f7308affe825
Merge: 0d395c7 75817c8
Author: Linux User <max@ststor01.stratos.xfusioncorp.com>
Date: Fri Jan 16 10:07:56 2026 +0000
fix: change spelling moose to mouse
commit 0d395c7d2a03d571e49bae826788e33642ad613f
Author: Linux User <max@ststor01.stratos.xfusioncorp.com>
Date: Fri Jan 16 10:02:29 2026 +0000
fix: change spelling moose to mouse
commit 909511f4f2c0ad20cfcc4db3e021eb071e7a30aa
Author: Linux User <max@ststor01.stratos.xfusioncorp.com>
Date: Fri Jan 16 09:57:43 2026 +0000
Added the fox and grapes story
commit 75817c899d762226d3481a1c68a9fdaafda9c77f
Author: sarah <sarah@stratos.xfusioncorp.com>
Date: Fri Jan 16 09:57:42 2026 +0000
Added Index
commit a15185df863df6826ec9e1009e8c4fdcd9605738
Merge: 8a9a036 bb0aee5
Author: sarah <sarah@stratos.xfusioncorp.com>
Date: Fri Jan 16 09:57:41 2026 +0000
Merge branch 'story/frogs-and-ox'
commit 8a9a03604b24f08560601b4f7d83013ff8e87689
Author: sarah <sarah@stratos.xfusioncorp.com>
Date: Fri Jan 16 09:57:41 2026 +0000
Fix typo in story title
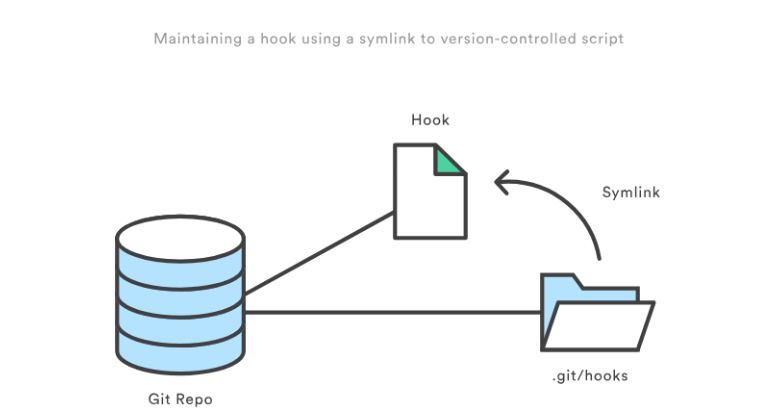
Day 34: Git Hook
The Nautilus application development team was working on a git repository /opt/news.git which is cloned under /usr/src/kodekloudrepos directory present on Storage server in Stratos DC. The team want to setup a hook on this repository, please find below more details:
- Merge the
featurebranch into themasterbranch, but before pushing your changes complete below point. - Create a
post-updatehook in this git repository so that whenever any changes are pushed to themasterbranch, it creates a release tag with namerelease-2023-06-15, where2023-06-15is supposed to be the current date. For example if today is20th June, 2023then the release tag must berelease-2023-06-20. Make sure you test the hook at least once and create a release tag for today’s release. - Finally remember to push your changes.
Note:Perform this task using thenatashauser, and ensure the repository or existing directory permissions are not altered.
1. Navigate to working repository
1
cd /usr/src/kodekloudrepos/news
Checked repository status and branches:
1
2
git status
git branch
2. Merge feature branch into master
1
2
git checkout master
git merge feature
3. Create post-update hook in bare repository
Navigate to hooks directory:
1
2
cd /opt/news.git/hooks
ls
Create hook file:
1
vi post-update
Hook content:
1
2
3
4
5
6
7
8
9
#!/bin/bash
refname="$1"
if [[ "$refname" == "refs/heads/master" ]]; then
DATE=$(date +%Y-%m-%d)
TAG="release-$DATE"
git tag -f "$TAG"
fi
Make executable:
1
chmod +x post-update
4. Push changes to trigger hook
1
2
cd /usr/src/kodekloudrepos/news
git push origin master
Push output:
1
2
To /opt/news.git
38f6832..279d796 master -> master
5. Verify release tag creation
1
2
cd /opt/news.git
git tag
Result:
1
release-2026-01-16
(The date reflects the current system date.)
Day 35: Install Docker Packages and Start Docker Service
The Nautilus DevOps team aims to containerize various applications following a recent meeting with the application development team. They intend to conduct testing with the following steps:
- Install
docker-ceanddocker composepackages onApp Server 1. - Initiate the
dockerservice.
System Information
The operating system details were verified using:
1
cat /etc/os-release
1. Install required dependencies
1
sudo yum install -y yum-utils device-mapper-persistent-data lvm2
2. Add Docker official repository
1
sudo yum-config-manager --add-repo https://download.docker.com/linux/centos/docker-ce.repo
3. Install Docker CE and Docker Compose packages
1
sudo yum install docker-ce docker-ce-cli containerd.io docker-buildx-plugin docker-compose-plugin -y
Installed components:
- docker-ce
- docker-ce-cli
- containerd.io
- docker-buildx-plugin
- docker-compose-plugin
4. Enable and start Docker service
1
sudo systemctl enable --now docker
5. Verify Docker installation
1
sudo docker run hello-world
Day 36: Deploy Nginx Container on Application Server
The Nautilus DevOps team is conducting application deployment tests on selected application servers. They require a nginx container deployment on Application Server 3. Complete the task with the following instructions:
- On
Application Server 3create a container namednginx_3using thenginximage with thealpinetag. Ensure container is in arunningstate.
Steps Performed
Ran the Docker container with the required name and image:
1
docker run -d --name nginx_3 nginx:alpine
Verified the container status:
1
docker ps
Day 37: Copy File to Docker Container
The Nautilus DevOps team possesses confidential data on App Server 3 in the Stratos Datacenter. A container named ubuntu_latest is running on the same server.
Copy an encrypted file /tmp/nautilus.txt.gpg from the docker host to the ubuntu_latest container located at /opt/. Ensure the file is not modified during this operation.
Steps Performed
Checking Docker Name
1
docker ps
Copy the encrypted file from the host to the container:
1
docker cp /tmp/nautilus.txt.gpg ubuntu_latest:/opt/Access the container to verify the file:
1
docker exec -it ubuntu_latest bash
Navigate to the destination directory and confirm the file exists:
1 2
cd /opt ls
Day 38: Pull Docker Image
Nautilus project developers are planning to start testing on a new project. As per their meeting with the DevOps team, they want to test containerized environment application features. As per details shared with DevOps team, we need to accomplish the following task: a. Pull busybox:musl image on App Server 2 in Stratos DC and re-tag (create new tag) this image as busybox:blog.
Steps Performed
- Pulled the BusyBox image with the
musltag:
1
docker pull busybox:musl
- Created a new tag named
busybox:blogfrom the pulled image:
1
docker tag busybox:musl busybox:blog
- Verified the images:
1
docker images | grep busybox
Day 39: Create a Docker Image From Container
One of the Nautilus developer was working to test new changes on a container. He wants to keep a backup of his changes to the container. A new request has been raised for the DevOps team to create a new image from this container. Below are more details about it: a. Create an image beta:devops on Application Server 2 from a container ubuntu_latest that is running on same server.
Steps Performed
- Verified that the container is running:
1
docker ps | grep ubuntu_latest
- Created a new image from the running container:
1
docker commit ubuntu_latest beta:devops
- Verified the new image:
1
docker images | grep beta
Day 40: Docker EXEC Operations
One of the Nautilus DevOps team members was working to configure services on a kkloud container that is running on App Server 3 in Stratos Datacenter. Due to some personal work he is on PTO for the rest of the week, but we need to finish his pending work ASAP. Please complete the remaining work as per details given below:
a. Install apache2 in kkloud container using apt that is running on App Server 3 in Stratos Datacenter.
b. Configure Apache to listen on port 6200 instead of default http port. Do not bind it to listen on specific IP or hostname only, i.e it should listen on localhost, 127.0.0.1, container ip, etc.
c. Make sure Apache service is up and running inside the container. Keep the container in running state at the end.
Steps Performed
- Accessed the running container:
1
docker exec -it kkloud bash
- Updated the package index and installed Apache2:
1
apt install -y apache2
- Configured Apache to listen on port 6200:
1
sed -i 's/Listen 80/Listen 6200/' /etc/apache2/ports.conf
- Vim is not downloaded
- Restarted Apache service to apply changes:
1
service apache2 restart
- Verified that Apache is running and listening on the new port:
1
service apache2 status
- Exited the container, keeping it in running state:
1
2
exit
docker ps
Day 41: Write a Docker File
As per recent requirements shared by the Nautilus application development team, they need custom images created for one of their projects. Several of the initial testing requirements are already been shared with DevOps team. Therefore, create a docker file /opt/docker/Dockerfile (please keep D capital of Dockerfile) on App server 1 in Stratos DC and configure to build an image with the following requirements:
a. Use ubuntu:24.04 as the base image.
b. Install apache2 and configure it to work on 3003 port. (do not update any other Apache configuration settings like document root etc).
Steps Performed
- Go to the directory
/opt/docker/
1
vi Dockerfile
Paste the objects in the Dockerfile
1
2
3
4
5
6
7
8
9
10
11
12
13
FROM ubuntu:24.04
ENV DEBIAN_FRONTEND=noninteractive
RUN apt-get update && apt-get install -y apache2 && apt-get clean
RUN sed -i 's/Listen 80/Listen 3003/' /etc/apache2/ports.conf
RUN sed -i 's/:80/:3003/' /etc/apache2/sites-available/000-default.conf
EXPOSE 3003
CMD ["apachectl", "-D", "FOREGROUND"]
Run the Command in the /opt/docker/ folder
1
docker build -t nautilus-app-image:latest .
Day 42: Create a Docker Network
The Nautilus DevOps team needs to set up several docker environments for different applications. One of the team members has been assigned a ticket where he has been asked to create some docker networks to be used later. Complete the task based on the following ticket description:
a. Create a docker network named as media on App Server 3 in Stratos DC.
b. Configure it to use bridge drivers.
c. Set it to use subnet 10.10.1.0/24 and iprange 10.10.1.0/24.
Steps Performed
1
2
3
4
5
6
7
8
9
10
11
12
13
14
15
16
17
18
19
20
21
22
23
24
[root@stapp03 banner]# docker network create --driver bridge --subnet 10.10.1.0/24 --ip-range 10.10.1.0/24 media
1a0b4591d6d61da07c3dfgdf3454356732ff63d540bcb27fghtryt756765ea
[root@stapp03 banner]# docker network
Usage: docker network COMMAND
Manage networks
Commands:
connect Connect a container to a network
create Create a network
disconnect Disconnect a container from a network
inspect Display detailed information on one or more networks
ls List networks
prune Remove all unused networks
rm Remove one or more networks
Run 'docker network COMMAND --help' for more information on a command.
[root@stapp03 banner]# docker network ls
NETWORK ID NAME DRIVER SCOPE
0c0f46f7bc87 bridge bridge local
33d05cba4099 host host local
1a0b4591d6d6 media bridge local
6f6dc1599b7e none null local
I find docker documentation is the best guide for docker network
Day 43: Docker Ports Mapping
The Nautilus DevOps team is planning to host an application on a nginx-based container. There are number of tickets already been created for similar tasks. One of the tickets has been assigned to set up a nginx container on Application Server 3 in Stratos Datacenter. Please perform the task as per details mentioned below:
a. Pull nginx:stable docker image on Application Server 3.
b. Create a container named demo using the image you pulled.
c. Map host port 6300 to container port 80. Please keep the container in running state.
Step 1: Pull the NGINX Stable Image
1
docker pull nginx:stable
The nginx:stable image was pulled from Docker Hub to ensure a reliable and production-ready version of NGINX is available locally on the server.
Step 2: Create and Run the Container
1
docker run -d --name demo -p 6300:80 nginx:stable
A container named demo was created and started in detached mode using the pulled image. The host port 6300 was mapped to container port 80, allowing external access to the NGINX web service.
Step 3: Verify Container Status
1
docker ps
This command was used to confirm that the demo container is running successfully and that the port mapping is active.
1
2
CONTAINER ID IMAGE COMMAND CREATED STATUS PORTS NAMES
f738f0094168 nginx:stable "/docker-entrypoint.…" 3 seconds ago Up 1 second 0.0.0.0:6300->80/tcp demo
Step 4: Validate NGINX Service Accessibility
1
curl http://localhost:6300
The command returned the default NGINX welcome page, verifying that the web server is running correctly and accessible through the mapped port.
Day 44: Write a Docker Compose File
The Nautilus application development team shared static website content that needs to be hosted on the httpd web server using a containerised platform. The team has shared details with the DevOps team, and we need to set up an environment according to those guidelines. Below are the details:
a. On App Server 1 in Stratos DC create a container named httpd using a docker compose file /opt/docker/docker-compose.yml (please use the exact name for file).
b. Use httpd (preferably latest tag) image for container and make sure container is named as httpd; you can use any name for service.
c. Map 80 number port of container with port 8085 of docker host.
d. Map container’s /usr/local/apache2/htdocs volume with /opt/security volume of docker host which is already there. (please do not modify any data within these locations).
Docker Compose Configuration
The following Docker Compose file was created at the exact required path:
/opt/docker/docker-compose.yml
1
2
3
4
5
6
7
8
9
10
version: "3.8"
services:
web:
image: httpd:latest
container_name: httpd
ports:
- "8085:80"
volumes:
- /opt/security:/usr/local/apache2/htdocs
Deployment Steps
Navigated to the Docker directory:
1
cd /opt/docker/Created and saved the
docker-compose.ymlfile with the configuration shown above.Started the container in detached mode:
1
docker compose up -dVerified that the container is running:
1
docker ps
Verification
The web service was tested using curl:
1
curl http://172.16.238.10:8085
The response confirmed that the static content from /opt/security is being served correctly:
1
2
3
4
5
6
7
8
9
10
<!DOCTYPE HTML PUBLIC "-//W3C//DTD HTML 4.01//EN" "http://www.w3.org/TR/html4/strict.dtd">
<html>
<head>
<title>Index of /</title>
</head>
<body>
<h1>Index of /</h1>
<ul><li><a href="index1.html"> index1.html</a></li>
</ul>
</body></html>
Day 45: Resolve Dockerfile Issues
The Nautilus DevOps team is working to create new images per requirements shared by the development team. One of the team members is working to create a Dockerfile on App Server 2 in Stratos DC. While working on it she ran into issues in which the docker build is failing and displaying errors. Look into the issue and fix it to build an image as per details mentioned below: a. The Dockerfile is placed on App Server 2 under /opt/docker directory.
b. Fix the issues with this file and make sure it is able to build the image.
c. Do not change base image, any other valid configuration within Dockerfile, or any of the data been used — for example, index.html.
Note: Please note that once you click on FINISH button all the existing containers will be destroyed and new image will be built from your Dockerfile.
Problem found
1
/usr/local/apache2/conf.d/httpd.conf
- This is not the correct Path
- The correct path is
/usr/local/apache2/conf/httpd.conf
Fixed Dockerfile
1
2
3
4
5
6
7
8
9
10
11
12
13
14
FROM httpd:2.4.43
RUN sed -i "s/Listen 80/Listen 8080/g" /usr/local/apache2/conf/httpd.conf
RUN sed -i '/LoadModule\ ssl_module modules\/mod_ssl.so/s/^#//g' /usr/local/apache2/conf/httpd.conf
RUN sed -i '/LoadModule\ socache_shmcb_module modules\/mod_socache_shmcb.so/s/^#//g' /usr/local/apache2/conf/httpd.conf
RUN sed -i '/Include\ conf\/extra\/httpd-ssl.conf/s/^#//g' /usr/local/apache2/conf/httpd.conf
COPY certs/server.crt /usr/local/apache2/conf/server.crt
COPY certs/server.key /usr/local/apache2/conf/server.key
COPY html/index.html /usr/local/apache2/htdocs/
Build Command
1
docker build -t nautilus-httpd .
Day 46: Deploy an App on Docker Containers
The Nautilus Application development team recently finished development of one of the apps that they want to deploy on a containerized platform. The Nautilus Application development and DevOps teams met to discuss some of the basic pre-requisites and requirements to complete the deployment. The team wants to test the deployment on one of the app servers before going live and set up a complete containerized stack using a docker compose fie. Below are the details of the task:
- On
App Server 1inStratos Datacentercreate a docker compose file/opt/dba/docker-compose.yml(should be named exactly). - The compose should deploy two services (web and DB), and each service should deploy a container as per details below:
For web service:
a. Container name must be php_host.
b. Use image php with any apache tag. Check here for more details. c. Map php_host container’s port 80 with host port 6100
d. Map php_host container’s /var/www/html volume with host volume /var/www/html.
For DB service:
a. Container name must be mysql_host.
b. Use image mariadb with any tag (preferably latest). Check here for more details.
c. Map mysql_host container’s port 3306 with host port 3306
d. Map mysql_host container’s /var/lib/mysql volume with host volume /var/lib/mysql.
e. Set MYSQL_DATABASE=database_host and use any custom user ( except root ) with some complex password for DB connections.
- After running docker-compose up you can access the app with curl command
curl <server-ip or hostname>:6100/
For more details check here.
Note: Once you click on FINISH button, all currently running/stopped containers will be destroyed and stack will be deployed again using your compose file.
Here’s a complete write-up for your Docker Compose deployment task, formatted with ## for main title and ### for subtitles:
Environment Setup
- Directory for Compose File The Docker Compose file was created at
/opt/dba/docker-compose.yml.
Docker Compose File
1
2
3
4
5
6
7
8
9
10
11
12
13
14
15
16
17
18
19
20
21
22
23
24
25
version: "3.9"
services:
web:
container_name: php_host
image: php:8.2-apache
ports:
- "6100:80"
volumes:
- "/var/www/html:/var/www/html"
restart: unless-stopped
db:
container_name: mysql_host
image: mariadb:latest
ports:
- "3306:3306"
volumes:
- "/var/lib/mysql:/var/lib/mysql"
environment:
MYSQL_DATABASE: database_host
MYSQL_USER: nautilus_user
MYSQL_PASSWORD: "password123#"
MYSQL_ROOT_PASSWORD: "RootP@ssw0rd123"
restart: unless-stopped
Deployment Steps
- Navigate to the deployment directory:
1
cd /opt/dba
- Launch the stack in detached mode:
1
docker compose up -d
- Verify running containers:
1
docker compose ps
Expected Outcome:
1
curl http://172.16.238.10:6100
Sample Output:
1
2
3
4
5
6
7
8
<html>
<head>
<title>Welcome to xFusionCorp Industries!</title>
</head>
<body>
Welcome to xFusionCorp Industries!
</body>
</html>
Day 47: Docker Python App
A python app needed to be Dockerized, and then it needs to be deployed on App Server 1. We have already copied a requirements.txt file (having the app dependencies) under /python_app/src/ directory on App Server 1. Further complete this task as per details mentioned below:
- Create a
Dockerfileunder/python_appdirectory:- Use any
pythonimage as the base image. - Install the dependencies using
requirements.txtfile. - Expose the port
5004. - Run the
server.pyscript usingCMD.
- Use any
- Build an image named
nautilus/python-appusing this Dockerfile. - Once image is built, create a container named
pythonapp_nautilus- Map port
5004of the container to the host port8091.
- Map port
- Once deployed, you can test the app using
curlcommand onApp Server 1.
1
curl http://localhost:8091/
Directory Structure
1
2
3
4
5
/python_app
├── Dockerfile
└── src
├── server.py
└── requirements.txt
Dockerfile (Python Flask App)
1
2
3
4
5
6
7
8
9
10
11
12
13
FROM python:3.9-slim
WORKDIR /app
COPY src/requirements.txt .
RUN pip install --no-cache-dir -r requirements.txt
COPY src/ .
EXPOSE 5004
CMD ["python", "server.py"]
Build Docker Image
1
docker build -t nautilus/python-app .
Run Docker Container
1
2
3
4
docker run -d \
--name pythonapp_nautilus \
-p 8091:5004 \
nautilus/python-app
Port Mapping:
1
docker ps
Test the Application
1
curl http://localhost:8091/
Expected Output:
1
Welcome to xFusionCorp Industries!
Day 48: Deploy Pods in Kubernetes Cluster
The Nautilus DevOps team is diving into Kubernetes for application management. One team member has a task to create a pod according to the details below:
1
2
3
Create a pod named pod-nginx using the nginx image with the latest tag. Ensure to specify the tag as nginx:latest.
Set the app label to nginx_app, and name the container as nginx-container.
Note: The kubectl utility on jump_host is configured to operate with the Kubernetes cluster.
Copy POD Syntax
1
kubectl run nginx-pod --image=nginx --restart=Never --dry-run=client -o yaml > pod-nginx.yaml
Pod Manifest (YAML)
The following YAML file was used to define and create the Pod:
1
2
3
4
5
6
7
8
9
10
apiVersion: v1
kind: Pod
metadata:
name: pod-nginx
labels:
app: nginx_app
spec:
containers:
- name: nginx-container
image: nginx:latest
The Pod was created using the command:
1
kubectl apply -f pod-nginx.yaml
Pod Verification
After deployment, the Pod was verified using kubectl describe to confirm its status, image, labels, and container details.
1
kubectl describe pod pod-nginx
Output Summary
1
2
3
4
5
6
7
8
9
10
11
12
13
14
15
16
17
18
19
20
21
22
23
24
25
26
27
28
29
Name: pod-nginx
Namespace: default
Node: kodekloud-control-plane/172.17.0.2
Start Time: Fri, 23 Jan 2026 08:41:15 +0000
Status: Running
IP: 10.244.0.5
Labels:
app=nginx_app
Containers:
nginx-container:
Image: nginx:latest
State: Running
Ready: True
Restart Count: 0
Conditions:
Initialized True
Ready True
ContainersReady True
PodScheduled True
Events:
Successfully assigned pod-nginx to kodekloud-control-plane
Pulling image "nginx:latest"
Successfully pulled image "nginx:latest"
Created container nginx-container
Started container nginx-container
Day 49: Deploy Applications with Kubernetes Deployments
The Nautilus DevOps team is delving into Kubernetes for app management. One team member needs to create a deployment following these details: Create a deployment named nginx to deploy the application nginx using the image nginx:latest (ensure to specify the tag) Note: The kubectl utility on jump_host is set up to interact with the Kubernetes cluster. Since kubectl is already configured on jump_host, you can create the deployment directly from the command line.
Run:
1
kubectl create deployment nginx --image=nginx:latest
This will:
- Create a deployment named nginx
- Use the image nginx:latest (tag explicitly specified)
To verify it was created successfully:
1
kubectl get deployments
And to check the pods:
1
kubectl get pods
Day 50: Set Resource Limits in Kubernetes Pods
The Nautilus DevOps team has noticed performance issues in some Kubernetes-hosted applications due to resource constraints. To address this, they plan to set limits on resource utilization. Here are the details: Create a pod named httpd-pod with a container named httpd-container. Use the httpd image with the latest tag (specify as httpd:latest). Set the following resource limits: Requests: Memory: 15Mi, CPU: 100m Limits: Memory: 20Mi, CPU: 100m Note: The kubectl utility on jump_host is configured to operate with the Kubernetes cluster.
httpd-pod.yaml
1
2
3
4
5
6
7
8
9
10
11
12
13
14
15
apiVersion: v1
kind: Pod
metadata:
name: httpd-pod
spec:
containers:
- name: httpd-container
image: httpd:latest
resources:
requests:
memory: "15Mi"
cpu: "100m"
limits:
memory: "20Mi"
cpu: "100m"
Apply and Verify
Create pod:
1
kubectl apply -f httpd-pod.yaml
Check pod:
1
kubectl get pods
Detailed info:
1
kubectl describe pod httpd-pod.yaml
Quick Create Without YAML
1
kubectl run httpd-pod --image=httpd:latest --restart=Never --requests='cpu=100m,memory=15Mi' --limits='cpu=100m,memory=20Mi'
Day 51: Execute Rolling Updates in Kubernetes
An application currently running on the Kubernetes cluster employs the nginx web server. The Nautilus application development team has introduced some recent changes that need deployment. They’ve crafted an image nginx:1.17 with the latest updates. Execute a rolling update for this application, integrating the nginx:1.17 image. The deployment is named nginx-deployment. Ensure all pods are operational post-update. Note: The kubectl utility on jump_host is set up to operate with the Kubernetes cluster
Check Current Cluster State
1
2
3
kubectl get pods
kubectl get deployments
kubectl describe pods
Inspect Deployment Details
1
kubectl get deployment nginx-deployment -o yaml | grep -i name:
Perform Rolling Update (Update Image)
1
kubectl set image deployment/nginx-deployment nginx-container=nginx:1.17
Monitor Rollout Status
1
kubectl rollout status deployment/nginx-deployment
Verify Pods After Update
1
2
kubectl get pods
kubectl get deployments
Confirm Updated Image
1
kubectl describe deployment nginx-deployment | grep Image
Rollback (If Needed)
1
kubectl rollout undo deployment/nginx-deployment
Reference Documentation
I found the Kubernetes documentation very helpful while performing this lab. The official documentation clearly explains deployments, rolling updates, and image updates with practical examples.
kubectl rollout Reference:
Day 52: Revert Deployment to Previous Version in Kubernetes
Earlier today, the Nautilus DevOps team deployed a new release for an application. However, a customer has reported a bug related to this recent release. Consequently, the team aims to revert to the previous version. There exists a deployment named nginx-deployment; initiate a rollback to the previous revision. Note: The kubectl utility on jump_host is configured to interact with the Kubernetes cluster.
List all deployments
1
kubectl get deployments
Check pods
1
kubectl get pods
Check detailed deployment info
1
kubectl describe deployment nginx-deployment
View Rollout History
View rollout history of a specific deployment
1
kubectl rollout history deployment nginx-deployment
Output example:
1
2
3
REVISION CHANGE-CAUSE
1 <none>
2 kubectl set image deployment nginx-deployment nginx-container=nginx:stable --record=true
REVISIONshows deployment versions.CHANGE-CAUSEshows what command triggered the update (if--recordwas used).
Rollback Deployment
Rollback to previous revision
1
kubectl rollout undo deployment nginx-deployment
Rollback to a specific revision
1
kubectl rollout undo deployment nginx-deployment --to-revision=1
Verify Rollback
Check rollout status
1
kubectl rollout status deployment nginx-deployment
Confirm running pods
1
kubectl get pods
Verify image version
1
kubectl describe deployment nginx-deployment | grep -i image
Day 53: Resolve VolumeMounts Issue in Kubernetes
We encountered an issue with our Nginx and PHP-FPM setup on the Kubernetes cluster this morning, which halted its functionality. Investigate and rectify the issue:
The pod name is nginx-phpfpm and configmap name is nginx-config. Identify and fix the problem.
Once resolved, copy /home/thor/index.php file from the jump host to the nginx-container within the nginx document root. After this, you should be able to access the website using Website button on the top bar.
Note: The kubectl utility on jump_host is configured to operate with the Kubernetes cluster.
1. Initial Assessment
The issue occurred in the nginx-phpfpm pod consisting of:
nginx:latestphp:7.2-fpm-alpine- A shared
emptyDirvolume - A ConfigMap named
nginx-config
Initial verification confirmed the pod was in a Running state and both containers were marked Ready:
1
2
3
kubectl get pod
kubectl describe pod nginx-phpfpm
kubectl logs nginx-phpfpm -c nginx-container
Since the containers were healthy, the issue was isolated to configuration rather than container failure.
2. Identifying the Root Cause
Upon reviewing the pod specification and ConfigMap, a directory mismatch was identified.
The Nginx configuration defined the document root as:
1
root /var/www/html;
However, the PHP-FPM container was initially mounting the shared volume at:
1
/usr/share/nginx/html
This caused a mismatch between:
- The directory Nginx was serving from (
/var/www/html) - The directory where PHP files were expected
- The shared volume mount path between containers
As a result, Nginx could not properly locate and serve the PHP files.
3. Corrective Action
The fix involved standardizing the shared volume mount path across both containers.
The corrected pod configuration ensured both containers mounted the shared volume at:
1
/var/www/html
Relevant section of the pod spec:
1
2
3
4
5
6
7
8
9
10
11
12
13
14
15
containers:
- image: php:7.2-fpm-alpine
name: php-fpm-container
volumeMounts:
- mountPath: /var/www/html
name: shared-files
- image: nginx:latest
name: nginx-container
volumeMounts:
- mountPath: /var/www/html
name: shared-files
- mountPath: /etc/nginx/nginx.conf
name: nginx-config-volume
subPath: nginx.conf
The ConfigMap remained correctly configured:
1
2
3
4
5
6
7
root /var/www/html;
location ~ \.php$ {
include fastcgi_params;
fastcgi_param SCRIPT_FILENAME $document_root$fastcgi_script_name;
fastcgi_pass 127.0.0.1:9000;
}
This alignment ensured:
- Both containers accessed the same directory
- Nginx served files from the correct path
- PHP-FPM processed files from the same shared volume
4. Pod Recreation
After correcting the mount path, the pod was recreated to apply changes:
1
2
kubectl delete pod nginx-phpfpm
kubectl apply -f nginx-phpfpm.yml
The new pod initialized successfully with both containers ready.
5. Deploying the Application File
The required PHP file was copied from the jump host into the Nginx container:
1
kubectl cp /home/thor/index.php nginx-phpfpm:/var/www/html/index.php -c nginx-container
Verification confirmed successful placement:
1
kubectl exec -it nginx-phpfpm -c nginx-container -- ls /var/www/html
Day 54: Kubernetes Shared Volumes
We are working on an application that will be deployed on multiple containers within a pod on Kubernetes cluster. There is a requirement to share a volume among the containers to save some temporary data. The Nautilus DevOps team is developing a similar template to replicate the scenario. Below you can find more details about it.
- Create a pod named
volume-share-datacenter. - For the first container, use image
debianwithlatesttag only and remember to mention the tag i.edebian:latest, container should be named asvolume-container-datacenter-1, and run asleepcommand for it so that it remains in running state. Volumevolume-shareshould be mounted at path/tmp/official. - For the second container, use image
debianwith thelatesttag only and remember to mention the tag i.edebian:latest, container should be named asvolume-container-datacenter-2, and again run asleepcommand for it so that it remains in running state. Volumevolume-shareshould be mounted at path/tmp/apps. - Volume name should be
volume-shareof typeemptyDir. - After creating the pod, exec into the first container i.e
volume-container-datacenter-1, and just for testing create a fileofficial.txtwith any content under the mounted path of first container i.e/tmp/official. - The file
official.txtshould be present under the mounted path/tmp/appson the second containervolume-container-datacenter-2as well, since they are using a shared volume.
Note: The kubectl utility on jump_host has been configured to work with the kubernetes cluster.
Step 1: Create the Pod Manifest
I define a pod named volume-share-datacenter with two containers, each mounting the same volume at different paths.
1
2
3
4
5
6
7
8
9
10
11
12
13
14
15
16
17
18
19
20
21
apiVersion: v1
kind: Pod
metadata:
name: volume-share-datacenter
spec:
containers:
- name: volume-container-datacenter-1
image: debian:latest
command: ["sleep", "infinity"]
volumeMounts:
- name: volume-share
mountPath: /tmp/official
- name: volume-container-datacenter-2
image: debian:latest
command: ["sleep", "infinity"]
volumeMounts:
- name: volume-share
mountPath: /tmp/apps
volumes:
- name: volume-share
emptyDir: {}
Step 2: Apply the Pod Manifest
Create the pod using the following command:
1
kubectl apply -f volume-share-pod.yaml
Check the pod status:
1
kubectl get pods volume-share-datacenter
Expected output:
1
2
NAME READY STATUS RESTARTS AGE
volume-share-datacenter 2/2 Running 0 <time>
Step 3: Exec into the First Container and Create a File
Exec into the first container:
1
kubectl exec -it volume-share-datacenter -c volume-container-datacenter-1 -- bash
Inside the container, create a test file in the shared volume:
1
2
echo "This is a test file" > /tmp/official/official.txt
exit
Step 4: Verify the File in the Second Container
Exec into the second container:
1
kubectl exec -it volume-share-datacenter -c volume-container-datacenter-2 -- bash
Check that the file exists in the mounted path of the second container:
1
cat /tmp/apps/official.txt
Expected output:
1
This is a test file
This confirms that the shared emptyDir volume is accessible by both containers, and any changes made in one container are visible to the other.
Step 5: Optional — Generate YAML from CLI
If you want to generate a pod YAML skeleton directly from the terminal:
1
2
3
4
kubectl run volume-container-datacenter-1 \
--image=debian:latest \
--restart=Never \
--dry-run=client -o yaml > volume-share-pod.yaml
- This generates a basic pod YAML for single-container.
- You can then edit it to add additional containers and shared volumes as needed.
Day 55: Kubernetes Sidecar Containers
We have a web server container running the nginx image. The access and error logs generated by the web server are not critical enough to be placed on a persistent volume. However, Nautilus developers need access to the last 24 hours of logs so that they can trace issues and bugs. Therefore, we need to ship the access and error logs for the web server to a log-aggregation service.
Following the separation of concerns principle, we implement the Sidecar pattern by deploying a second container that ships the error and access logs from nginx. Nginx does one thing, and it does it well—serving web pages. The second container also specializes in its task—shipping logs. Since containers are running on the same Pod, we can use a shared emptyDir volume to read and write logs.
Requirements
- Create a pod named webserver.
- Create an emptyDir volume
shared-logs. - Create two containers from
nginx:latestandubuntu:latestimages (remember to mention tag). - Nginx container name should be
nginx-container. - Ubuntu container name should be
sidecar-containeron webserver pod. - Add command on
sidecar-container:
1
2
3
"sh","-c","while true; do cat /var/log/nginx/access.log /var/log/nginx/error.log; sleep 30; done"
- Mount the volume
shared-logson both containers at location/var/log/nginx. - All containers should be up and running.
Note: The
kubectlutility onjump_hosthas been configured to work with the kubernetes cluster.
Step 1: Create the Pod Manifest
Create a file named:
1
vi webserver.yaml
Add the following content:
1
2
3
4
5
6
7
8
9
10
11
12
13
14
15
16
17
18
19
20
21
22
apiVersion: v1
kind: Pod
metadata:
name: webserver
spec:
volumes:
- name: shared-logs
emptyDir: {}
containers:
- name: nginx-container
image: nginx:latest
volumeMounts:
- name: shared-logs
mountPath: /var/log/nginx
- name: sidecar-container
image: ubuntu:latest
command: ["sh", "-c", "while true; do cat /var/log/nginx/access.log /var/log/nginx/error.log; sleep 30; done"]
volumeMounts:
- name: shared-logs
mountPath: /var/log/nginx
Save and exit.
Step 2: Deploy the Pod
Apply the manifest:
1
kubectl apply -f webserver.yaml
Expected output:
1
pod/webserver created
Step 3: Verify Pod Status
Check whether the Pod is running:
1
kubectl get pods
Expected result:
1
2
NAME READY STATUS RESTARTS AGE
webserver 2/2 Running 0 10s
2/2 means both containers are running.
Day 56: Deploy Nginx Web Server on Kubernetes Cluster
Some of the Nautilus team developers are developing a static website and they want to deploy it on Kubernetes cluster. They want it to be highly available and scalable. Therefore, based on the requirements, the DevOps team has decided to create a deployment for it with multiple replicas. Below you can find more details about it:
- Create a deployment using
nginximage withlatesttag only and remember to mention the tag i.enginx:latest. Name it asnginx-deployment. The container should be named asnginx-container, also make sure replica counts are3. - Create a
NodePorttype service namednginx-service. The nodePort should be30011.Note:Thekubectlutility onjump_hosthas been configured to work with the kubernetes cluster.
Method 1: Imperative Approach
This method uses direct CLI commands. It is useful for quick setups, labs, and troubleshooting.
Step 1: Create Deployment
1
2
3
kubectl create deployment nginx-deployment \
--image=nginx:latest \
--replicas=3
Verify:
1
2
kubectl get deployments
kubectl get pods
Ensure 3 pods are running.
Edit:
Now set the container name properly (since kubectl create deployment auto-generates it):
1
kubectl edit deployment nginx-deployment
Change the container name under spec.template.spec.containers to:
1
name: nginx-container
Save and exit.
Step 2: Expose Deployment as NodePort Service
1
2
3
4
5
kubectl expose deployment nginx-deployment \
--name=nginx-service \
--type=NodePort \
--port=80 \
--target-port=80
Step 3: Set NodePort to 30011
1
2
3
4
5
6
7
8
9
kubectl patch svc nginx-service -p '{
"spec": {
"ports": [{
"port": 80,
"targetPort": 80,
"nodePort": 30011
}]
}
}'
Step 4: Verify Service
1
kubectl get svc
Expected output:
1
nginx-service NodePort 80:30011/TCP
Method 2: Declarative Approach
This is the production-style approach. Infrastructure is defined as code and can be version controlled.
Step 1: Create YAML File
1
vi nginx.yaml
Paste the following configuration:
1
2
3
4
5
6
7
8
9
10
11
12
13
14
15
16
17
18
19
20
21
22
23
24
25
26
27
28
29
30
31
32
33
apiVersion: apps/v1
kind: Deployment
metadata:
name: nginx-deployment
spec:
replicas: 3
selector:
matchLabels:
app: nginx-app
template:
metadata:
labels:
app: nginx-app
spec:
containers:
- name: nginx-container
image: nginx:latest
ports:
- containerPort: 80
---
apiVersion: v1
kind: Service
metadata:
name: nginx-service
spec:
type: NodePort
selector:
app: nginx-app
ports:
- port: 80
targetPort: 80
nodePort: 30011
Step 2: Apply Configuration
1
kubectl apply -f nginx.yaml
Step 3: Verify Deployment and Service
1
2
3
kubectl get deployments
kubectl get pods
kubectl get svc
Day 57: Print Environment Variables
The Nautilus DevOps team is working on to setup some pre-requisites for an application that will send the greetings to different users. There is a sample deployment, that needs to be tested. Below is a scenario which needs to be configured on Kubernetes cluster. Please find below more details about it.
- Create a
podnamedprint-envars-greeting. - Configure spec as, the container name should be
print-env-containerand usebashimage - Create three environment variables:
a. GREETING and its value should be Welcome to b. COMPANY and its value should be DevOps c. GROUP and its value should be Industries
- Use command
["/bin/sh", "-c", 'echo "$(GREETING) $(COMPANY) $(GROUP)"'](please use this exact command), also set itsrestartPolicypolicy toNeverto avoid crash loop back. - You can check the output using
kubectl logs -f print-envars-greetingcommand.
Note:Thekubectlutility onjump_hosthas been configured to work with the kubernetes cluster.
Manifest File
1
2
3
4
5
6
7
8
9
10
11
12
13
14
15
16
17
apiVersion: v1
kind: Pod
metadata:
name: print-envars-greeting
spec:
restartPolicy: Never
containers:
- name: print-env-container
image: bash
command: ["/bin/sh", "-c", 'echo "$(GREETING) $(COMPANY) $(GROUP)"']
env:
- name: GREETING
value: "Welcome to"
- name: COMPANY
value: "DevOps"
- name: GROUP
value: "Industries"
Deployment Steps
Apply the configuration:
1
kubectl apply -f pod.yaml
Verify that the Pod is created:
1
kubectl get pods
Check the logs to view the output:
1
kubectl logs -f print-envars-greeting
Expected Output
1
Welcome to DevOps Industries
Day 58: Deploy Grafana on Kubernetes Cluster
The Nautilus DevOps teams is planning to set up a Grafana tool to collect and analyze analytics from some applications. They are planning to deploy it on Kubernetes cluster. Below you can find more details.
1.) Create a deployment named grafana-deployment-devops using any grafana image for Grafana app. Set other parameters as per your choice.
2.) Create NodePort type service with nodePort 32000 to expose the app.
You need not to make any configuration changes inside the Grafana app once deployed, just make sure you are able to access the Grafana login page.
Note: The kubectl on jump_host has been configured to work with kubernetes cluster.
Manifest file
- This file holds the deployment and the service scripts
- Save this into
grafana.yaml
1
2
3
4
5
6
7
8
9
10
11
12
13
14
15
16
17
18
19
20
21
22
23
24
25
26
27
28
29
30
31
32
33
34
35
36
37
38
39
40
41
42
43
44
45
46
47
48
49
50
apiVersion: apps/v1
kind: Deployment
metadata:
labels:
app: grafana
name: grafana-deployment-devops
spec:
selector:
matchLabels:
app: grafana
template:
metadata:
labels:
app: grafana
spec:
securityContext:
fsGroup: 472
supplementalGroups:
- 0
containers:
- name: grafana
image: grafana/grafana:latest
imagePullPolicy: IfNotPresent
ports:
- containerPort: 3000
name: http-grafana
protocol: TCP
readinessProbe:
failureThreshold: 3
httpGet:
path: /robots.txt
port: 3000
scheme: HTTP
---
apiVersion: v1
kind: Service
metadata:
name: grafana-service
spec:
type: NodePort
selector:
app: grafana
ports:
- protocol: TCP
port: 3000
targetPort: 3000
nodePort: 32000
Deploying to NodePort
1
2
3
kubectl apply -f grafana.yaml
kubectl get all
- Wait for some time and check the
http://NodeIp:nodepordbut for this lab just hit theGrafanabutton.
for details check the official documentation: Grafana Documentation
Day 59: Troubleshoot Deployment issues in Kubernetes
Last week, the Nautilus DevOps team deployed a redis app on Kubernetes cluster, which was working fine so far. This morning one of the team members was making some changes in this existing setup, but he made some mistakes and the app went down. We need to fix this as soon as possible. Please take a look.
The deployment name is redis-deployment. The pods are not in running state right now, so please look into the issue and fix the same.
Note: The kubectl utility on jump_host has been configured to work with the kubernetes cluster.
Step 1 — Check the overall state
1
kubectl get all
Output showed:
1
2
3
4
5
6
7
8
9
10
11
NAME READY STATUS RESTARTS AGE
pod/redis-deployment-54cdf4f76d-4vqmv 0/1 ContainerCreating 0 58s
NAME TYPE CLUSTER-IP EXTERNAL-IP PORT(S) AGE
service/kubernetes ClusterIP 10.96.0.1 <none> 443/TCP 4m56s
NAME READY UP-TO-DATE AVAILABLE AGE
deployment.apps/redis-deployment 0/1 1 0 58s
NAME DESIRED CURRENT READY AGE
replicaset.apps/redis-deployment-54cdf4f76d 1 1 0 58s
So the issue is at pod startup, not at service or deployment level.
Step 2 — Go directly to the pod
1
kubectl describe pod redis-deployment-54cdf4f76d-4vqmv
Events (most important)
1
2
3
4
5
6
Events:
Type Reason Age From Message
---- ------ ---- ---- -------
Normal Scheduled 12m default-scheduler Successfully assigned default/redis-deployment-54cdf4f76d-4vqmv to kodekloud-control-plane
Warning FailedMount 83s (x5 over 10m) kubelet Unable to attach or mount volumes: unmounted volumes=[config], unattached volumes=[], failed to process volumes=[]: timed out waiting for the condition
Warning FailedMount 8s (x14 over 12m) kubelet MountVolume.SetUp failed for volume "config" : configmap "redis-conig" not found
"”redis-conig” not found, this line gives the first root cause.
Step 3 — Validate the referenced resource
1
kubectl get configmap
Output:
1
2
3
4
NAME DATA AGE
kube-root-ca.crt 1 16m
redis-config 2 12m
Mismatch found:
1
2
redis-conig → wrong
redis-config → correct
Step 4 — Fix the deployment
1
kubectl edit deployment redis-deployment
Correct the ConfigMap name.
Step 5 — Observe rollout
1
kubectl get all
Now a new pod appears with:
1
2
3
4
5
6
7
8
9
10
11
12
13
14
NAME READY STATUS RESTARTS AGE
pod/redis-deployment-5bcd4c7d64-fllmc 0/1 ErrImagePull 0 15s
pod/redis-deployment-7c8d4f6ddf-tpvck 1/1 Running 0 7m26s
NAME TYPE CLUSTER-IP EXTERNAL-IP PORT(S) AGE
service/kubernetes ClusterIP 10.96.0.1 <none> 443/TCP 32m
NAME READY UP-TO-DATE AVAILABLE AGE
deployment.apps/redis-deployment 1/1 1 1 28m
NAME DESIRED CURRENT READY AGE
replicaset.apps/redis-deployment-54cdf4f76d 0 0 0 28m
replicaset.apps/redis-deployment-5bcd4c7d64 1 1 0 11m
replicaset.apps/redis-deployment-7c8d4f6ddf 1 1 1 7m26s
This means:
Volume issue is fixed Image phase is now failing
Step 6 — Describe the new pod
1
kubectl describe pod redis-deployment-5bcd4c7d64-fllmc
Containers section
1
2
Image: redis:alpin
State: Waiting (ImagePullBackOff)
Events section
1
2
3
4
5
6
7
8
9
Events:
Type Reason Age From Message
---- ------ ---- ---- -------
Normal Scheduled 35s default-scheduler Successfully assigned default/redis-deployment-5bcd4c7d64-fllmc to kodekloud-control-plane
Normal Pulling 19s (x2 over 34s) kubelet Pulling image "redis:alpin"
Warning Failed 18s (x2 over 34s) kubelet Failed to pull image "redis:alpin": rpc error: code = NotFound desc = failed to pull and unpack image "docker.io/library/redis:alpin": failed to resolve reference "docker.io/library/redis:alpin": docker.io/library/redis:alpin: not found
Warning Failed 18s (x2 over 34s) kubelet Error: ErrImagePull
Normal BackOff 7s (x2 over 34s) kubelet Back-off pulling image "redis:alpin"
Warning Failed 7s (x2 over 34s) kubelet Error: ImagePullBackOff
Second root cause identified.
Step 7 — Fix the image
1
kubectl edit deployment redis-deployment
Change:
1
redis:alpin → redis:alpine
Step 8 — Final rollout state
1
kubectl get all
You will see:
1
2
3
4
5
6
7
8
9
10
11
12
13
NAME READY STATUS RESTARTS AGE
pod/redis-deployment-7c8d4f6ddf-tpvck 1/1 Running 0 12m
NAME TYPE CLUSTER-IP EXTERNAL-IP PORT(S) AGE
service/kubernetes ClusterIP 10.96.0.1 <none> 443/TCP 37m
NAME READY UP-TO-DATE AVAILABLE AGE
deployment.apps/redis-deployment 1/1 1 1 33m
NAME DESIRED CURRENT READY AGE
replicaset.apps/redis-deployment-54cdf4f76d 0 0 0 33m
replicaset.apps/redis-deployment-5bcd4c7d64 0 0 0 15m
replicaset.apps/redis-deployment-7c8d4f6ddf 1 1 1 12m
Minimal Debugging Logic (what to think when you see a state)
Pod stuck in ContainerCreating
Run:
1
kubectl describe pod <pod>
If Events show FailedMount, think only about:
- ConfigMap
- Secret
- PVC
- Volume name mismatch
Pod in ImagePullBackOff or ErrImagePull
Check in kubectl describe pod:
1
2
Containers → Image
Events → pull error
Think only about:
- Wrong image name
- Wrong tag
- Registry access
Day 60: Persistent Volumes in Kubernetes
The Nautilus DevOps team is working on a Kubernetes template to deploy a web application on the cluster. There are some requirements to create/use persistent volumes to store the application code, and the template needs to be designed accordingly. Please find more details below:
- Create a
PersistentVolumenamed aspv-devops. Configure thespecas storage class should bemanual, set capacity to4Gi, set access mode toReadWriteOnce, volume type should behostPathand set path to/mnt/dba(this directory is already created, you might not be able to access it directly, so you need not to worry about it). - Create a
PersistentVolumeClaimnamed aspvc-devops. Configure thespecas storage class should bemanual, request1Giof the storage, set access mode toReadWriteOnce. - Create a
podnamed aspod-devops, mount the persistent volume you created with claim namepvc-devopsat document root of the web server, the container within the pod should be named ascontainer-devopsusing imagehttpdwithlatesttag only (remember to mention the tag i.ehttpd:latest). - Create a node port type service named
web-devopsusing node port30008to expose the web server running within the pod.Note:Thekubectlutility onjump_hosthas been configured to work with the kubernetes cluster.
Step 1 - Create the PersistentVolume
Create the file
1
vi pv-devops.yaml
Add configuration
1
2
3
4
5
6
7
8
9
10
11
12
apiVersion: v1
kind: PersistentVolume
metadata:
name: pv-devops
spec:
capacity:
storage: 4Gi
accessModes:
- ReadWriteOnce
storageClassName: manual
hostPath:
path: /mnt/dba
Apply the configuration
1
kubectl apply -f pv-devops.yaml
Verify
1
kubectl get pv
Step 2 — Create the PersistentVolumeClaim
Create the file
1
vi pvc-devops.yaml
Add configuration
1
2
3
4
5
6
7
8
9
10
11
apiVersion: v1
kind: PersistentVolumeClaim
metadata:
name: pvc-devops
spec:
accessModes:
- ReadWriteOnce
storageClassName: manual
resources:
requests:
storage: 1Gi
Apply the configuration
1
kubectl apply -f pvc-devops.yaml
Verify binding
1
2
kubectl get pvc
kubectl get pv
Step 3 — Create the Pod and Service
Create the file
1
vi pod-svc.yaml
Add configuration
1
2
3
4
5
6
7
8
9
10
11
12
13
14
15
16
17
18
19
20
21
22
23
24
25
26
27
28
29
30
apiVersion: v1
kind: Pod
metadata:
name: pod-devops
labels:
app: web-devops
spec:
containers:
- name: container-devops
image: httpd:latest
volumeMounts:
- name: devops-storage
mountPath: /usr/local/apache2/htdocs
volumes:
- name: devops-storage
persistentVolumeClaim:
claimName: pvc-devops
---
apiVersion: v1
kind: Service
metadata:
name: web-devops
spec:
type: NodePort
selector:
app: web-devops
ports:
- port: 80
targetPort: 80
nodePort: 30008
Apply the configuration
1
kubectl apply -f pod-svc.yaml
Step 4 — Verify All Resources
1
kubectl get all
Step 5 — Check if the pod is running or not
1
2
3
4
5
6
7
8
9
kubectl get all
thor@jumphost ~$ kubectl get all
NAME READY STATUS RESTARTS AGE
pod/pod-devops 1/1 Running 0 7m48s
NAME TYPE CLUSTER-IP EXTERNAL-IP PORT(S) AGE
service/kubernetes ClusterIP 10.96.0.1 <none> 443/TCP 44m
service/web-devops NodePort 10.96.217.198 <none> 80:30008/TCP 7m48s
Day 61: Init Containers in Kubernetes
There are some applications that need to be deployed on Kubernetes cluster and these apps have some pre-requisites where some configurations need to be changed before deploying the app container. Some of these changes cannot be made inside the images so the DevOps team has come up with a solution to use init containers to perform these tasks during deployment. Below is a sample scenario that the team is going to test first.
- Create a
Deploymentnamed asic-deploy-nautilus. - Configure
specas replicas should be1, labelsappshould beic-nautilus, template’s metadata lablesappshould be the sameic-nautilus. - The
initContainersshould be named asic-msg-nautilus, use imagefedorawithlatesttag and use command'/bin/bash','-c'and'echo Init Done - Welcome to xFusionCorp Industries > /ic/official'. The volume mount should be named asic-volume-nautilusand mount path should be/ic. - Main container should be named as
ic-main-nautilus, use imagefedorawithlatesttag and use command'/bin/bash','-c'and'while true; do cat /ic/official; sleep 5; done'. The volume mount should be named asic-volume-nautilusand mount path should be/ic. - Volume to be named as
ic-volume-nautilusand it should be an emptyDir type.
Note: The kubectl utility on jump_host has been configured to work with the kubernetes cluster.
Creating Manifest File
Step 1 — Create the Deployment manifest
On the jump host, create the YAML:
1
vi ic-deploy-nautilus.yaml
Paste the configuration:
1
2
3
4
5
6
7
8
9
10
11
12
13
14
15
16
17
18
19
20
21
22
23
24
25
26
27
28
29
30
31
32
33
34
35
36
apiVersion: apps/v1
kind: Deployment
metadata:
labels:
app: ic-deploy
name: ic-deploy-nautilus
spec:
replicas: 1
selector:
matchLabels:
app: ic-nautilus
template:
metadata:
labels:
app: ic-nautilus
spec:
volumes:
- name: ic-volume-nautilus
emptyDir: {}
initContainers:
- name: ic-msg-nautilus
image: fedora:latest
imagePullPolicy: IfNotPresent
command: ['/bin/bash', '-c', 'echo Init Done - Welcome to xFusionCorp Industries > /ic/official']
volumeMounts:
- name: ic-volume-nautilus
mountPath: /ic
containers:
- name: ic-main-nautilus
image: fedora:latest
imagePullPolicy: IfNotPresent
command: ['/bin/bash', '-c', 'while true; do cat /ic/official; sleep 5; done']
volumeMounts:
- name: ic-volume-nautilus
mountPath: /ic
Save and exit.
Step 2 — Apply the Deployment
1
kubectl apply -f ic-deploy-nautilus.yaml
Deployment gets created.
Step 3 — Verify all resources
1
kubectl get all
This confirms:
- Deployment created
- ReplicaSet created
- Pod running
Step 4 — Verify the Pod using label selector
1
kubectl get pods -l app=ic-nautilus
Output:
1
ic-deploy-nautilus-54dcb78c6c-2sttn 1/1 Running
This proves:
- Selector and template labels match
- Pod is successfully managed by the Deployment
Step 5 — Check application logs
1
kubectl logs ic-deploy-nautilus-54dcb78c6c-2sttn
Output:
1
2
Defaulted container "ic-main-nautilus" out of: ic-main-nautilus, ic-msg-nautilus (init)
Init Done - Welcome to xFusionCorp Industries
repeating every 5 seconds.
Explanation:
- Init container already completed
- Main container is running and reading the file from the shared volume
Day 62: Manage Secrets in Kubernetes
The Nautilus DevOps team is working to deploy some tools in Kubernetes cluster. Some of the tools are licence based so that licence information needs to be stored securely within Kubernetes cluster. Therefore, the team wants to utilize Kubernetes secrets to store those secrets. Below you can find more details about the requirements:
- We already have a secret key file
ecommerce.txtunder/optlocation onjump host. Create ageneric secretnamedecommerce, it should contain the password/license-number present inecommerce.txtfile. - Also create a
podnamedsecret-devops. - Configure pod’s
specas container name should besecret-container-devops, image should bedebianwithlatesttag (remember to mention the tag with image). Usesleepcommand for container so that it remains in running state. Consume the created secret and mount it under/opt/appswithin the container. - To verify you can exec into the container
secret-container-devops, to check the secret key under the mounted path/opt/apps. Before hitting theCheckbutton please make sure pod/pods are in running state, also validation can take some time to complete so keep patience.
Note: The kubectl utility on jump_host has been configured to work with the kubernetes cluster.
Declarative Approach (Using Manifest File)
This approach uses YAML manifests and is preferred for reproducibility, version control, and automation.
Step 1: Prepare the Manifest File
Create a file named secret.yaml with the following content:
1
2
3
4
5
6
7
8
9
10
11
12
13
14
15
16
17
18
19
20
21
22
23
24
25
apiVersion: v1
kind: Secret
metadata:
name: ecommerce
type: Opaque
data:
ecommerce.txt: NWVjdXIz
---
apiVersion: v1
kind: Pod
metadata:
name: secret-devops
spec:
volumes:
- name: ecommerce-secret
secret:
secretName: ecommerce
containers:
- name: secret-container-devops
image: debian:latest
command: ["sleep", "3600"]
volumeMounts:
- name: ecommerce-secret
readOnly: true
mountPath: "/opt/apps"
Explanation:
NWVjdXIzis the base64-encoded value of5ecur31
echo -n "5ecur3" | base64
- The secret key name
ecommerce.txtbecomes a file inside the container - The secret is mounted at
/opt/apps
Step 2: Apply the Manifest
1
kubectl apply -f secret.yaml
Expected output:
- Secret
ecommercecreated or unchanged - Pod
secret-devopscreated
Step 3: Verify Pod Status
1
kubectl get pods
Ensure the pod status is Running.
Step 4: Verify Secret Inside the Container
1
kubectl exec -it secret-devops -c secret-container-devops -- /bin/bash
Inside the container:
1
2
3
cd /opt/apps
ls
cat ecommerce.txt
Expected output:
1
5ecur3
Exit the container:
1
exit
Imperative Approach (Using kubectl Commands)
This approach creates resources directly from the command line and is useful for quick tasks and troubleshooting.
Step 1: Create the Secret Imperatively
1
kubectl create secret generic ecommerce --from-file=/opt/ecommerce.txt
Verify:
1
kubectl get secret ecommerce
Step 2: Create the Pod Imperatively
1
2
3
4
kubectl run secret-devops \
--image=debian:latest \
--restart=Never \
--command -- sleep 3600
Step 3: Patch the Pod to Mount the Secret
Create a small patch file patch.yaml:
1
2
3
4
5
6
7
8
9
10
11
spec:
volumes:
- name: ecommerce-secret
secret:
secretName: ecommerce
containers:
- name: secret-devops
volumeMounts:
- name: ecommerce-secret
mountPath: /opt/apps
readOnly: true
Apply the patch:
1
kubectl patch pod secret-devops --patch-file patch.yaml
Step 4: Verify the Secret
1
2
3
kubectl exec -it secret-devops -- /bin/bash
cd /opt/apps
cat ecommerce.txt
Day 63: Deploy Iron Gallery App on Kubernetes
There is an iron gallery app that the Nautilus DevOps team was developing. They have recently customized the app and are going to deploy the same on the Kubernetes cluster. Below you can find more details:
- Create a namespace
iron-namespace-nautilus Create a deployment
iron-gallery-deployment-nautilusforiron galleryunder the same namespace you created. :- Labelsrunshould beiron-gallery. :- Replicas count should be1. :- Selector’s matchLabelsrunshould beiron-gallery. :- Template labelsrunshould beiron-galleryunder metadata. :- The container should be named asiron-gallery-container-nautilus, usekodekloud/irongallery:2.0image ( use exact image name / tag ). :- Resources limits for memory should be100Miand for CPU should be50m. :- First volumeMount name should beconfig, its mountPath should be/usr/share/nginx/html/data. :- Second volumeMount name should beimages, its mountPath should be/usr/share/nginx/html/uploads. :- First volume name should beconfigand give itemptyDirand second volume name should beimages, also give itemptyDir.Create a deployment
iron-db-deployment-nautilusforiron dbunder the same namespace. :- Labelsdbshould bemariadb. :- Replicas count should be1. :- Selector’s matchLabelsdbshould bemariadb. :- Template labelsdbshould bemariadbunder metadata. :- The container name should beiron-db-container-nautilus, usekodekloud/irondb:2.0image ( use exact image name / tag ). :- Define environment, setMYSQL_DATABASEits value should bedatabase_host, setMYSQL_ROOT_PASSWORDandMYSQL_PASSWORDvalue should be with some complex passwords for DB connections, andMYSQL_USERvalue should be any custom user ( except root ). :- Volume mount name should bedband its mountPath should be/var/lib/mysql. Volume name should bedband give it anemptyDir.- Create a service for
iron dbwhich should be namediron-db-service-nautilusunder the same namespace. Configure spec as selector’s db should bemariadb. Protocol should beTCP, port and targetPort should be3306and its type should beClusterIP. - Create a service for
iron gallerywhich should be namediron-gallery-service-nautilusunder the same namespace. Configure spec as selector’s run should beiron-gallery. Protocol should beTCP, port and targetPort should be80, nodePort should be32678and its type should beNodePort.
Note:
- We don’t need to make connection b/w database and front-end now, if the installation page is coming up it should be enough for now.
- The
kubectlonjump_hosthas been configured to work with the kubernetes cluster.
Declarative Approach (Using Manifest File)
This approach uses YAML manifests and is preferred for reproducibility, version control, and automation.
Step 1: Prepare the Manifest File
Create a file named deployment-iron-app.yaml with the following content:
1
2
3
4
5
6
7
8
9
10
11
12
13
14
15
16
17
18
19
20
21
22
23
24
25
26
27
28
29
30
31
32
33
34
35
36
37
38
39
40
41
42
43
44
45
46
47
48
49
50
51
52
53
54
55
56
57
58
59
60
61
62
63
64
65
66
67
68
69
70
71
72
73
74
75
76
77
78
79
80
81
82
83
84
85
86
87
88
89
90
91
92
93
94
95
96
97
98
99
100
apiVersion: apps/v1
kind: Deployment
metadata:
name: iron-gallery-deployment-nautilus
namespace: iron-namespace-nautilus
spec:
replicas: 1
selector:
matchLabels:
run: iron-gallery
template:
metadata:
labels:
run: iron-gallery
spec:
containers:
- name: iron-gallery-container-nautilus
image: kodekloud/irongallery:2.0
imagePullPolicy: IfNotPresent
resources:
limits:
memory: "100Mi"
cpu: "50m"
volumeMounts:
- name: config
mountPath: /usr/share/nginx/html/data
- name: images
mountPath: /usr/share/nginx/html/uploads
volumes:
- name: config
emptyDir: {}
- name: images
emptyDir: {}
---
apiVersion: apps/v1
kind: Deployment
metadata:
name: iron-db-deployment-nautilus
namespace: iron-namespace-nautilus
spec:
replicas: 1
selector:
matchLabels:
db: mariadb
template:
metadata:
labels:
db: mariadb
spec:
containers:
- name: iron-db-container-nautilus
image: kodekloud/irondb:2.0
imagePullPolicy: IfNotPresent
env:
- name: MYSQL_DATABASE
value: database_host
- name: MYSQL_ROOT_PASSWORD
value: password@password
- name: MYSQL_PASSWORD
value: password@password
- name: MYSQL_USER
value: gallerydb
volumeMounts:
- name: db
mountPath: /var/lib/mysql
volumes:
- name: db
emptyDir: {}
---
apiVersion: v1
kind: Service
metadata:
name: iron-db-service-nautilus
namespace: iron-namespace-nautilus
spec:
type: ClusterIP
selector:
db: mariadb
ports:
- protocol: TCP
port: 3306
targetPort: 3306
---
apiVersion: v1
kind: Service
metadata:
name: iron-gallery-service-nautilus
namespace: iron-namespace-nautilus
spec:
type: NodePort
selector:
run: iron-gallery
ports:
- protocol: TCP
port: 80
targetPort: 80
nodePort: 32678
Step 2: Create the Namespace
1
kubectl create ns iron-namespace-nautilus
Step 3: Apply the Manifest
1
kubectl apply -f deployment-iron-app.yaml
Step 4: Verify Resources
1
kubectl get all -n iron-namespace-nautilus
As per requirement, seeing the installation page is sufficient.
Imperative Approach (Using kubectl Commands)
This approach creates resources directly from the command line and is useful for quick tasks and troubleshooting.
Step 1: Create Namespace Imperatively
1
kubectl create namespace iron-namespace-nautilus
Step 2: Create Iron Gallery Deployment Imperatively
1
2
3
kubectl create deployment iron-gallery-deployment-nautilus \
--image=kodekloud/irongallery:2.0 \
-n iron-namespace-nautilus
Scale replicas to 1 (explicit):
1
2
kubectl scale deployment iron-gallery-deployment-nautilus \
--replicas=1 -n iron-namespace-nautilus
Add labels:
1
2
kubectl label deployment iron-gallery-deployment-nautilus \
run=iron-gallery -n iron-namespace-nautilus
Volume mounts, resources, and emptyDir volumes cannot be fully configured imperatively and usually require
kubectl editor YAML.
Step 3: Create Iron DB Deployment Imperatively
1
2
3
kubectl create deployment iron-db-deployment-nautilus \
--image=kodekloud/irondb:2.0 \
-n iron-namespace-nautilus
Add label:
1
2
kubectl label deployment iron-db-deployment-nautilus \
db=mariadb -n iron-namespace-nautilus
Add environment variables:
1
2
3
4
5
6
kubectl set env deployment/iron-db-deployment-nautilus \
MYSQL_DATABASE=database_host \
MYSQL_ROOT_PASSWORD=password@password \
MYSQL_PASSWORD=password@password \
MYSQL_USER=gallerydb \
-n iron-namespace-nautilus
Step 4: Create Services Imperatively
Iron DB Service (ClusterIP)
1
2
3
4
5
6
kubectl expose deployment iron-db-deployment-nautilus \
--name=iron-db-service-nautilus \
--port=3306 \
--target-port=3306 \
--type=ClusterIP \
-n iron-namespace-nautilus
Iron Gallery Service (NodePort)
1
2
3
4
5
6
kubectl expose deployment iron-gallery-deployment-nautilus \
--name=iron-gallery-service-nautilus \
--port=80 \
--target-port=80 \
--type=NodePort \
-n iron-namespace-nautilus
Set NodePort explicitly:
1
2
3
kubectl patch svc iron-gallery-service-nautilus \
-n iron-namespace-nautilus \
-p '{"spec":{"ports":[{"port":80,"targetPort":80,"nodePort":32678}]}}'
Step 5: Verify Imperative Setup
1
kubectl get all -n iron-namespace-nautilus
Day 64: Fix Python App Deployed on Kubernetes Cluster
One of the DevOps engineers was trying to deploy a python app on Kubernetes cluster. Unfortunately, due to some mis-configuration, the application is not coming up. Please take a look into it and fix the issues. Application should be accessible on the specified nodePort.
- The deployment name is
python-deployment-datacenter, its usingporoko/flask-demo-appimage. The deployment and service of this app is already deployed. - nodePort should be
32345and targetPort should be python flask app’s default port.
Note: The kubectl on jump_host has been configured to work with the kubernetes cluster.
Step 0: Inspect Current Cluster State
1
kubectl get all
Observed output:
1
2
3
4
5
6
pod/python-deployment-datacenter-6fdb496d59-g4pft 0/1 ImagePullBackOff 0 95s
service/python-service-datacenter NodePort 10.96.68.190 <none> 8080:32345/TCP 95s
deployment.apps/python-deployment-datacenter 0/1 1 0 95s
replicaset.apps/python-deployment-datacenter-6fdb496d59 1 1 0 95s
Key observations:
- Pod status was ImagePullBackOff
- Deployment had 0 available replicas
- Service existed, but the application was not reachable
At this point, the issue was clearly not related to networking, since the pod itself was failing to start.
Step 0.1: Investigate the Pod Failure
To understand why the pod was failing, the pod was described in detail.
1
kubectl describe pod python-deployment-datacenter-6fdb496d59-g4pft
Relevant output:
1
2
3
Failed to pull image "poroko/flask-app-demo"
repository does not exist or may require authorization
Error: ImagePullBackOff
Conclusion:
ImagePullBackOffstrongly indicates an invalid image name, tag, or registry- The image
poroko/flask-app-demodoes not exist or is inaccessible - This confirmed that the root cause was the container image
Once the image issue was identified, the next step was to fix the Deployment configuration.
Step 1: Fix the Deployment Manifest
Issue Identified
Image name was incorrect:
1
poroko/flask-app-demo ❌
Correct image:
1
poroko/flask-demo-app ✅
Corrected Deployment Manifest
Create or update deployment.yaml:
1
2
3
4
5
6
7
8
9
10
11
12
13
14
15
16
17
18
19
apiVersion: apps/v1
kind: Deployment
metadata:
name: python-deployment-datacenter
spec:
replicas: 1
selector:
matchLabels:
app: python_app
template:
metadata:
labels:
app: python_app
spec:
containers:
- name: python-container-datacenter
image: poroko/flask-demo-app
ports:
- containerPort: 5000
Explanation:
poroko/flask-demo-appis the valid and accessible image- Flask application listens on port 5000
containerPortis defined for clarity and service mapping
Step 2: Fix the Service Manifest
Issue Identified
- Service was routing traffic to 8080
- Flask app listens on 5000
Corrected Service Manifest
Create or update service.yaml:
1
2
3
4
5
6
7
8
9
10
11
12
apiVersion: v1
kind: Service
metadata:
name: python-service-datacenter
spec:
type: NodePort
selector:
app: python_app
ports:
- port: 5000
targetPort: 5000
nodePort: 32345
Explanation:
targetPort: 5000matches Flask’s default portnodePort: 32345exposes the app externally as required
Step 3: Apply the Manifests
1
2
kubectl apply -f deployment.yaml
kubectl apply -f service.yaml
Expected output:
- Deployment updated
- Service updated
Step 4: Verify Resources
1
2
kubectl get pods
kubectl get svc python-service-datacenter
Expected state:
- Pod status:
Running - Service:
NodePort 32345
Step 5: Verify Application Access
1
kubectl get nodes -o wide
Troubleshooting Summary
kubectl get allidentified a pod startup issueImagePullBackOffimmediately pointed to an image misconfiguration- Fixing the image allowed the pod to reach
Running - Service
targetPortmismatch prevented traffic from reaching the container - Aligning Service and container ports completed the fix
Day 65: Deploy Redis Deployment on Kubernetes
The Nautilus application development team observed some performance issues with one of the application that is deployed in Kubernetes cluster. After looking into number of factors, the team has suggested to use some in-memory caching utility for DB service. After number of discussions, they have decided to use Redis. Initially they would like to deploy Redis on kubernetes cluster for testing and later they will move it to production. Please find below more details about the task:
Create a redis deployment with following parameters:
- Create a
config mapcalledmy-redis-confighavingmaxmemory 2mbinredis-config. - Name of the
deploymentshould beredis-deployment, it should use
redis:alpineimage and container name should beredis-container. Also make sure it has only1replica. - The container should request for
1CPU. Mount
2volumes: a. An Empty directory volume calleddataat path/redis-master-data. b. A configmap volume calledredis-configat path/redis-master. c. The container should expose the port6379.- Finally,
redis-deploymentshould be in an up and running state.Note:Thekubectlutility onjump_hosthas been configured to work with the kubernetes cluster.
Step 1: Create the ConfigMap
Create a ConfigMap named my-redis-config with the key redis-config containing maxmemory 2mb.
1
2
kubectl create configmap my-redis-config \
--from-literal=redis-config="maxmemory 2mb"
Verify:
1
kubectl describe configmap my-redis-config
Step 2: Create the Redis Deployment
Create a file named redis-deployment.yaml with the following content:
1
2
3
4
5
6
7
8
9
10
11
12
13
14
15
16
17
18
19
20
21
22
23
24
25
26
27
28
29
30
31
32
33
apiVersion: apps/v1
kind: Deployment
metadata:
name: redis-deployment
spec:
replicas: 1
selector:
matchLabels:
app: redis
template:
metadata:
labels:
app: redis
spec:
containers:
- name: redis-container
image: redis:alpine
ports:
- containerPort: 6379
resources:
requests:
cpu: "1"
volumeMounts:
- name: data
mountPath: /redis-master-data
- name: redis-config
mountPath: /redis-master
volumes:
- name: data
emptyDir: {}
- name: redis-config
configMap:
name: my-redis-config
Apply the deployment:
1
kubectl apply -f redis-deployment.yaml
Step 3: Verify Deployment Status
Check that the deployment is running:
1
kubectl get deployments
Day 66: Deploy MySQL on Kubernetes
A new MySQL server needs to be deployed on Kubernetes cluster. The Nautilus DevOps team was working on to gather the requirements. Recently they were able to finalize the requirements and shared them with the team members to start working on it. Below you can find the details:
1.) Create a PersistentVolume mysql-pv, its capacity should be 250Mi, set other parameters as per your preference.
2.) Create a PersistentVolumeClaim to request this PersistentVolume storage. Name it as mysql-pv-claim and request a 250Mi of storage. Set other parameters as per your preference.
3.) Create a deployment named mysql-deployment, use any mysql image as per your preference. Mount the PersistentVolume at mount path /var/lib/mysql.
4.) Create a NodePort type service named mysql and set nodePort to 30007.
5.) Create a secret named mysql-root-pass having a key pair value, where key is password and its value is YUIidhb667, create another secret named mysql-user-pass having some key pair values, where frist key is username and its value is kodekloud_cap, second key is password and value is dCV3szSGNA, create one more secret named mysql-db-url, key name is database and value is kodekloud_db5
6.) Define some Environment variables within the container:
a) name: MYSQL_ROOT_PASSWORD, should pick value from secretKeyRef name: mysql-root-pass and key: password
b) name: MYSQL_DATABASE, should pick value from secretKeyRef name: mysql-db-url and key: database
c) name: MYSQL_USER, should pick value from secretKeyRef name: mysql-user-pass key key: username
d) name: MYSQL_PASSWORD, should pick value from secretKeyRef name: mysql-user-pass and key: password
Note: The kubectl utility on jump_host has been configured to work with the kubernetes cluster.
Step 1: Create the PersistentVolume
Create a PersistentVolume named mysql-pv with 250Mi capacity using hostPath.
Create a file named mysql-pv.yaml:
1
2
3
4
5
6
7
8
9
10
11
12
apiVersion: v1
kind: PersistentVolume
metadata:
name: mysql-pv
spec:
capacity:
storage: 250Mi
accessModes:
- ReadWriteOnce
storageClassName: manual
hostPath:
path: /var/lib/mysql
Apply the PersistentVolume:
1
kubectl apply -f mysql-pv.yaml
Verify:
1
kubectl get pv mysql-pv
Step 2: Create the PersistentVolumeClaim
Create a PersistentVolumeClaim named mysql-pv-claim requesting 250Mi of storage.
Create a file named mysql-pv-claim.yaml:
1
2
3
4
5
6
7
8
9
10
11
apiVersion: v1
kind: PersistentVolumeClaim
metadata:
name: mysql-pv-claim
spec:
accessModes:
- ReadWriteOnce
storageClassName: manual
resources:
requests:
storage: 250Mi
Apply the PVC:
1
kubectl apply -f mysql-pv-claim.yaml
Verify:
1
kubectl get pvc mysql-pv-claim
Step 3: Create Secrets for MySQL Credentials
Create mysql-root-pass Secret
1
2
3
4
5
6
7
apiVersion: v1
kind: Secret
metadata:
name: mysql-root-pass
type: Opaque
stringData:
password: YUIidhb667
Create mysql-user-pass Secret
1
2
3
4
5
6
7
8
apiVersion: v1
kind: Secret
metadata:
name: mysql-user-pass
type: Opaque
stringData:
username: kodekloud_cap
password: dCV3szSGNA
Create mysql-db-url Secret
1
2
3
4
5
6
7
apiVersion: v1
kind: Secret
metadata:
name: mysql-db-url
type: Opaque
stringData:
database: kodekloud_db5
Apply all secrets:
1
kubectl apply -f secrets.yaml
Verify:
1
kubectl get secrets
Step 4: Create the MySQL Deployment
Create a deployment named mysql-deployment using the MySQL image and mount the PVC at /var/lib/mysql.
Create a file named mysql-deployment.yaml:
1
2
3
4
5
6
7
8
9
10
11
12
13
14
15
16
17
18
19
20
21
22
23
24
25
26
27
28
29
30
31
32
33
34
35
36
37
38
39
40
41
42
43
44
45
46
47
48
apiVersion: apps/v1
kind: Deployment
metadata:
name: mysql-deployment
spec:
replicas: 1
selector:
matchLabels:
db: mysql
template:
metadata:
labels:
db: mysql
spec:
containers:
- name: mysql
image: mysql
imagePullPolicy: IfNotPresent
ports:
- containerPort: 3306
env:
- name: MYSQL_ROOT_PASSWORD
valueFrom:
secretKeyRef:
name: mysql-root-pass
key: password
- name: MYSQL_DATABASE
valueFrom:
secretKeyRef:
name: mysql-db-url
key: database
- name: MYSQL_USER
valueFrom:
secretKeyRef:
name: mysql-user-pass
key: username
- name: MYSQL_PASSWORD
valueFrom:
secretKeyRef:
name: mysql-user-pass
key: password
volumeMounts:
- mountPath: /var/lib/mysql
name: mysql-storage
volumes:
- name: mysql-storage
persistentVolumeClaim:
claimName: mysql-pv-claim
Apply the deployment:
1
kubectl apply -f mysql-deployment.yaml
Verify deployment and pod:
1
2
kubectl get deployments
kubectl get pods
Step 5: Create NodePort Service
Expose MySQL using a NodePort service named mysql on port 30007.
Create a file named mysql-service.yaml:
1
2
3
4
5
6
7
8
9
10
11
12
apiVersion: v1
kind: Service
metadata:
name: mysql
spec:
type: NodePort
selector:
db: mysql
ports:
- port: 3306
targetPort: 3306
nodePort: 30007
Apply the service:
1
kubectl apply -f mysql-service.yaml
Verify:
1
kubectl get svc mysql
Step 6: Verify All Resources
Check the overall status of all resources:
1
kubectl get all
Day 67: Deploy Guest Book App on Kubernetes
The Nautilus Application development team has finished development of one of the applications and it is ready for deployment. It is a guestbook application that will be used to manage entries for guests/visitors. As per discussion with the DevOps team, they have finalized the infrastructure that will be deployed on Kubernetes cluster. Below you can find more details about it.
BACK-END TIER
Create a deployment named
redis-masterfor Redis master. a.) Replicas count should be1. b.) Container name should bemaster-redis-devopsand it should use imageredis. c.) Request resources asCPUshould be100mandMemoryshould be100Mi. d.) Container port should be redis default port i.e6379.- Create a service named
redis-masterfor Redis master. Port and targetPort should be Redis default port i.e6379. - Create another deployment named
redis-slavefor Redis slave. a.) Replicas count should be2. b.) Container name should beslave-redis-devopsand it should usegcr.io/google_samples/gb-redisslave:v3image. c.) Requests resources asCPUshould be100mandMemoryshould be100Mi. d.) Define an environment variable namedGET_HOSTS_FROMand its value should bedns. e.) Container port should be Redis default port i.e6379. - Create another service named
redis-slave. It should use Redis default port i.e6379.
FRONT END TIER
- Create a deployment named
frontend. a.) Replicas count should be3. b.) Container name should bephp-redis-devopsand it should usegcr.io/google-samples/gb-frontend@sha256:a908df8486ff66f2c4daa0d3d8a2fa09846a1fc8efd65649c0109695c7c5cbffimage. c.) Request resources asCPUshould be100mandMemoryshould be100Mi. d.) Define an environment variable named asGET_HOSTS_FROMand its value should bedns. e.) Container port should be80. - Create a service named
frontend. Itstypeshould beNodePort, port should be80and itsnodePortshould be30009.
Finally, you can check the guestbook app by clicking on App button.
You can use any labels as per your choice. Note: The kubectl utility on jump_host has been configured to work with the kubernetes cluster.
Step 1: Create Redis Master Deployment and Service
Create a Deployment named redis-master with a single replica to act as the Redis master.
Create a file named backend.yaml (Redis master section):
1
2
3
4
5
6
7
8
9
10
11
12
13
14
15
16
17
18
19
20
21
22
23
24
25
26
27
28
29
30
31
32
33
34
35
36
37
apiVersion: apps/v1
kind: Deployment
metadata:
name: redis-master
labels:
app: redis-master
spec:
replicas: 1
selector:
matchLabels:
app: redis-master
template:
metadata:
labels:
app: redis-master
spec:
containers:
- name: master-redis-devops
image: redis
ports:
- containerPort: 6379
resources:
requests:
cpu: 100m
memory: 100Mi
---
apiVersion: v1
kind: Service
metadata:
name: redis-master
spec:
type: ClusterIP
selector:
app: redis-master
ports:
- port: 6379
targetPort: 6379
Apply the configuration:
1
kubectl apply -f backend.yaml
Verify:
1
2
kubectl get deployment redis-master
kubectl get svc redis-master
Step 2: Create Redis Slave Deployment and Service
Create a Deployment named redis-slave with 2 replicas to act as Redis slaves.
Append the following to backend.yaml:
1
2
3
4
5
6
7
8
9
10
11
12
13
14
15
16
17
18
19
20
21
22
23
24
25
26
27
28
29
30
31
32
33
34
35
36
37
38
39
40
apiVersion: apps/v1
kind: Deployment
metadata:
name: redis-slave
labels:
app: redis-slave
spec:
replicas: 2
selector:
matchLabels:
app: redis-slave
template:
metadata:
labels:
app: redis-slave
spec:
containers:
- name: slave-redis-devops
image: gcr.io/google_samples/gb-redisslave:v3
ports:
- containerPort: 6379
env:
- name: GET_HOSTS_FROM
value: dns
resources:
requests:
cpu: 100m
memory: 100Mi
---
apiVersion: v1
kind: Service
metadata:
name: redis-slave
spec:
type: ClusterIP
selector:
app: redis-slave
ports:
- port: 6379
targetPort: 6379
Apply and verify:
1
2
3
kubectl apply -f backend.yaml
kubectl get deployment redis-slave
kubectl get svc redis-slave
Step 3: Create Frontend Deployment
Create a Deployment named frontend with 3 replicas to serve the Guestbook UI.
Create a file named frontend.yaml:
1
2
3
4
5
6
7
8
9
10
11
12
13
14
15
16
17
18
19
20
21
22
23
24
25
26
27
28
apiVersion: apps/v1
kind: Deployment
metadata:
name: frontend
labels:
app: frontend
spec:
replicas: 3
selector:
matchLabels:
app: frontend
template:
metadata:
labels:
app: frontend
spec:
containers:
- name: php-redis-devops
image: gcr.io/google-samples/gb-frontend@sha256:a908df8486ff66f2c4daa0d3d8a2fa09846a1fc8efd65649c0109695c7c5cbff
ports:
- containerPort: 80
env:
- name: GET_HOSTS_FROM
value: dns
resources:
requests:
cpu: 100m
memory: 100Mi
Apply and verify:
1
2
kubectl apply -f frontend.yaml
kubectl get deployment frontend
Step 4: Create Frontend NodePort Service
Expose the frontend using a NodePort Service on port 30009.
Append to frontend.yaml:
1
2
3
4
5
6
7
8
9
10
11
12
apiVersion: v1
kind: Service
metadata:
name: frontend
spec:
type: NodePort
selector:
app: frontend
ports:
- port: 80
targetPort: 80
nodePort: 30009
Apply and verify:
1
2
kubectl apply -f frontend.yaml
kubectl get svc frontend
Step 5: Verify All Resources
Verify that all Pods, Deployments, and Services are running correctly:
1
kubectl get all
Check service endpoints:
1
kubectl get endpoints redis-master redis-slave frontend

Day 68: Set Up Jenkins Server
The DevOps team at xFusionCorp Industries is initiating the setup of CI/CD pipelines and has decided to utilize Jenkins as their server. Execute the task according to the provided requirements:
- Install
Jenkinson the jenkins server using theyumutility only, and start its service.- If you face a timeout issue while starting the Jenkins service, refer to this.
- Jenkin’s admin user name should be
theadmin, password should beAdm!n321, full name should beJavedand email should bejaved@jenkins.stratos.xfusioncorp.com.
Note:
- To access the
jenkinsserver, connect from the jump host using therootuser with the passwordS3curePass - After Jenkins server installation, click the
Jenkinsbutton on the top bar to access the Jenkins UI and follow on-screen instructions to create an admin user.
Step 1: Install Java 11
Install Java 11:
1
yum install java-11-openjdk
Verify Java installation:
1
java -version
Check Java binary location:
1
which java
Step 2: Prepare Jenkins Repository
Install wget to download the Jenkins repository configuration:
1
sudo yum install wget
Add the Jenkins stable repository:
1
wget -O /etc/yum.repos.d/jenkins.repo http://pkg.jenkins-ci.org/redhat-stable/jenkins.repo
Verify repository file:
1
cat /etc/yum.repos.d/jenkins.repo
Import Jenkins GPG key to allow package verification:
1
rpm --import https://pkg.jenkins.io/redhat-stable/jenkins.io-2023.key
Step 3: Install Jenkins Using yum
Install Jenkins from the configured repository:
1
yum -y install jenkins
Verify Jenkins installation:
1
sudo jenkins --version
At this stage, Jenkins is installed but cannot start yet.
Step 4: Attempt to Start Jenkins (Failure with Java 11)
Start the Jenkins service:
1
systemctl start jenkins
Check Jenkins service status:
1
systemctl status jenkins.service
View detailed error logs:
1
journalctl -xeu jenkins.service
Issue Identified
Jenkins fails with the error:
Running with Java 11, which is older than the minimum required version (Java 17)
ReInstall Java: Jenkins version 2.541.x requires Java 17 or newer. Java 11 is no longer supported.
Step 5: Install Java 17 (Required Fix)
To resolve the compatibility issue, Java 17 is installed.
1
yum -y install java-17-openjdk java-17-openjdk-devel
Verify Java version:
1
java -version
Expected output shows Java 17.
Verify Jenkins binary again:
1
jenkins -version
Jenkins now detects a supported Java version
Step 6: Start and Enable Jenkins Successfully
Start Jenkins service again:
1
systemctl start jenkins
Enable Jenkins to start on boot:
1
systemctl enable jenkins
Verify service status:
1
systemctl status jenkins
Jenkins is now active and running
Step 7: Retrieve Initial Admin Password
To unlock Jenkins for first-time setup, retrieve the initial admin password:
1
cat /var/lib/jenkins/secrets/initialAdminPassword
This password is required on the Jenkins web UI Unlock Jenkins screen.
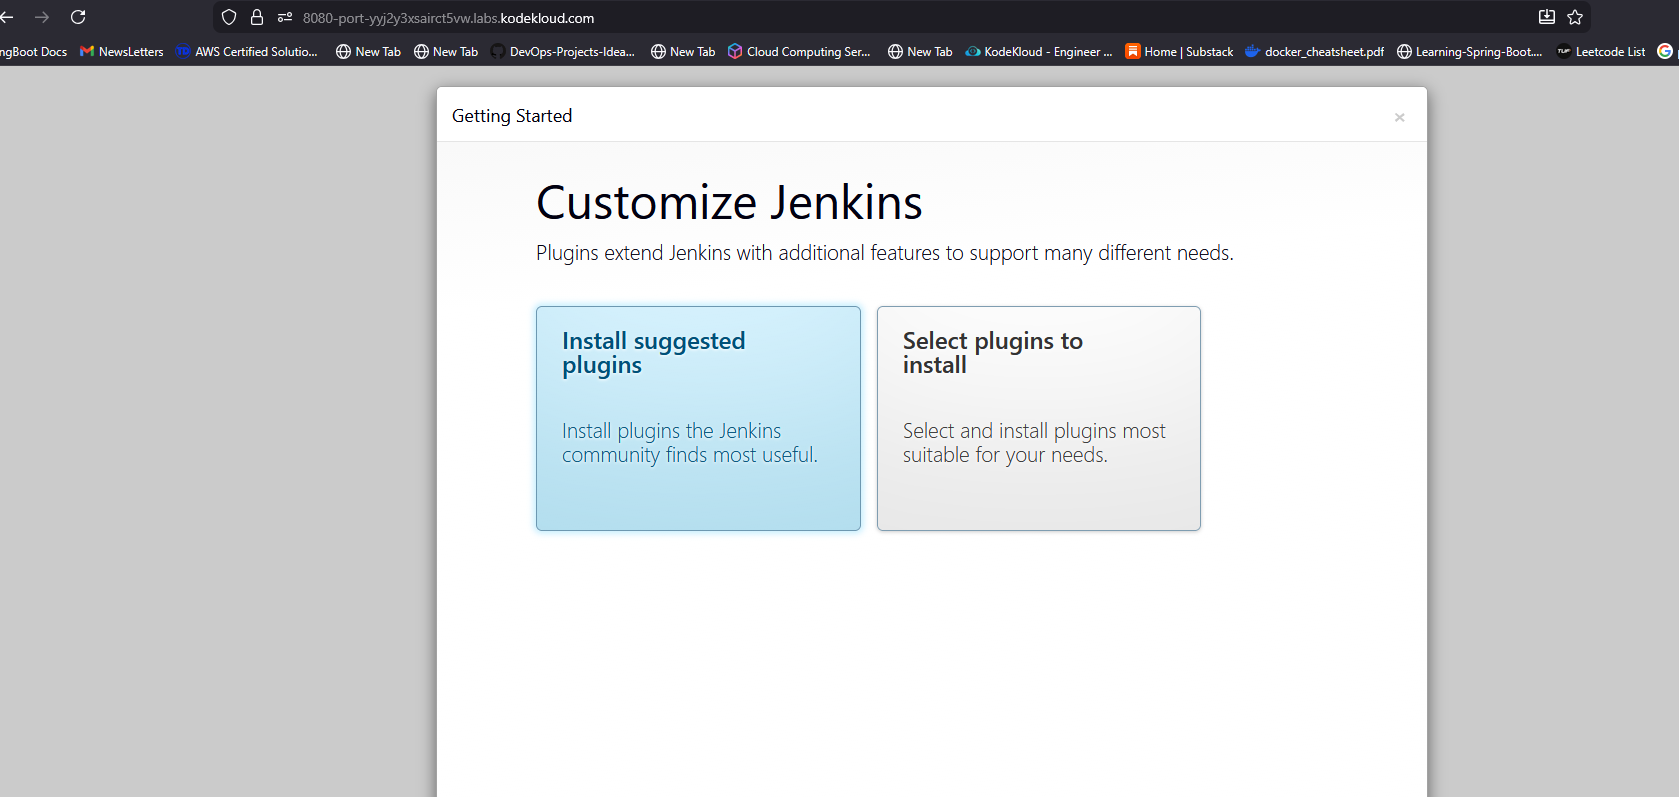
Step 8: Create Jenkins Admin User (UI Step)
After unlocking Jenkins and installing suggested plugins, create the admin user with exact required values:
| Field | Value |
|---|---|
| Username | theadmin |
| Password | Adm!n321 |
| Full Name | Javed |
javed@jenkins.stratos.xfusioncorp.com |
Save and finish setup.
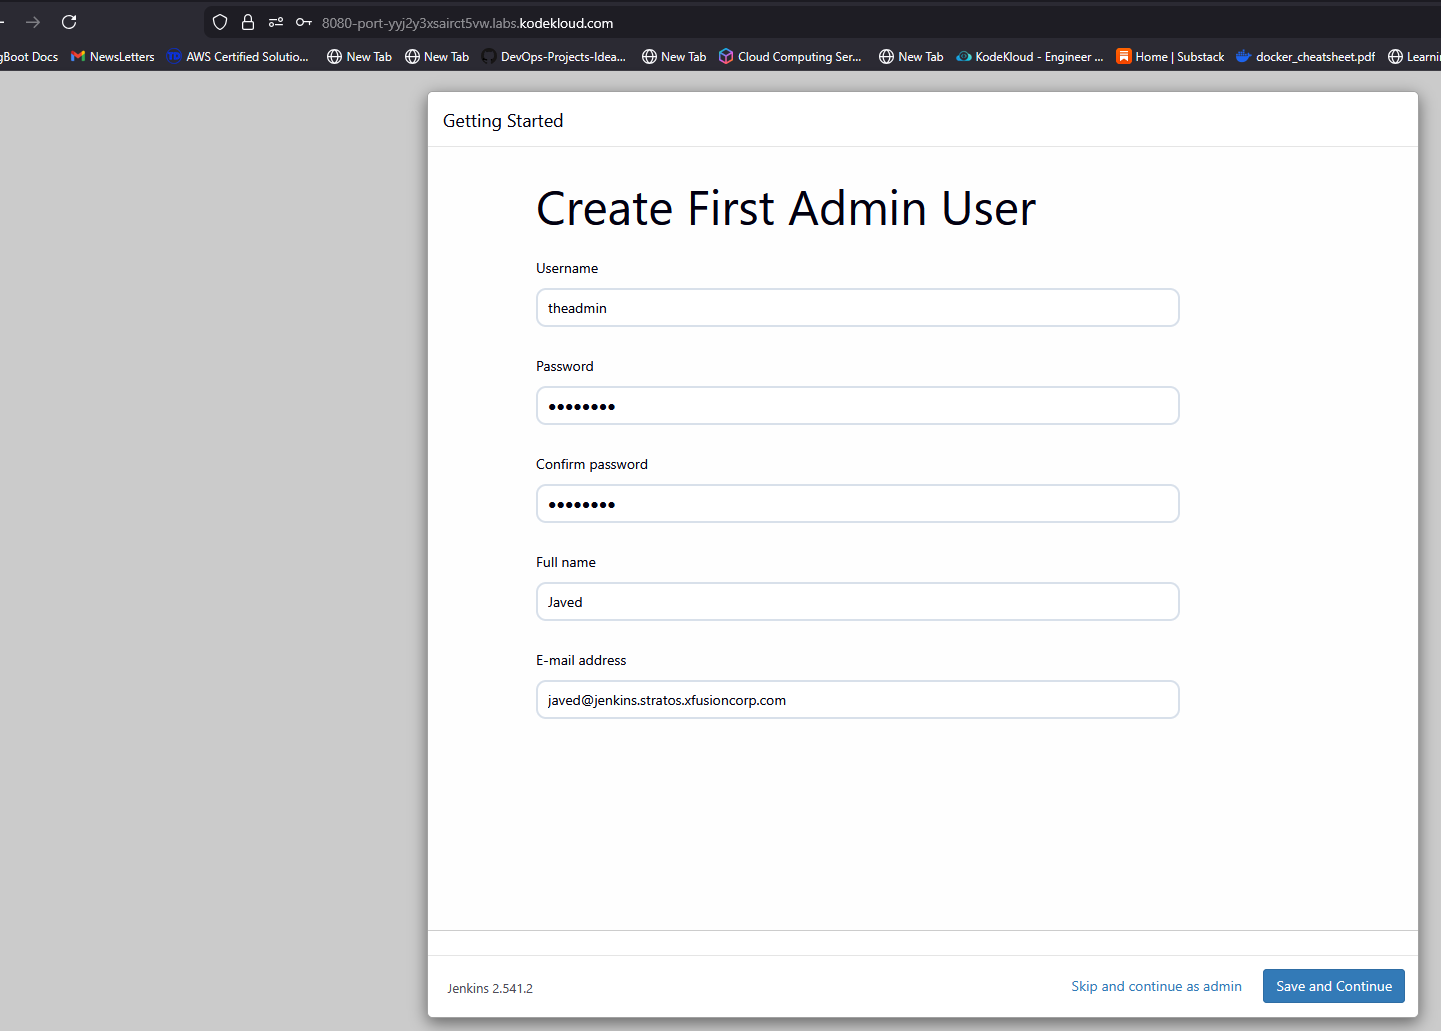
Now you will be redirected to jenkins Dashboard
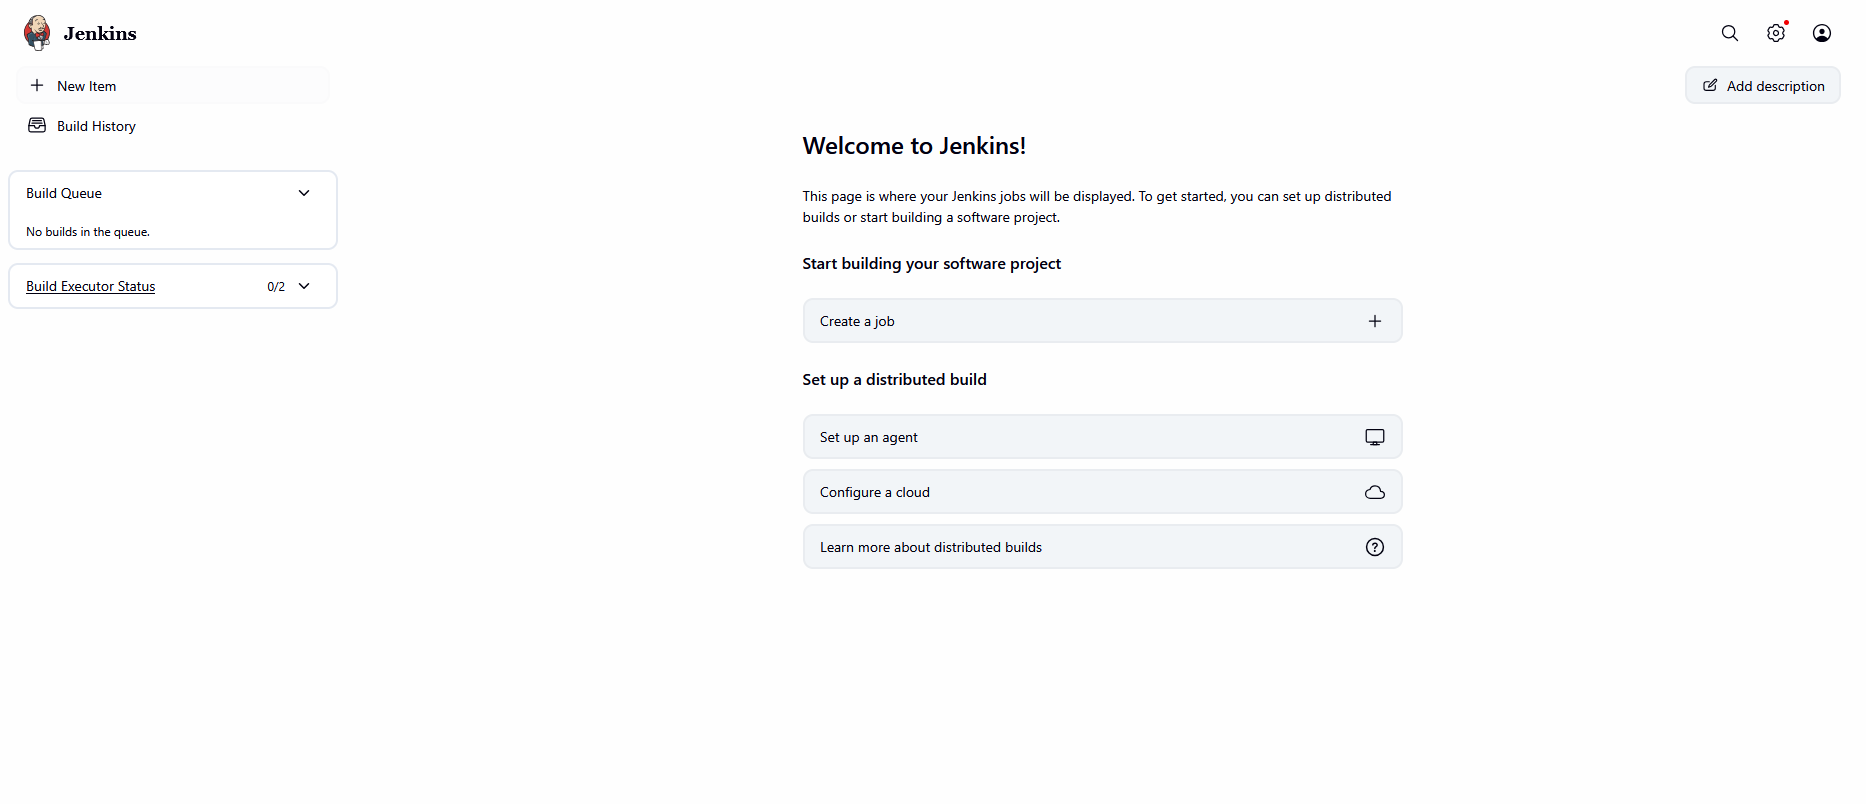
Day 69: Install Jenkins Plugins
The Nautilus DevOps team has recently setup a Jenkins server, which they want to use for some CI/CD jobs. Before that they want to install some plugins which will be used in most of the jobs. Please find below more details about the task
- Click on the Jenkins button on the top bar to access the Jenkins UI. Login using username
adminandAdm!n321password. - Once logged in, install the
GitandGitLabplugins. Note that you may need to restart Jenkins service to complete the plugins installation, If required, opt toRestart Jenkins when installation is complete and no jobs are runningon plugin installation/update page i.eupdate centre.
Note: - After restarting the Jenkins service, wait for the Jenkins login page to reappear before proceeding.
- For tasks involving web UI changes, capture screenshots to share for review or consider using screen recording software like loom.com for documentation and sharing.
Step 1: Access Jenkins UI
- Click the Jenkins button from the top navigation bar.
- The Jenkins login page opens.
Log in using the following credentials:
- Username:
admin - Password:
Adm!n321
- Username:
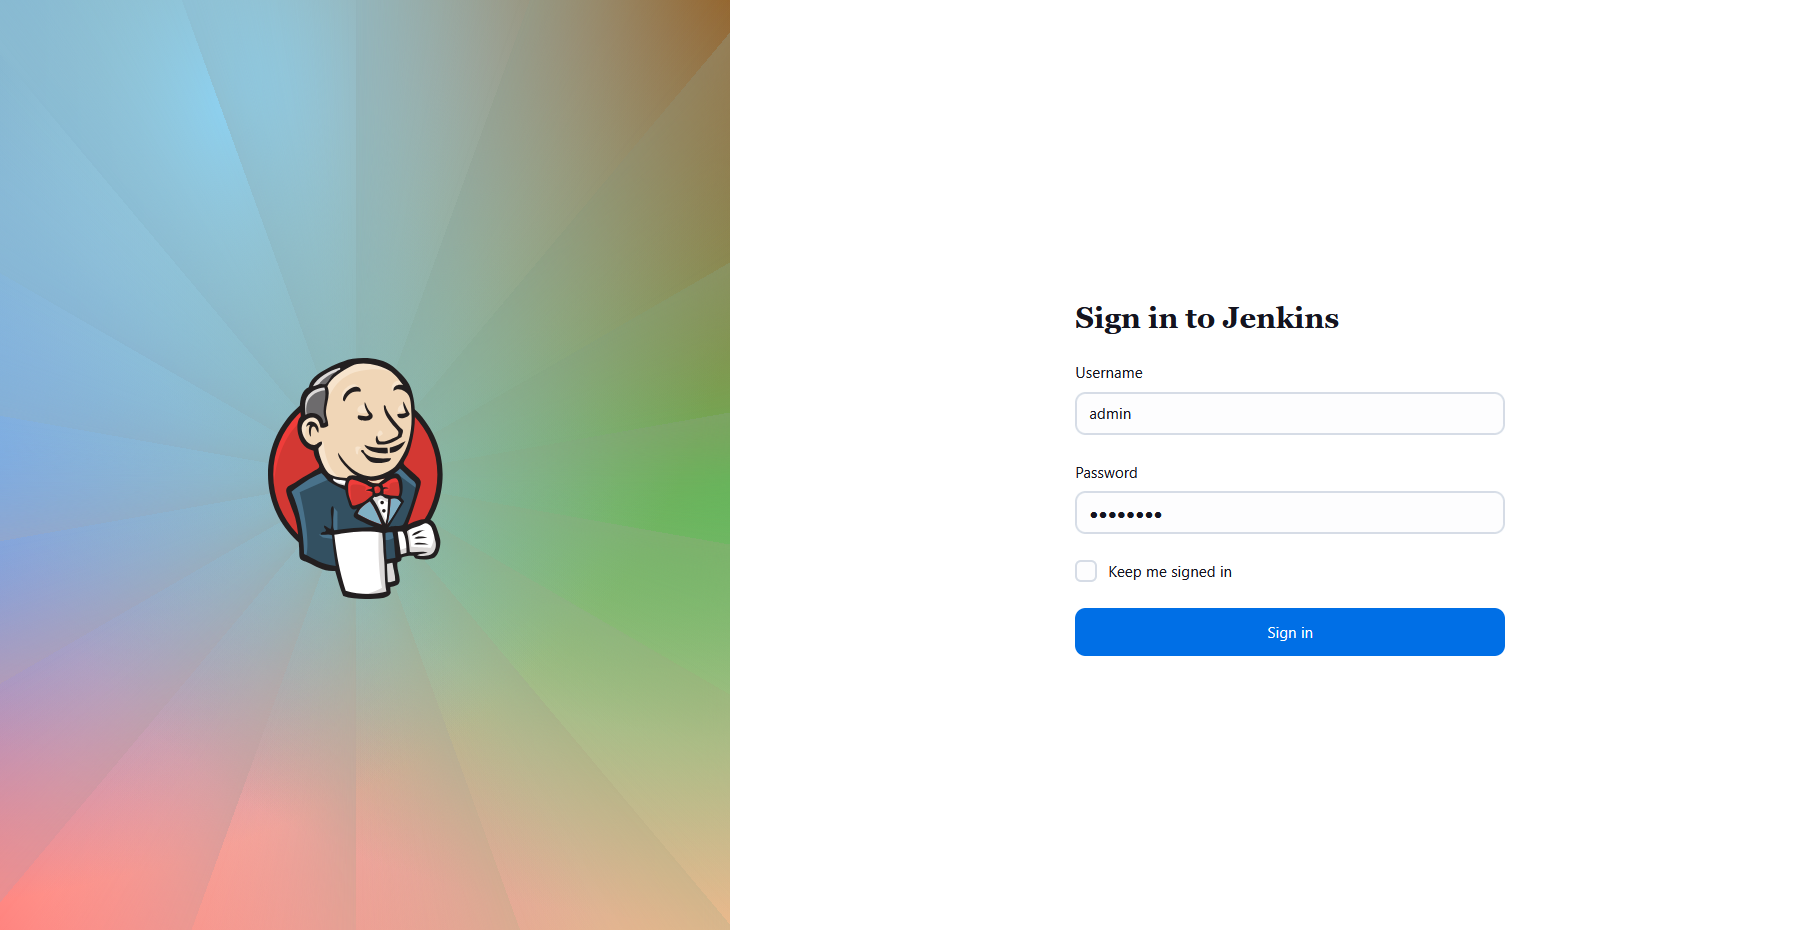
Step 2: Jenkins Dashboard
- After successful login, the Jenkins dashboard is displayed.
- Confirm that the dashboard loads without errors.
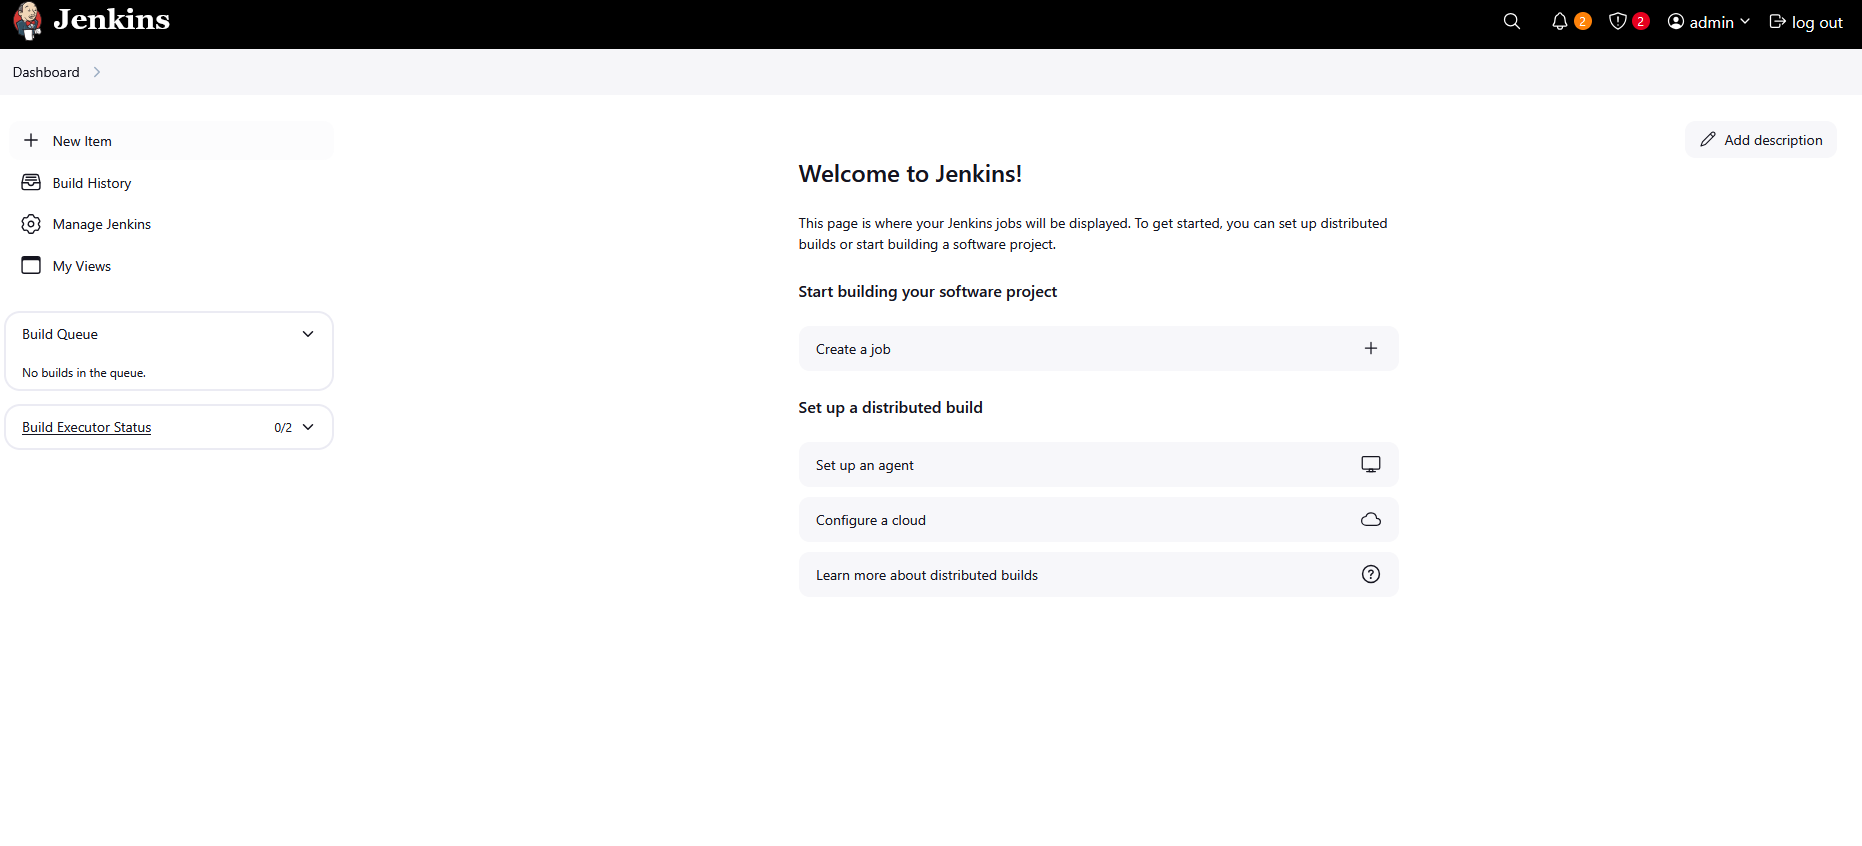
Step 3: Navigate to Manage Jenkins
- From the left-hand menu, click Manage Jenkins.
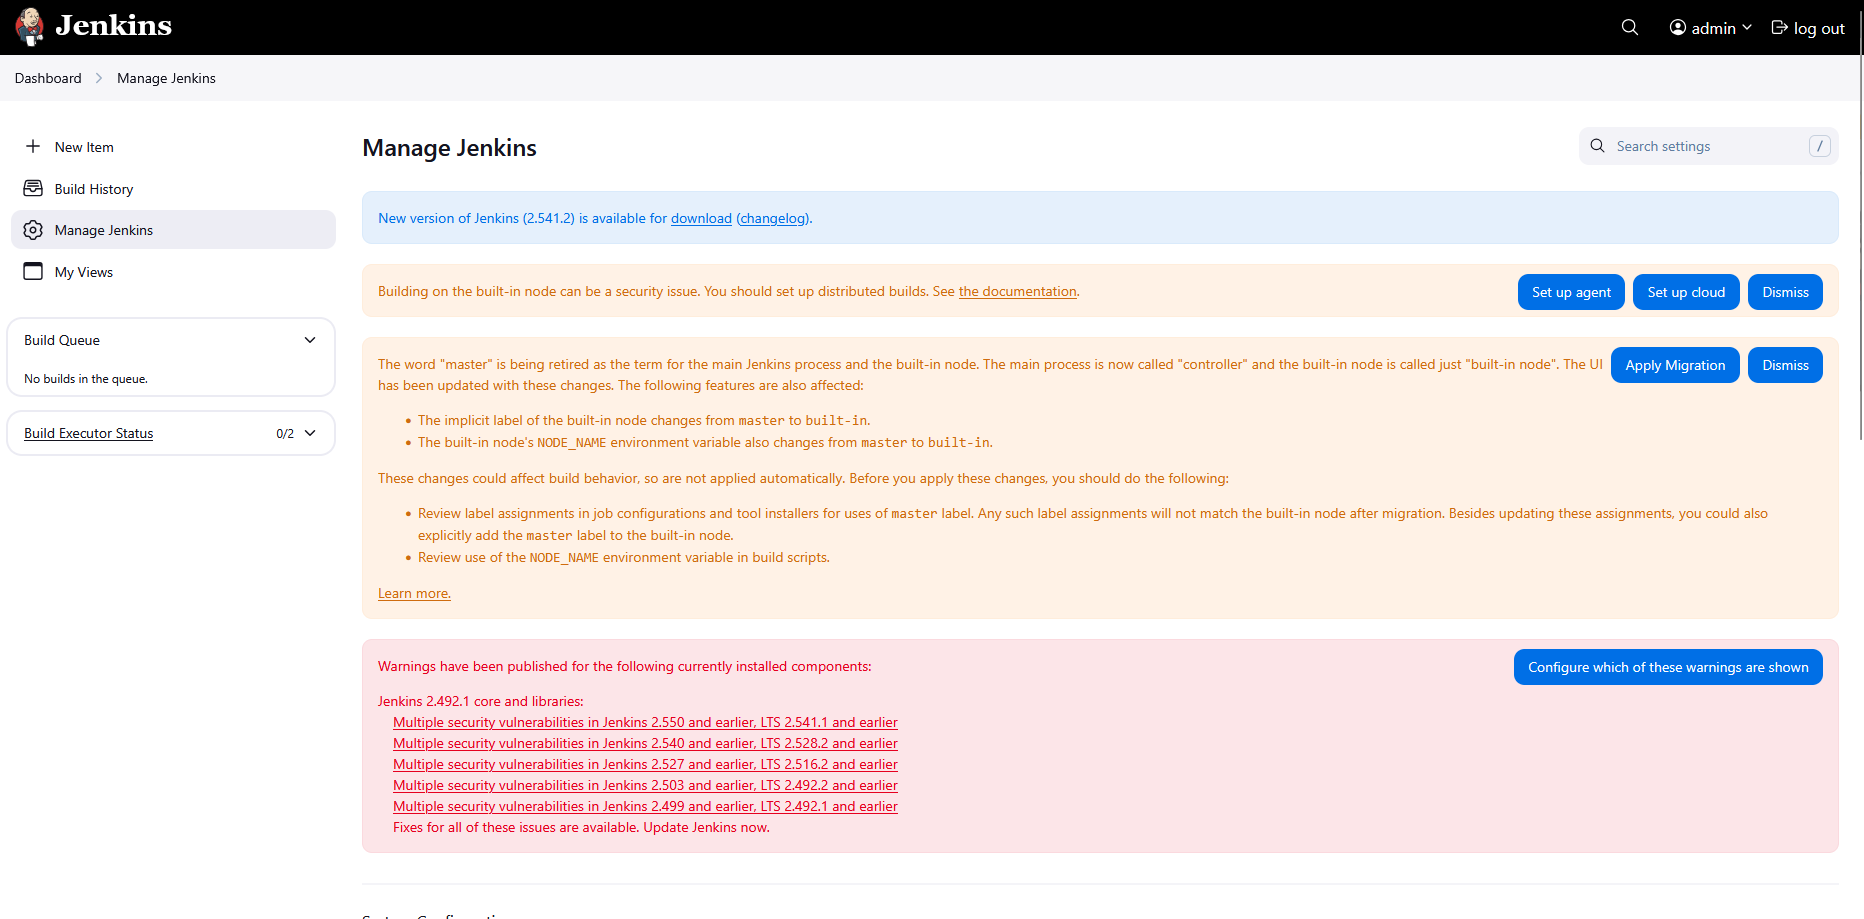
Step 4: Open Plugin Manager
- On the Manage Jenkins page, click Manage Plugins.
Step 5: Open Available Plugins Tab
- Scroll down and find pluggins
- Click the Avialable pluggins button
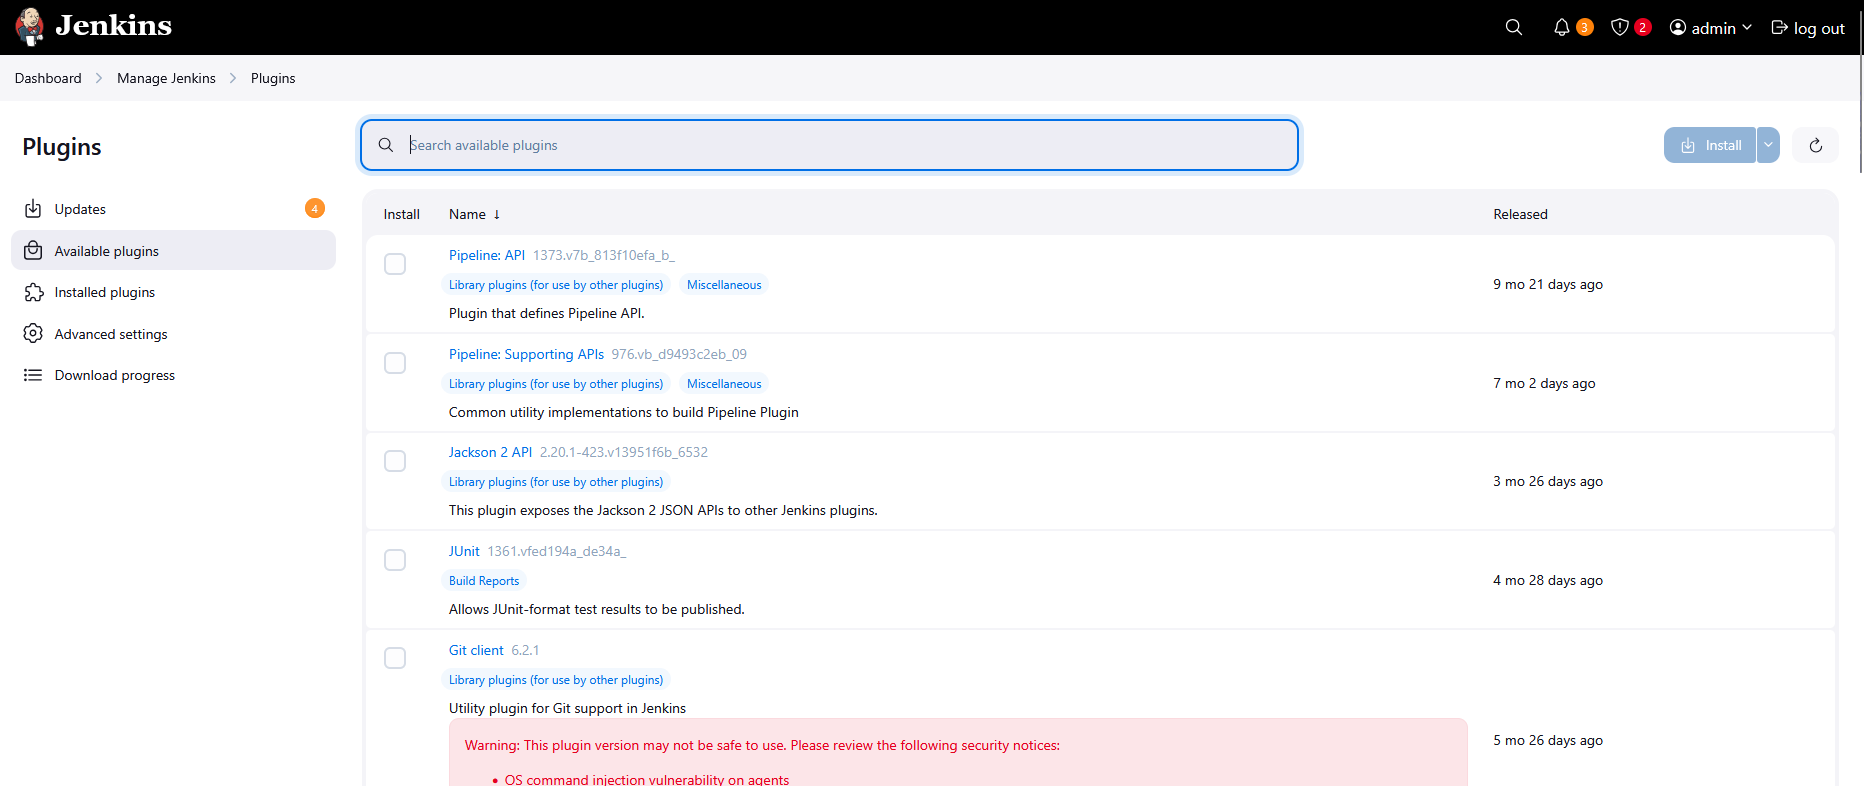
Step 6: Search and Select Git Plugin
- In the search field, type
Git. - Select the checkbox for Git Plugin.
Step 7: Search and Select GitLab Plugin
- Clear the search field and type
GitLab. - Select the checkbox for GitLab Plugin.
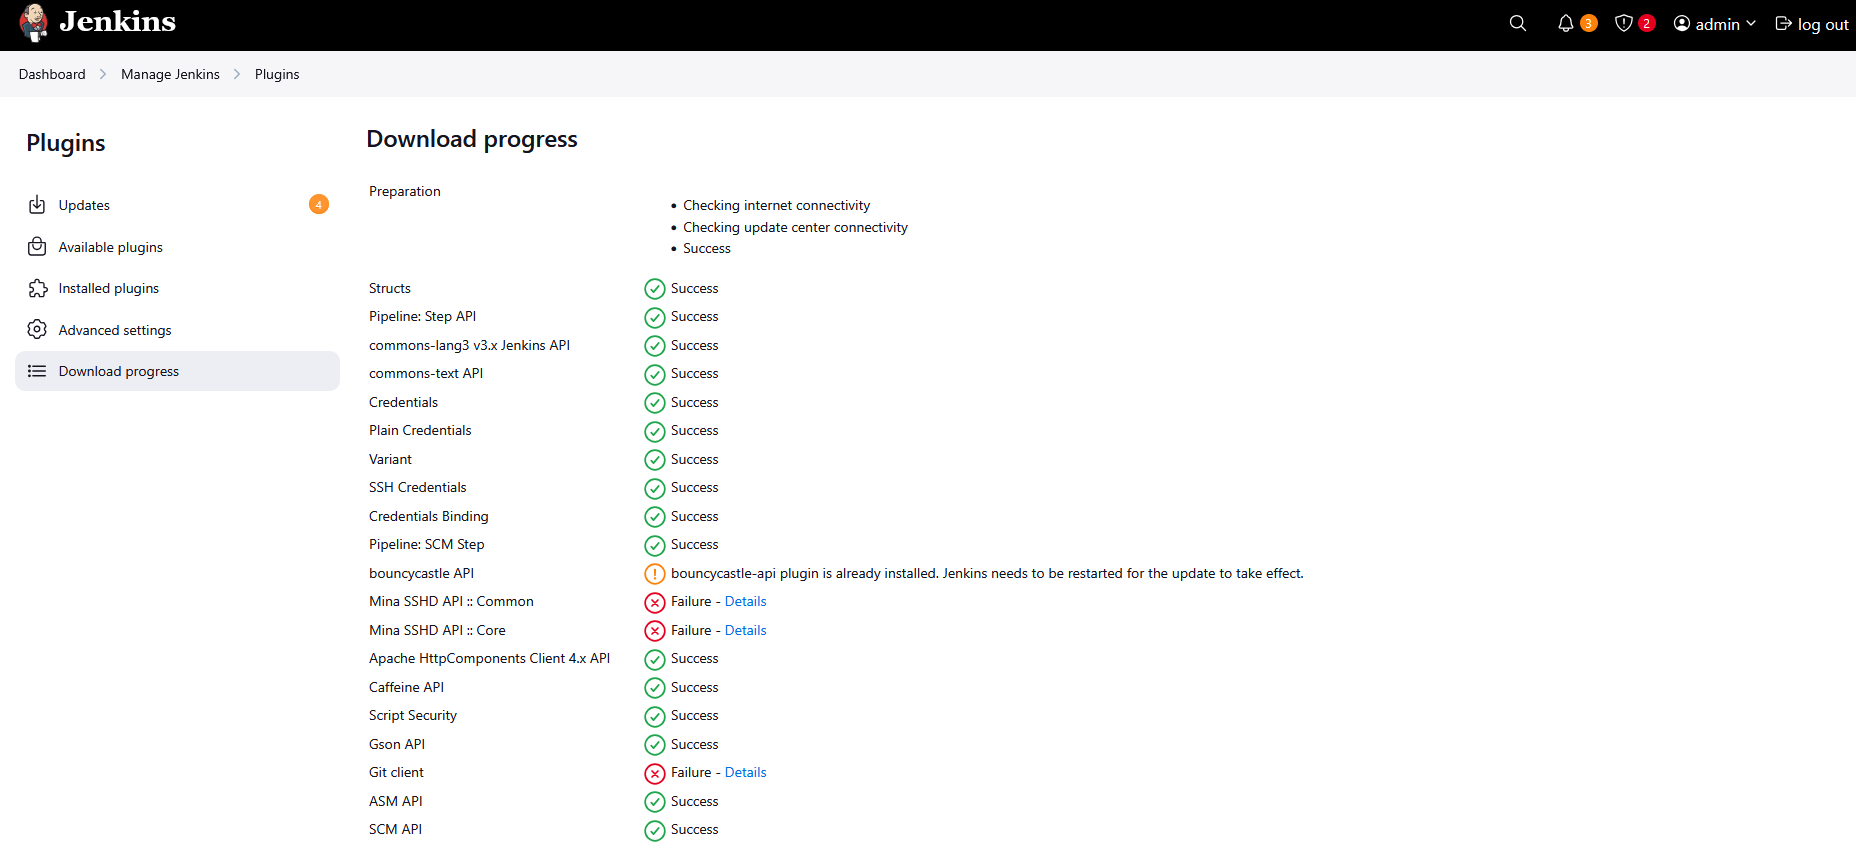
Step 8: Install Plugins
- Click Install without restart or Download now and install after restart.
- If prompted, select Restart Jenkins when installation is complete and no jobs are running.
Step 9: Jenkins Restart
- Jenkins restarts automatically.
- Wait for the Jenkins login page to reappear before proceeding.
Step 10: Verify Plugin Installation
- Log in again using
admin / Adm!n321. - Navigate to Manage Jenkins → Manage Plugins → Installed.
Verify that the following plugins are listed:
- Git Plugin
- GitLab Plugin
Day 70: Configure Jenkins User Access
The Nautilus team is integrating Jenkins into their CI/CD pipelines. After setting up a new Jenkins server, they’re now configuring user access for the development team, Follow these steps:
- Click on the
Jenkinsbutton on the top bar to access the Jenkins UI. Login with usernameadminand passwordAdm!n321 - Create a jenkins user named
kareemwith the passwordRc5C9EyvbU. Their full name should matchKareem. - Utilize the
Project-based Matrix Authorization Strategyto assignoverall readpermission to thekareemuser. - Remove all permissions for
Anonymoususers (if any) ensuring that theadminuser retains overallAdministerpermissions. - For the existing job, grant
kareemuser onlyreadpermissions, disregarding other permissions such as Agent, SCM etc.
Note:
- You may need to install plugins and restart Jenkins service. After plugins installation, select
Restart Jenkins when installation is complete and no jobs are runningon plugin installation/update page. - After restarting the Jenkins service, wait for the Jenkins login page to reappear before proceeding. Avoid clicking
Finishimmediately after restarting the service. - Capture screenshots of your configuration for review purposes. Consider using screen recording software like
loom.comfor documentation and sharing.
Step 1: Login to Jenkins
- Click on the Jenkins button on the top bar.
Login using the following credentials:
- Username:
admin - Password:
Adm!n321
- Username:
Step 2: Create User kareem
- From the dashboard, click Manage Jenkins.
- Click Users.
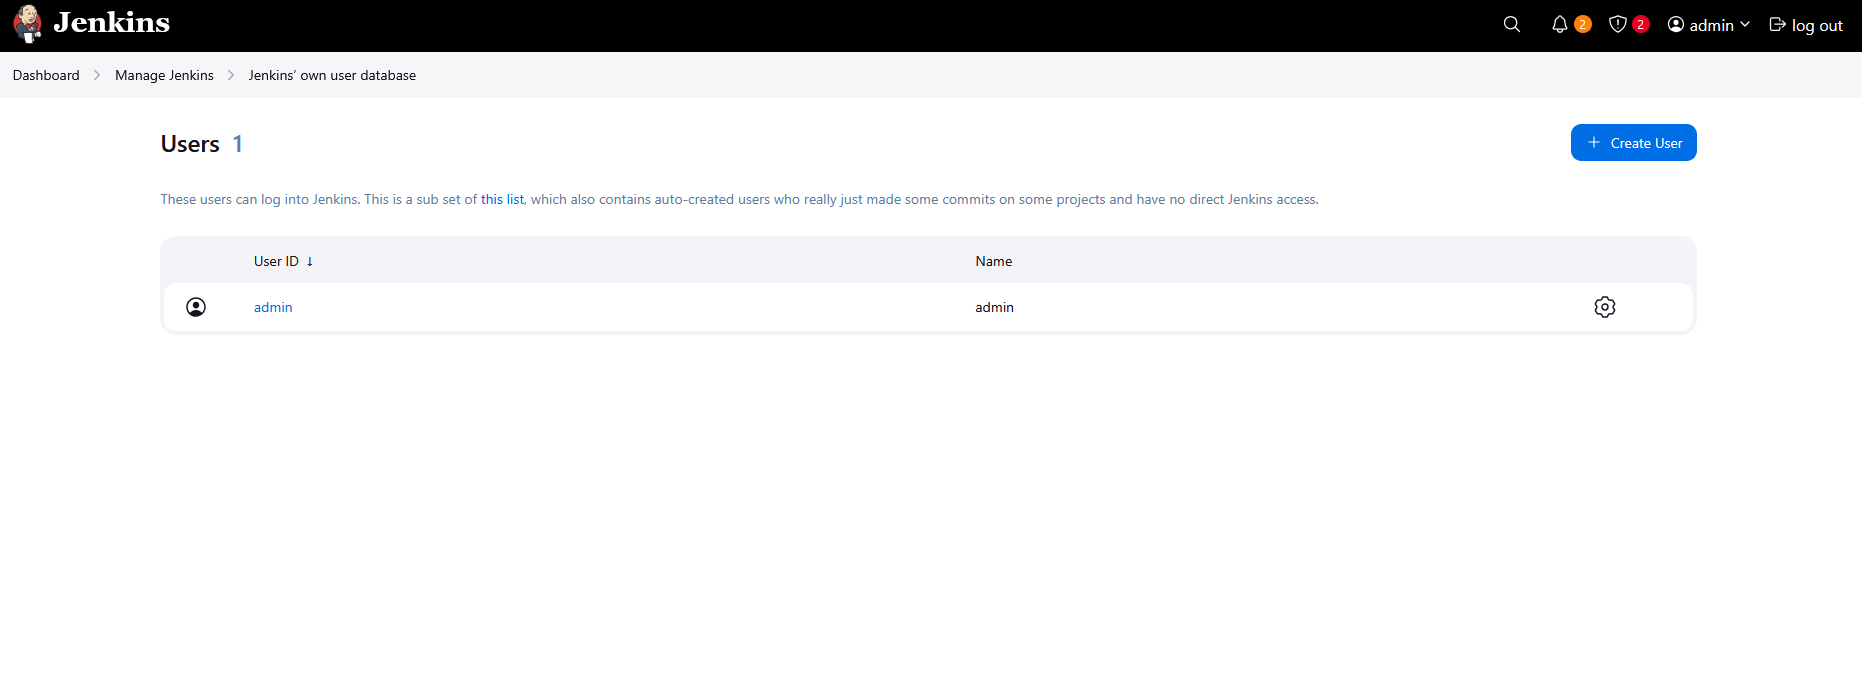
- Click Create User.
Fill in the following details:
- Username:
kareem - Password:
Rc5C9EyvbU - Confirm Password:
Rc5C9EyvbU - Full Name:
Kareem - Email: (optional)
- Username:

- Click Create User.
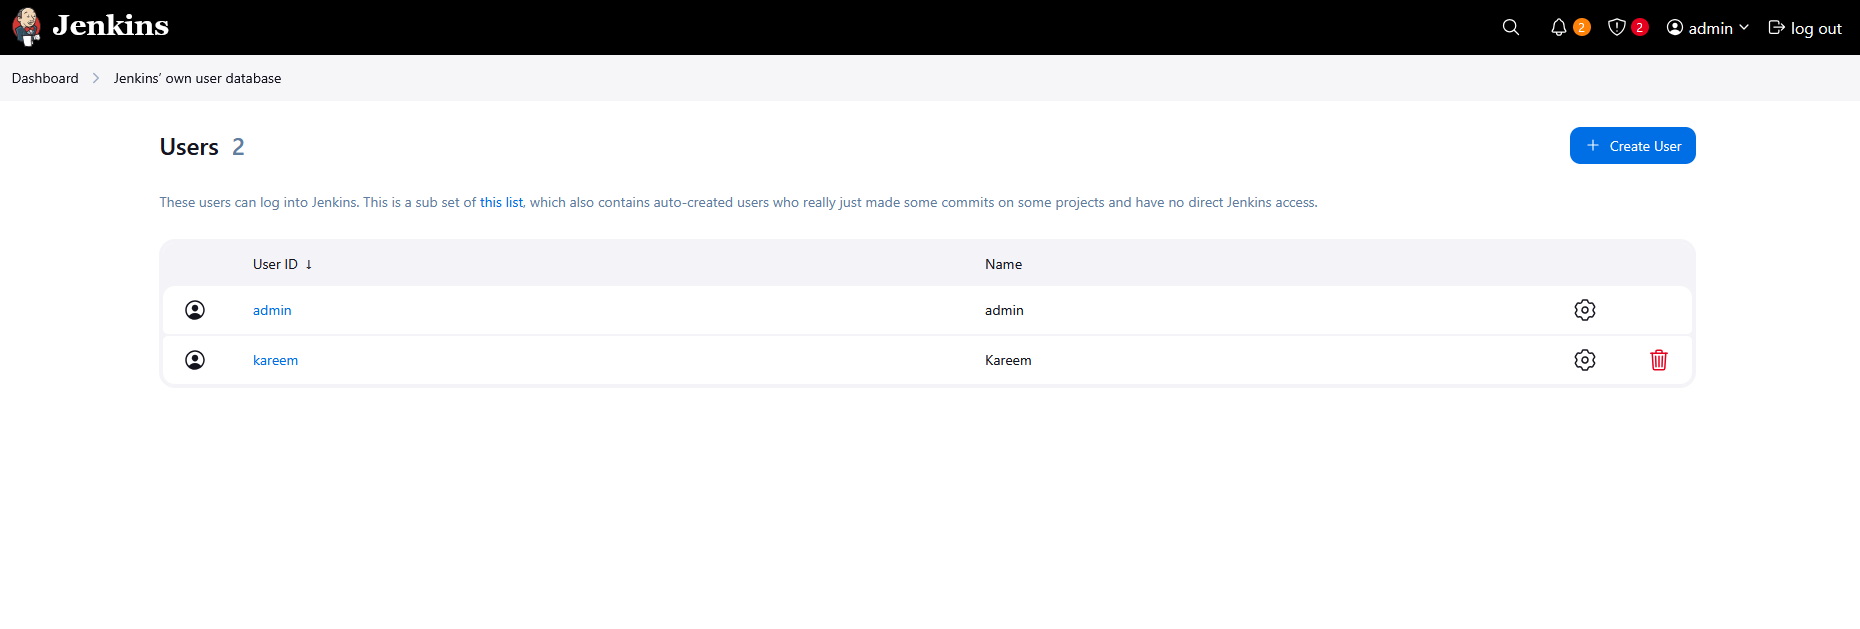
Step 3: Enable Project-based Matrix Authorization Strategy
If the plugin is not installed:
- Go to Manage Jenkins.
- Click Plugins.
- Search for Matrix Authorization Strategy.
- Install the plugin.

- Select Restart Jenkins when installation is complete and no jobs are running.
- Wait for Jenkins to restart fully and return to the login page before proceeding.
Now configure authorization:
- Go to Manage Jenkins.
- Click Security.
- Under Authorization, select Project-based Matrix Authorization Strategy.
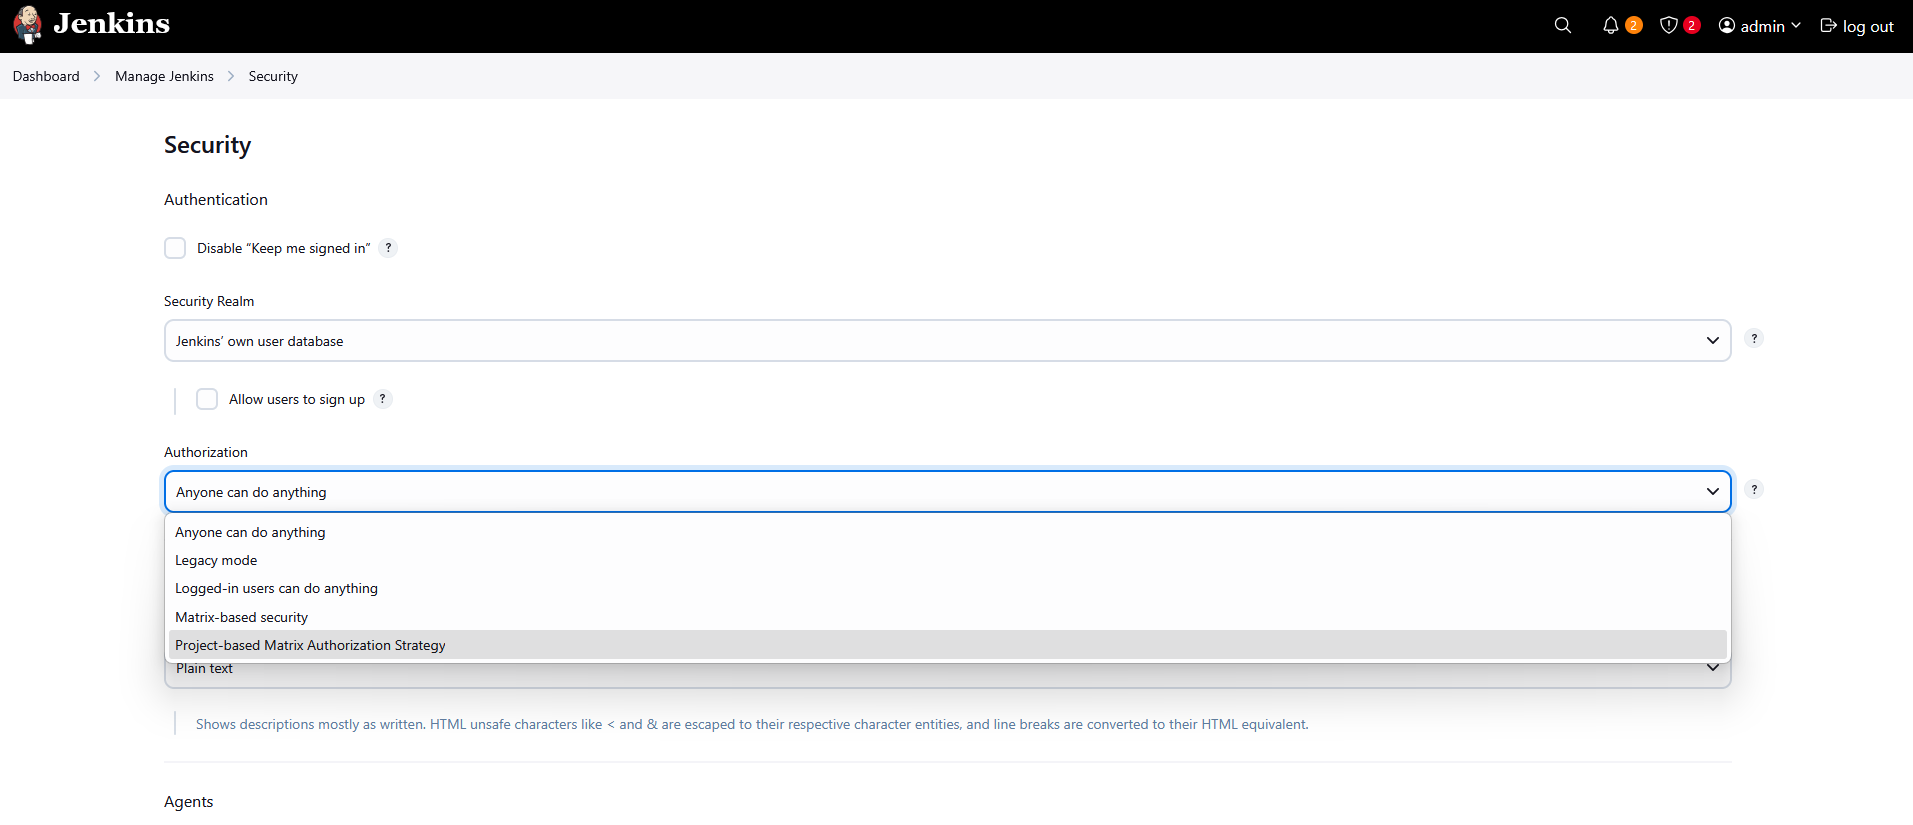
Step 4: Configure Global Permissions
In the permission matrix table, click Add User.
Enter
kareemand add the user.For kareem, check only:
- Read
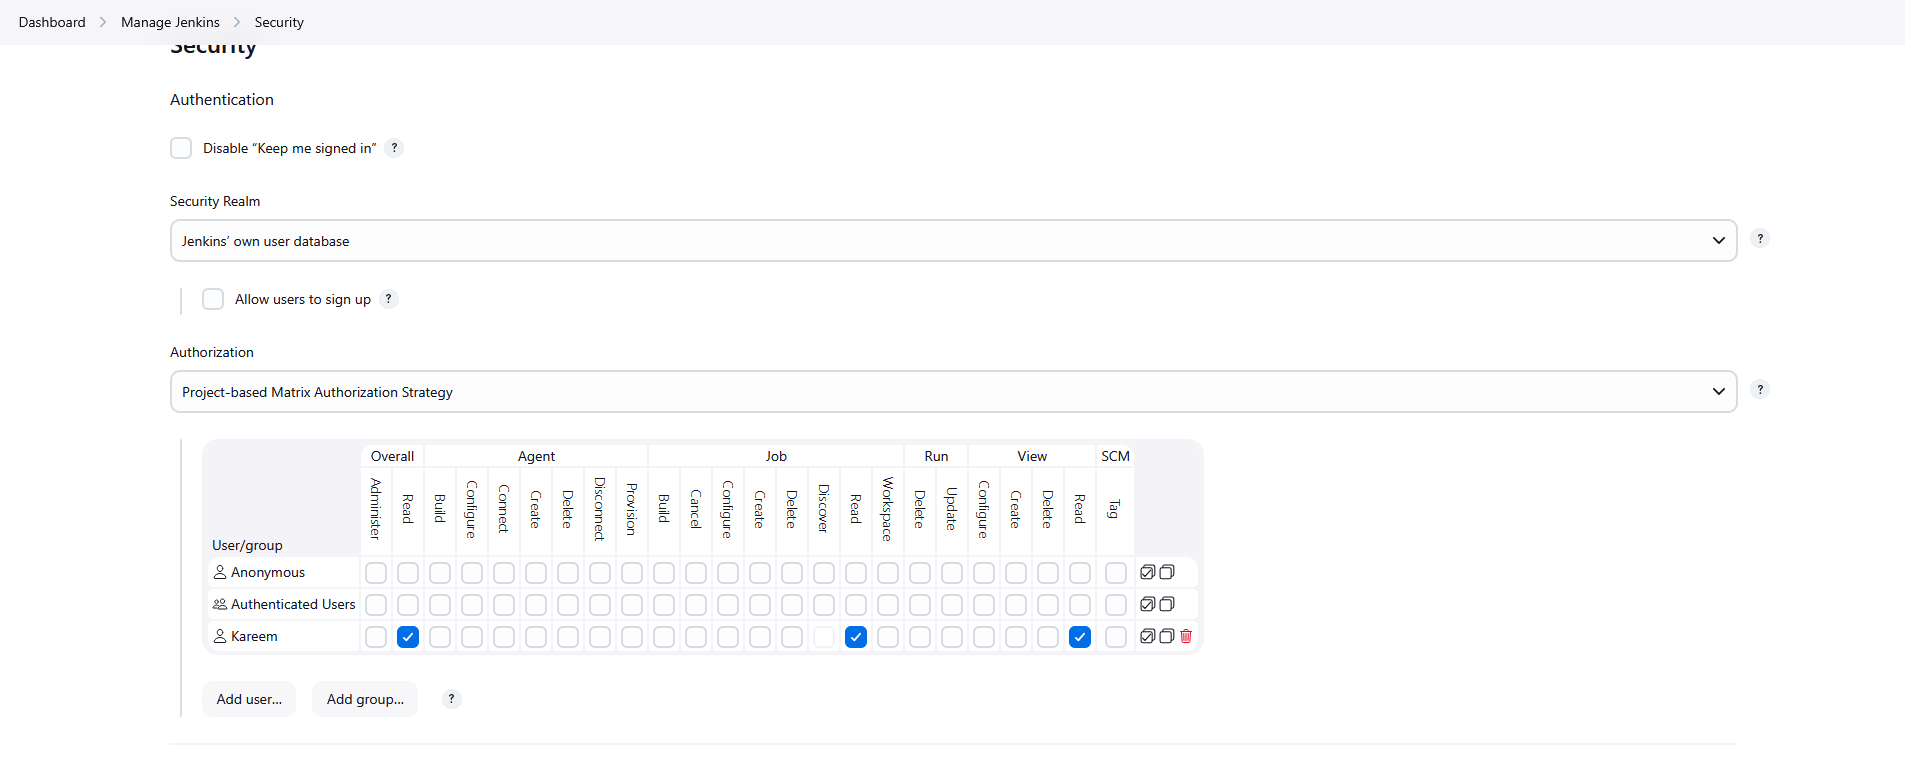
Locate the Anonymous user in the table.
Uncheck all permissions for Anonymous.
Ensure the admin user has:
- Overall → Administer
Click Save.
Step 5: Configure Job-Level Permissions for kareem
- From the dashboard, click the existing job (Helloworld).
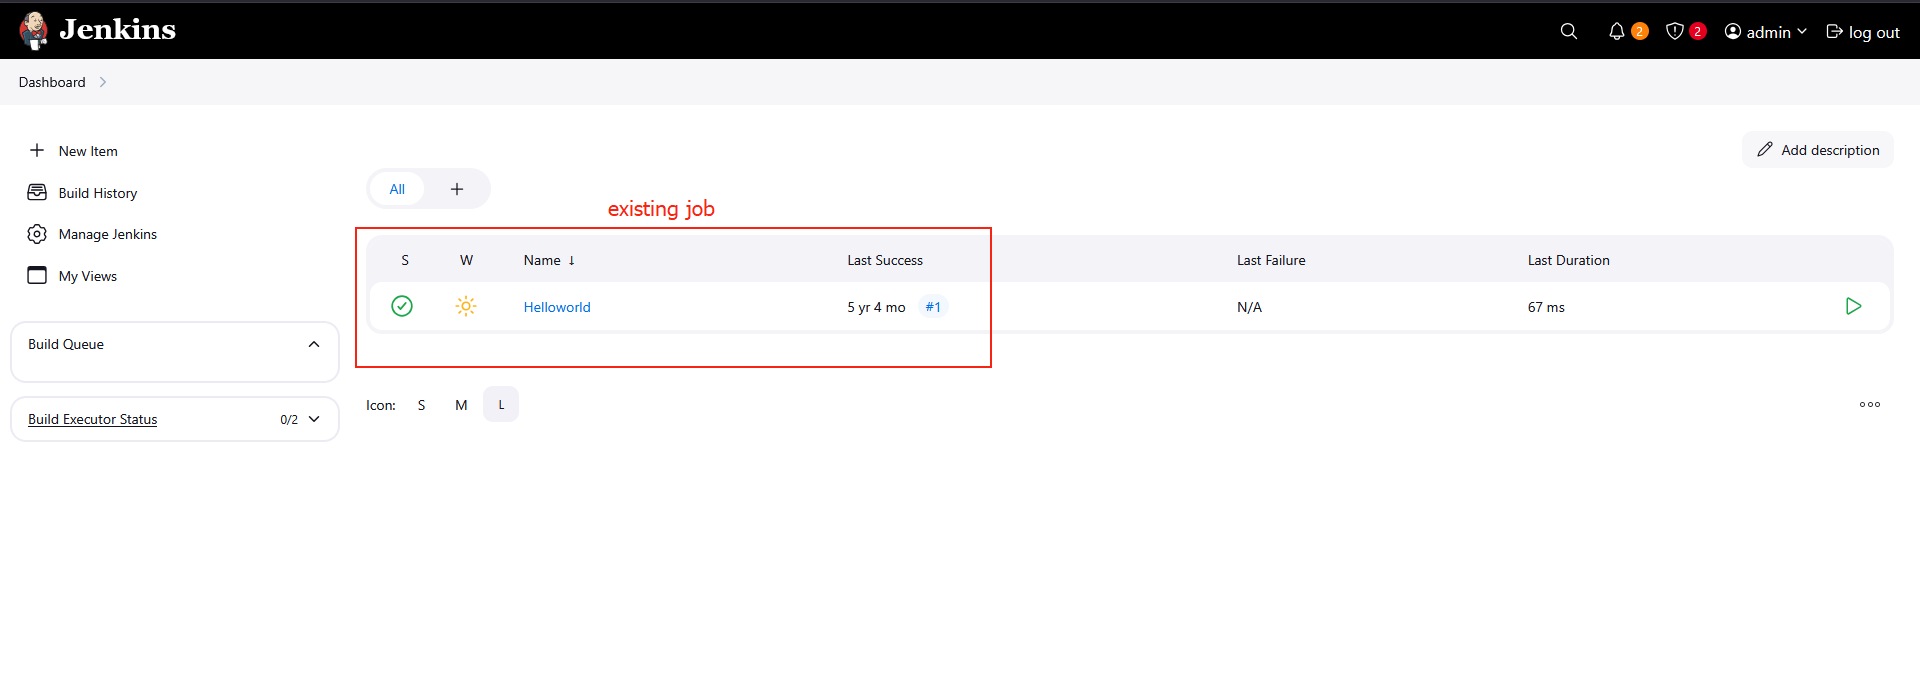
Click Configure from the left sidebar.
Scroll down and check Enable project-based security.
Click Add User and enter
kareem.For kareem, check only:
- Job → Read
Do not enable any other permissions such as:
- Build
- Configure
- Delete
- Workspace
- Agent
- SCM
Click Save.
Day 71: Configure Jenkins Job for Package Installation
Some new requirements have come up to install and configure some packages on the Nautilus infrastructure under Stratos Datacenter. The Nautilus DevOps team installed and configured a new Jenkins server so they wanted to create a Jenkins job to automate this task. Find below more details and complete the task accordingly:
- Access the Jenkins UI by clicking on the
Jenkinsbutton in the top bar. Log in using the credentials: usernameadminand passwordAdm!n321. - Create a new Jenkins job named
install-packagesand configure it with the following specifications:
- Add a string parameter named
PACKAGE. - Configure the job to install a package specified in the
$PACKAGEparameter on thestorage serverwithin theStratos Datacenter.
Note:
- Ensure to install any required plugins and restart the Jenkins service if necessary. Opt for
Restart Jenkins when installation is complete and no jobs are runningon the plugin installation/update page. Refresh the UI page if needed after restarting the service. - Verify that the Jenkins job runs successfully on repeated executions to ensure reliability.
- Capture screenshots of your configuration for documentation and review purposes. Alternatively, use screen recording software like
loom.comfor comprehensive documentation and sharing.
Step 1: Verify Package Status on the Storage Server
Before creating the Jenkins job, first verify whether the package you want to install already exists on the storage server.
- SSH into the storage server using the provided credentials.
1
ssh natasha@172.16.238.15
- Enter the password when prompted:
1
Bl@kW
- Check if the package (example:
nano) is installed.
1
nano
If the package is not installed, you will see an output similar to:
1
package nano is not installed
This confirms the Jenkins job will install it successfully.
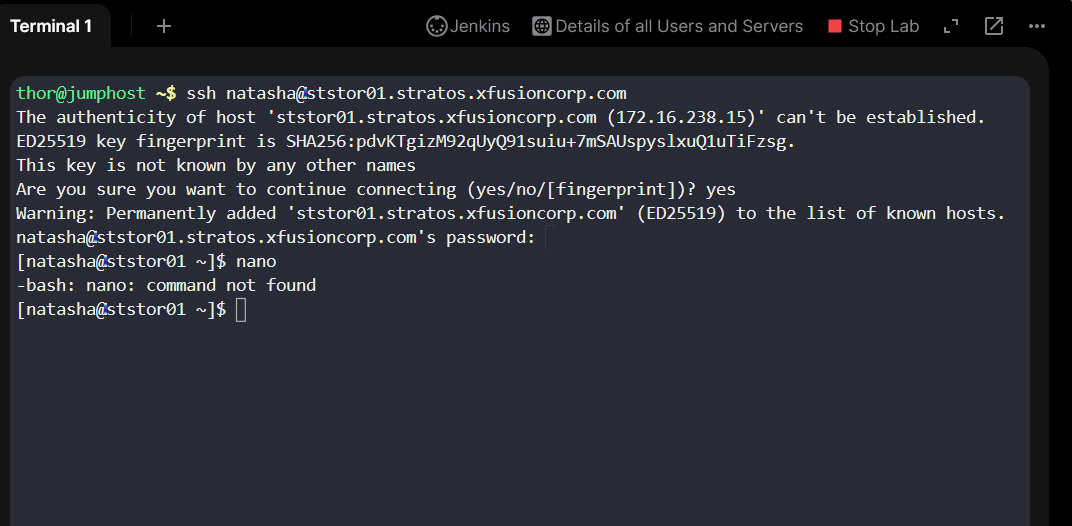
Step 2: Login to Jenkins
- Click on the Jenkins button on the top bar.
- Login using the following credentials:
- Username:
admin - Password:
Adm!n321
Step 3: Install SSH Plugin
To allow Jenkins to execute commands on remote servers, install the SSH plugin.
- From the Jenkins dashboard, click Manage Jenkins.
- Click Plugins.
- Search for SSH Plugin.
Install the plugin.
- Select Restart Jenkins when installation is complete and no jobs are running.

Step 4: Add Natasha Credentials
- Go to Manage Jenkins.
- Click Credentials.
- Select Global credentials domain.
- Click Add Credentials.
- Fill in the following details:
- Kind: Username with password
- Username:
natasha - Password:
Bl@kW
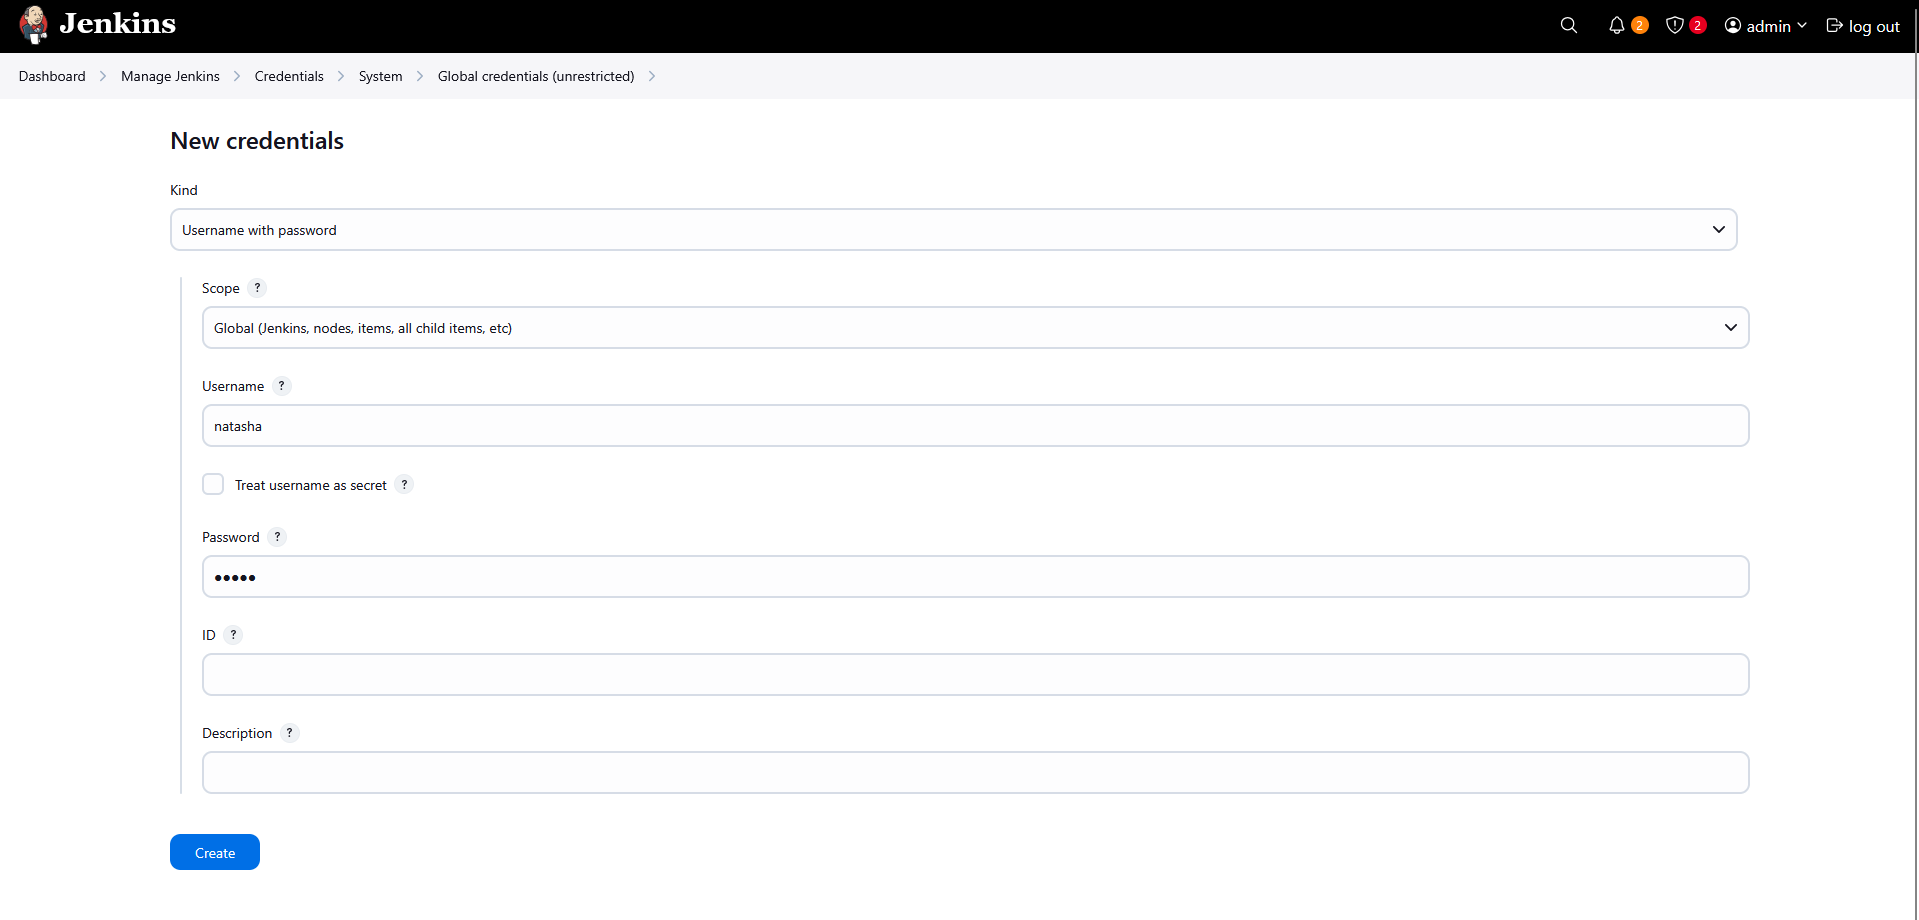
Step 5: Configure SSH Remote Host
- Go to Manage Jenkins.
- Click System.
- Scroll to the Publish over SSH section.
- Click Add under SSH Servers.
Fill in the following details:
- Name:
storage-server - Hostname:
172.16.238.15 - Username:
natasha - Password:
Bl@kW

Click Save.
Step 6: Create a New Job
- From the Jenkins dashboard, click New Item.
- Enter the job name:
1
install-packages
- Select Freestyle Project.
- Click OK.
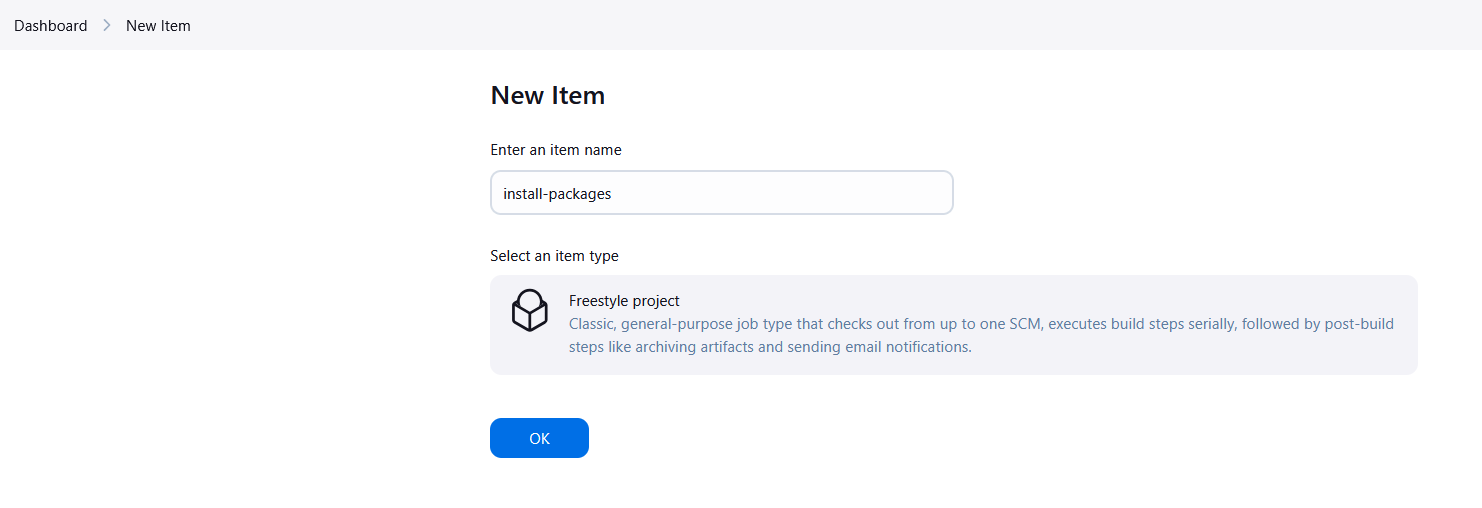
Step 7: Add Parameter for Package Name
- Scroll to This project is parameterized.
- Enable the checkbox.
- Click Add Parameter.
- Select String Parameter.
Configure it as follows:
- Name:
PACKAGE - Default Value: (leave empty)
- Description:
Enter the package name to install
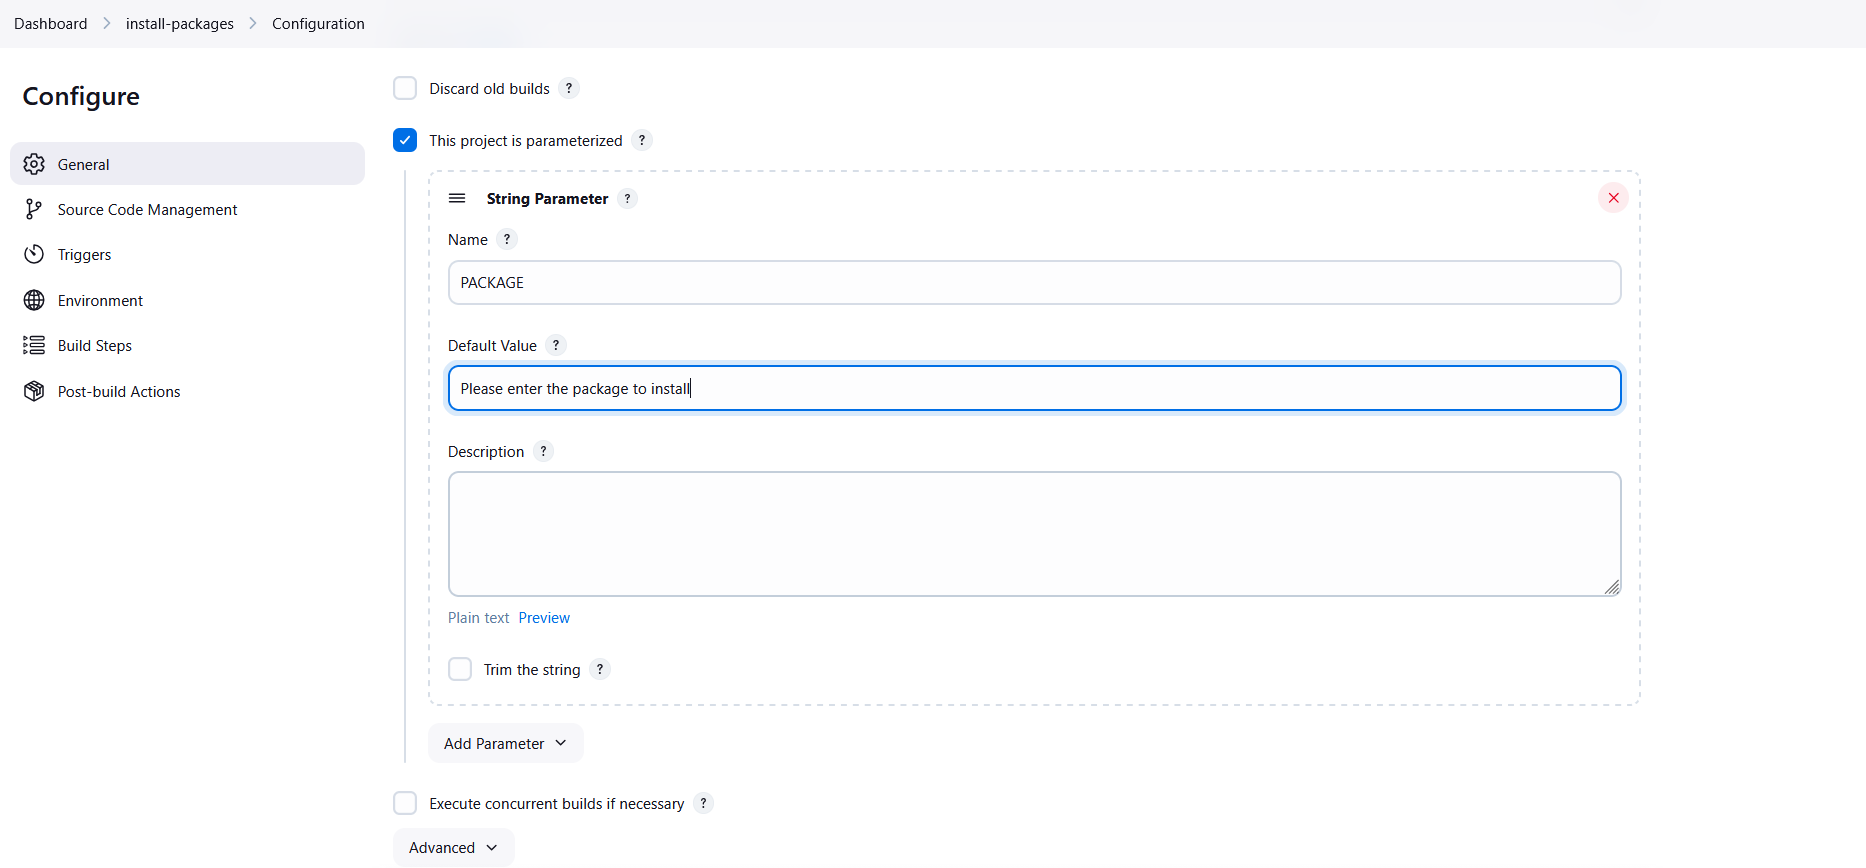
Step 8: Add Remote SSH Command
- Scroll to Build.
- Click Add Build Step.
- Select Send build artifacts over SSH.
Inside the Exec Command section, add the following command:
1
echo 'Bl@kW' | sudo -S yum install -y $PACKAGE
Explanation:
echo 'Bl@kW'→ provides the sudo passwordsudo -S→ allows sudo to read the password from standard inputyum install -y→ installs the package automatically$PACKAGE→ Jenkins parameter passed during job execution
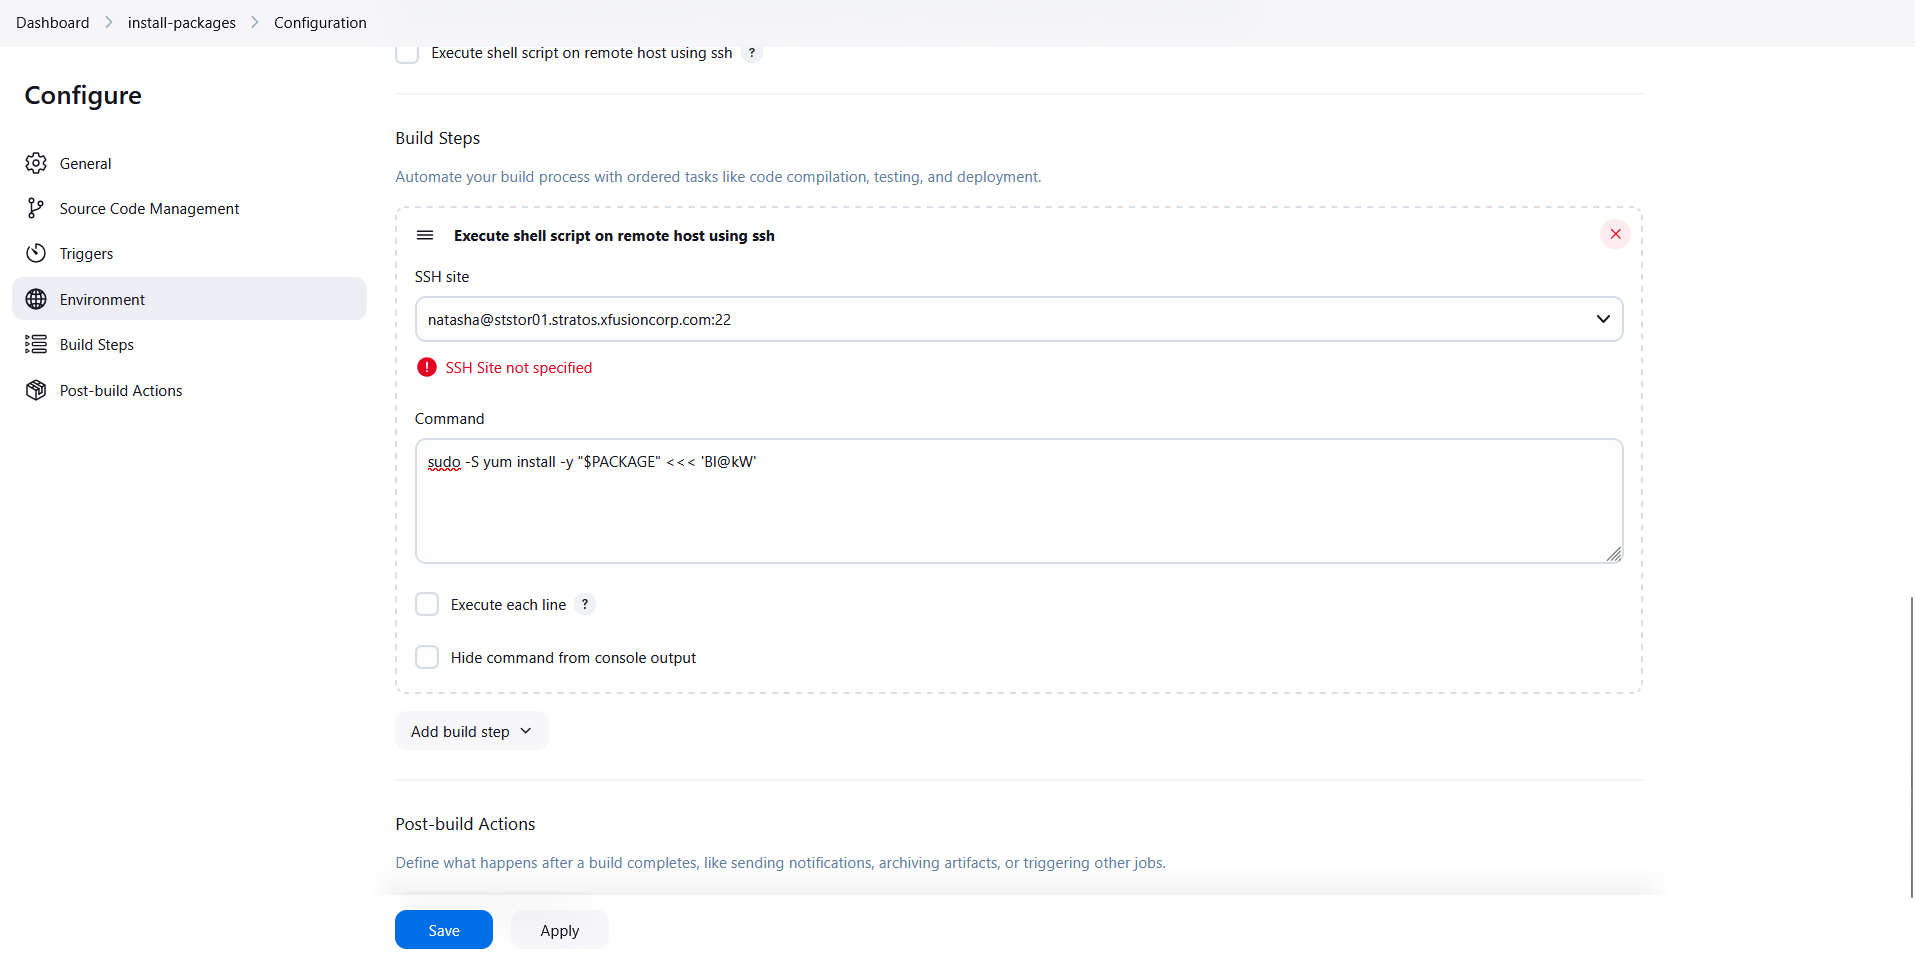
Click Save.
Step 9: Execute Jenkins Job
- Open the install-packages job.
- Click Build with Parameters.
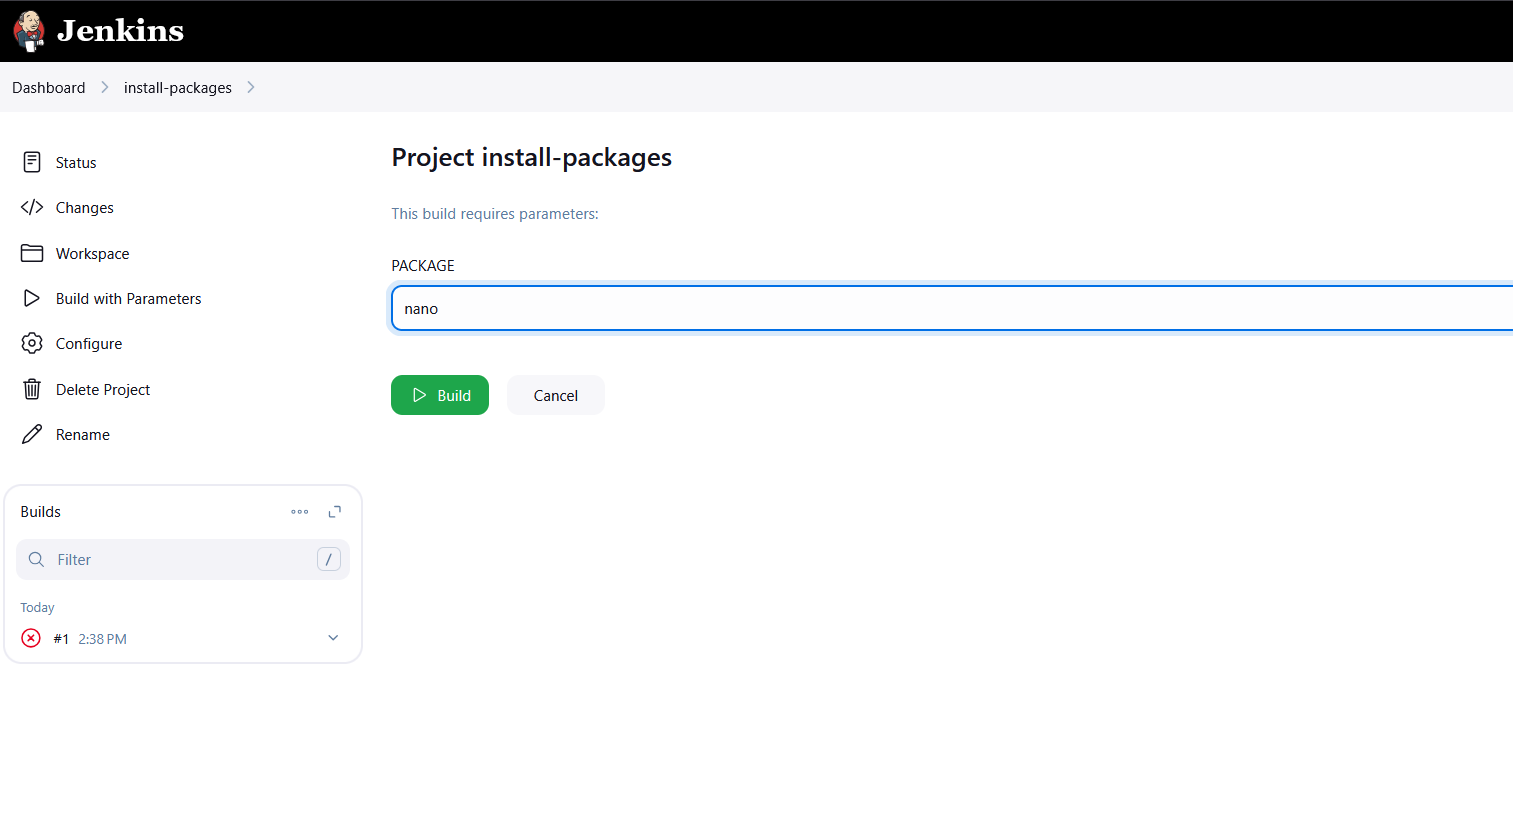
- Enter the package name:
1
nano
- Click Build.
Step 10: Confirm Package Installation
SSH into the storage server again and verify that the package has been installed.
1
ssh natasha@172.16.238.15
Check the package:
1
nano --version
Expected output:
1
nano-x.x.x installed

Day 72: Jenkins Parameterized Builds
A new DevOps Engineer has joined the team and he will be assigned some Jenkins related tasks. Before that, the team wanted to test a simple parameterized job to understand basic functionality of parameterized builds. He is given a simple parameterized job to build in Jenkins. Please find more details below:
Click on the Jenkins button on the top bar to access the Jenkins UI. Login using username admin and password Adm!n321.
- Create a
parameterizedjob which should be named asparameterized-job - Add a
stringparameter namedStage; its default value should beBuild. - Add a
choiceparameter namedenv; its choices should beDevelopment,StagingandProduction. - Configure job to execute a shell command, which should echo both parameter values (you are passing in the job).
- Build the Jenkins job at least once with choice parameter value
Productionto make sure it passes.
Note:
- You might need to install some plugins and restart Jenkins service. So, we recommend clicking on
Restart Jenkins when installation is complete and no jobs are runningon plugin installation/update page i.eupdate centre. Also, Jenkins UI sometimes gets stuck when Jenkins service restarts in the back end. In this case, please make sure to refresh the UI page. - For these kind of scenarios requiring changes to be done in a web UI, please take screenshots so that you can share it with us for review in case your task is marked incomplete. You may also consider using a screen recording software such as loom.com to record and share your work.
Step 1: Login to Jenkins
- Click on the Jenkins button on the top bar.
- Login using the following credentials:
- Username:
admin - Password:
Adm!n321
Step 2: Create a New Jenkins Job
- From the Jenkins dashboard, click New Item.
- Enter the job name:
1
parameterized-job
- Select Freestyle Project.
- Click OK.
Step 3: Enable Parameterized Build
- Inside the job configuration page, scroll to General section.
- Check the option:
1
This project is parameterized
Step 4: Add String Parameter
- Click Add Parameter.
- Select String Parameter.
- Configure the following values:
- Name:
Stage - Default Value:
Build
This parameter will allow users to define the pipeline stage dynamically.

Step 5: Add Choice Parameter
- Click Add Parameter again.
- Select Choice Parameter.
- Configure the following values:
- Name:
env - Choices:
1
2
3
Development
Staging
Production
This allows the job to run in different environments.
Step 6: Configure Build Step
- Scroll down to the Build section.
- Click Add Build Step.
- Select Execute Shell.
- Add the following shell command:
1
echo $Stage $env
Click Save.
Step 7: Build the Job with Parameters
- From the Jenkins dashboard, open the parameterized-job.
- Click Build with Parameters.
- Select the following values:
- Stage:
Build - env:
Production
- Click Build.
Step 8: Verify Build Output
- Click the latest build number.
- Select Console Output.
- Verify that Jenkins prints the parameter values correctly.
Example output:
1
2
3
Stage: Build
Environment: Production
Finished: SUCCESS
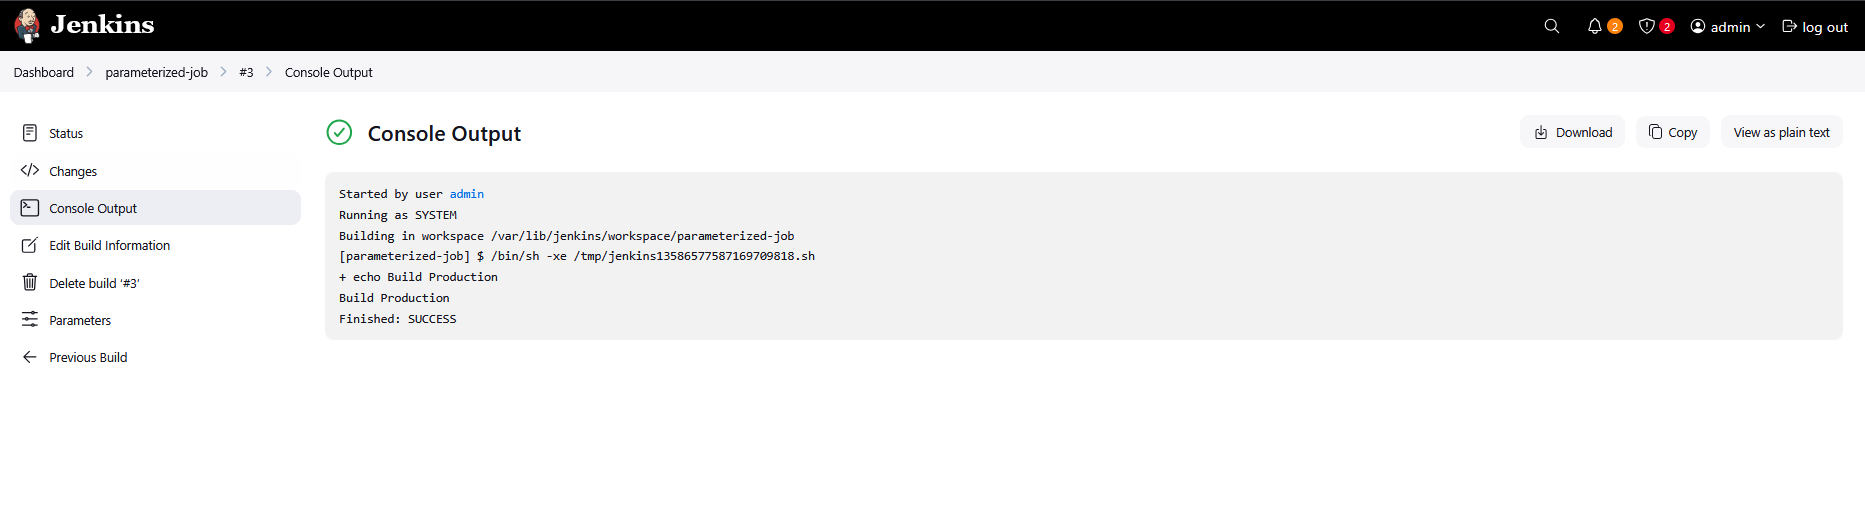
Day 73: Jenkins Scheduled Jobs
The devops team of xFusionCorp Industries is working on to setup centralised logging management system to maintain and analyse server logs easily. Since it will take some time to implement, they wanted to gather some server logs on a regular basis. At least one of the app servers is having issues with the Apache server. The team needs Apache logs so that they can identify and troubleshoot the issues easily if they arise. So they decided to create a Jenkins job to collect logs from the server. Please create/configure a Jenkins job as per details mentioned below:
Click on the Jenkins button on the top bar to access the Jenkins UI. Login using username admin and password Adm!n321
- Create a Jenkins jobs named
copy-logs. - Configure it to periodically build
every 12 minutesto copy the Apache logs (bothaccess_loganderror_log) from App Server 3 (stapp03) from the default logs location to location/usr/src/itadminon the Storage Server. - Build the job at least once so that the logs are copied and can be verified.
Note:
- You might need to install some plugins and restart Jenkins. We recommend selecting
Restart Jenkins when installation is complete and no jobs are runningin the update centre. Refresh the page if the UI gets stuck after a restart. - Define the cron expression as required (e.g.
*/10 * * * *to run every 10 minutes). - For scenarios that require web UI changes, take screenshots or record your work (e.g. using loom.com) so you can share it for review if the task is marked incomplete.
Step 1: Login to Jenkins
- Click on the Jenkins button on the top bar.
- Login using the following credentials:
- Username:
admin - Password:
Adm!n321
Step 2: Setup Passwordless SSH Access
To allow Jenkins to copy logs between servers automatically, we first configure SSH key-based authentication.
Generate SSH Key
Go to the jenkins Server :
1
ssh jenkins@jenkins
1
ssh-keygen -t rsa -b 2048
Press Enter for all prompts to generate the key.
Copy SSH Key to App Server 3
1
ssh-copy-id banner@stapp03
Verify the connection:
1
ssh banner@stapp03
Copy SSH Key to Storage Server
1
ssh-copy-id natasha@ststor01.stratos.xfusioncorp.com
or
1
ssh-copy-id natasha@ststor01
Verify connection:
1
ssh natasha@ststor01
Step 3: Create a New Jenkins Job
- From the Jenkins dashboard click New Item.
- Enter the job name:
1
copy-logs
- Select Freestyle Project.
- Click OK.
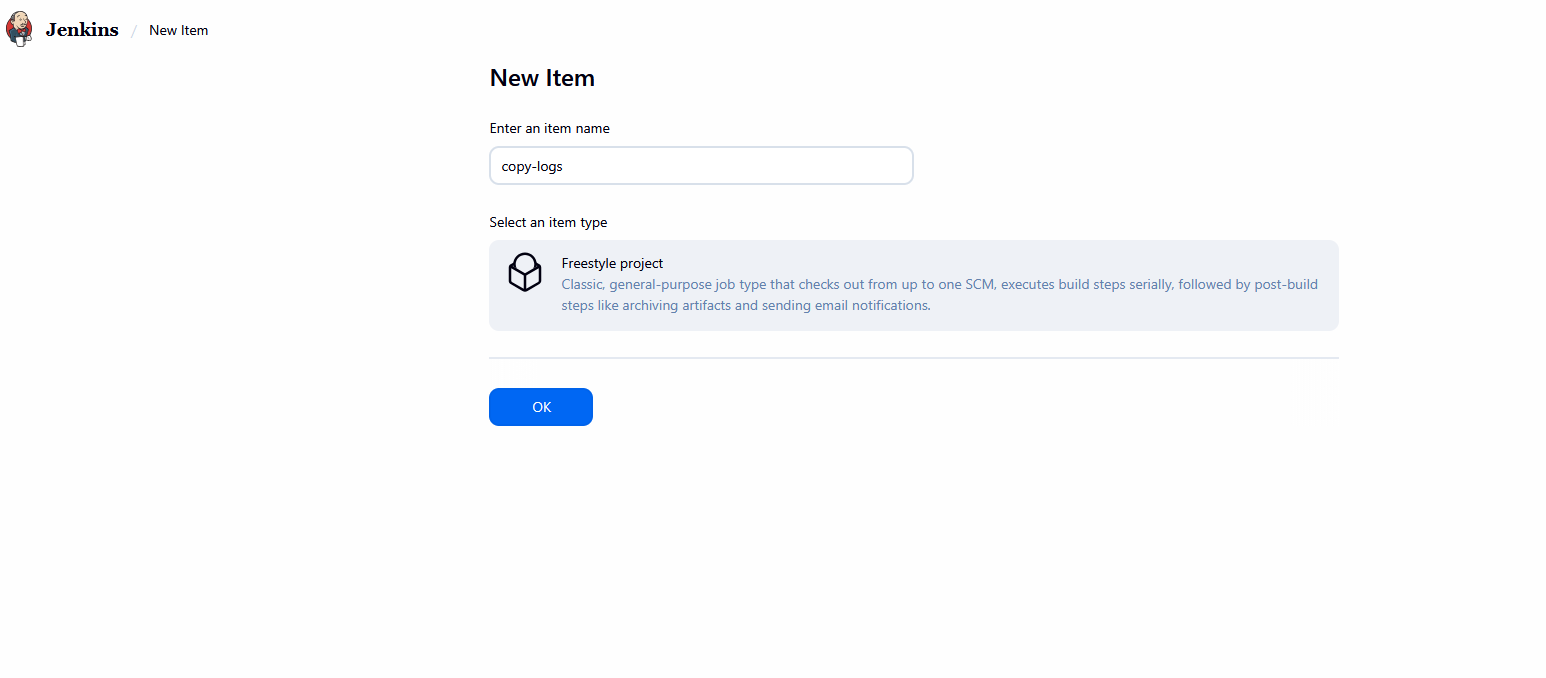
Step 4: Configure Periodic Build
Since the team needs logs regularly, configure Jenkins to run the job every 12 minutes.
- Scroll to Build Triggers.
- Enable:
1
Build periodically
- Add the following cron expression:
1
*/12 * * * *
This will execute the job every 12 minutes.
Step 5: Add Build Steps to Copy Apache Logs
Inside the Build section:
- Click Add Build Step
- Select:
1
Execute Shell
- Add the following commands.
Copy Logs from App Server
1
2
scp banner@stapp03:/var/log/httpd/access_log .
scp banner@stapp03:/var/log/httpd/error_log .
Transfer Logs to Storage Server
1
scp access_log error_log natasha@ststor01:/usr/src/itadmin
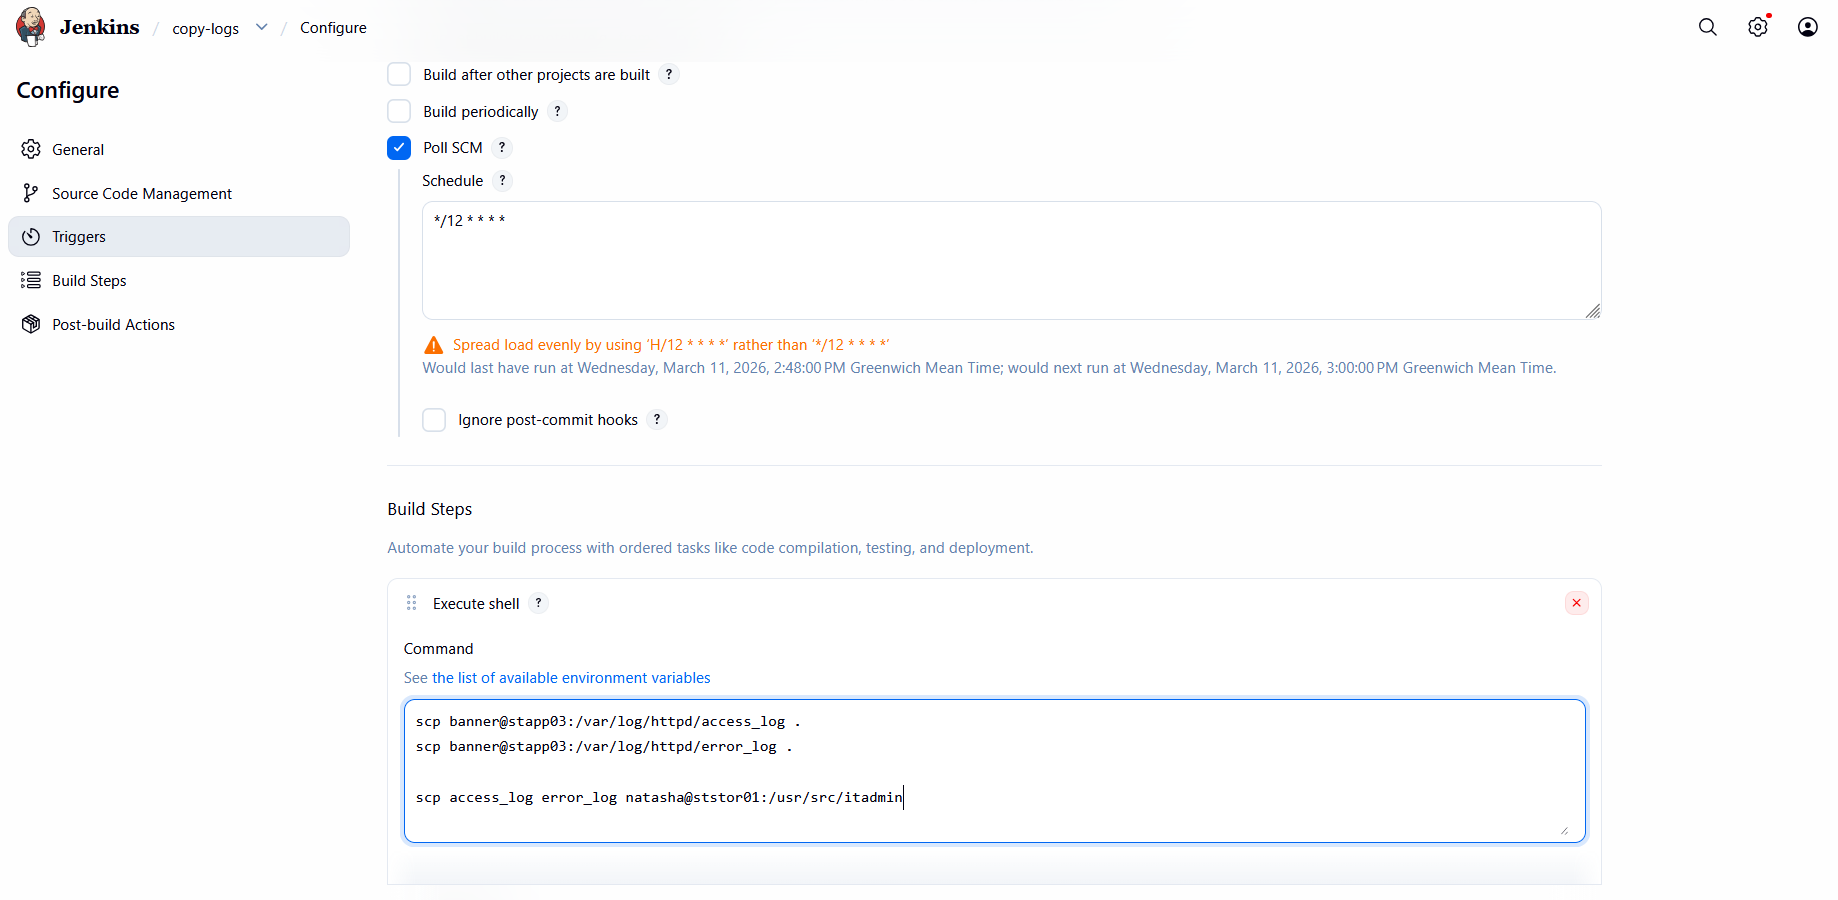
Step 6: Prepare Destination Directory on Storage Server
Login to the storage server and create the destination directory.
1
ssh natasha@ststor01
Create directory:
1
mkdir /usr/src/itadmin
Navigate to the directory:
1
cd /usr/src/itadmin
Step 7: Build the Jenkins Job
Now run the job manually once.
- Open the copy-logs job.
- Click:
1
Build Now
This will execute the shell commands and copy the logs.
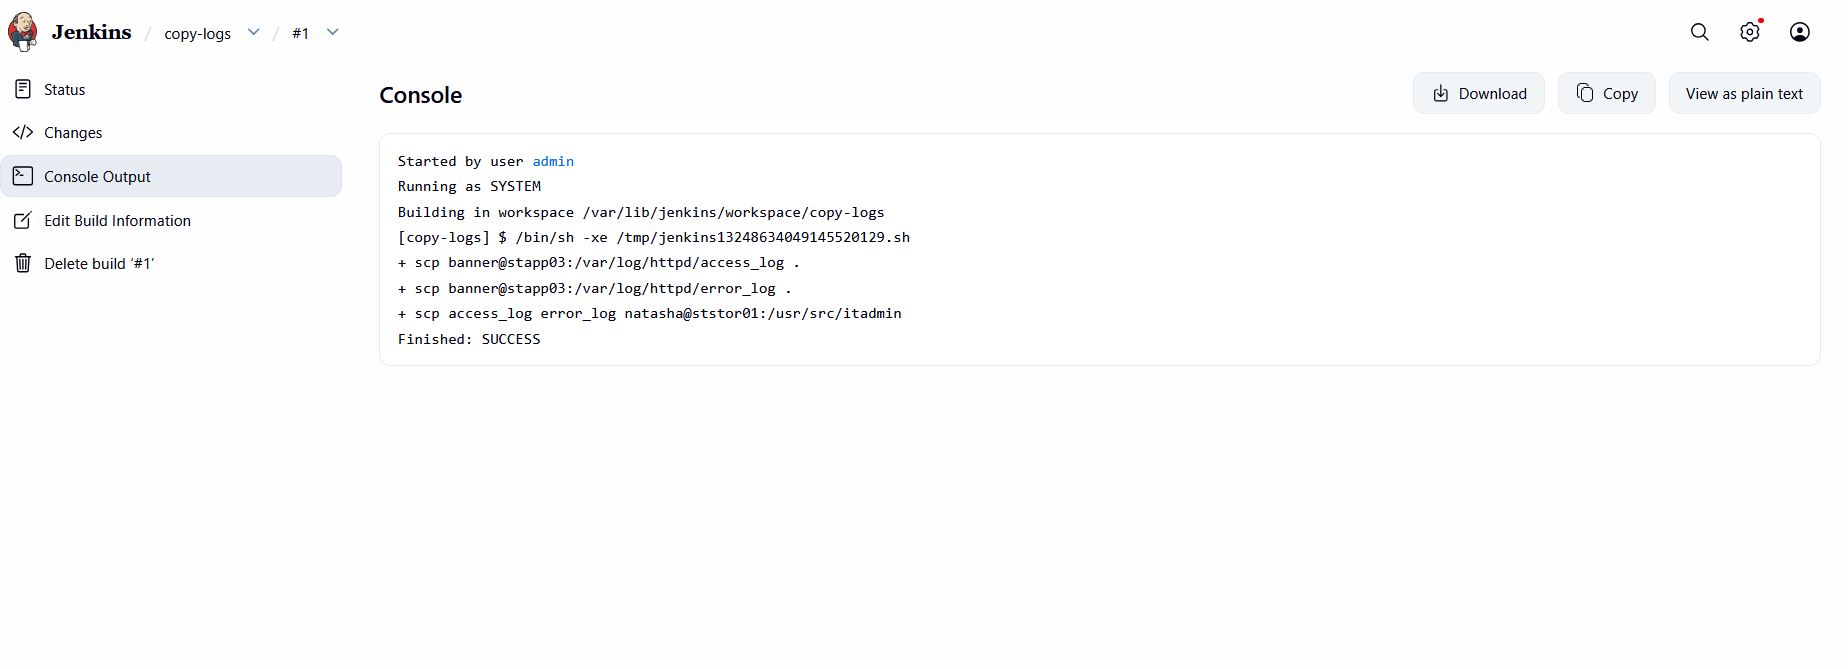
Step 8: Verify Logs on Storage Server
Login to the storage server and verify the copied logs.
1
2
cd /usr/src/itadmin
ls -laa
Output
1
2
3
4
5
6
[natasha@ststor01 itadmin]$ ls -laa
total 20
drwxr-xr-x 2 natasha natasha 4096 Mar 11 14:59 .
drwxr-xr-x 1 natasha natasha 4096 Mar 11 14:58 ..
-rw-r--r-- 1 natasha natasha 41 Mar 11 14:59 access_log
-rw-r--r-- 1 natasha natasha 733 Mar 11 14:59 error_log
This confirms that both Apache logs were successfully copied to the Storage Server.
Day 74: Jenkins Database Backup Job
There is a requirement to create a Jenkins job to automate the database backup. Below you can find more details to accomplish this task:
Click on the Jenkins button on the top bar to access the Jenkins UI. Login using username admin and password Adm!n321.
- Create a Jenkins job named
database-backup. - Configure it to take a database dump of the
kodekloud_db01database present on the App server (stapp01) in Stratos Datacenter, the database user iskodekloud_royand password isasdfgdsd. - The dump should be named in
db_$(date +%F).sqlformat, wheredate +%Fis the current date. - Copy the
db_$(date +%F).sqldump to the Storage server (ststor01) under location/home/natasha/db_backups. - Further, schedule this job to run periodically at
*/10 * * * *(please use this exact schedule format).
Note:
- You might need to install some plugins and restart Jenkins service. So, we recommend clicking on
Restart Jenkins when installation is complete and no jobs are runningon plugin installation/update page i.eupdate centre. Also, Jenkins UI sometimes gets stuck when Jenkins service restarts in the back end. In this case please make sure to refresh the UI page. - Please make sure to define you cron expression like this
*/10 * * * *(this is just an example to run job every 10 minutes). - For these kind of scenarios requiring changes to be done in a web UI, please take screenshots so that you can share it with us for review in case your task is marked incomplete. You may also consider using a screen recording software such as loom.com to record and share your work.
Step 1: Login to Jenkins
- Click on the Jenkins button on the top bar.
- Login using the following credentials:
- Username:
admin - Password:
Adm!n321
Step 2: Setup Passwordless SSH Access
To allow Jenkins to automatically take database dumps and copy them to the storage server, we need SSH key-based authentication.
Generate SSH Key
Go to the jenkins Server :
1
ssh jenkins@jenkins
1
ssh-keygen -t rsa -b 2048
Press Enter for all prompts to generate the key.
Copy SSH Key to App Server (stapp01)
1
ssh-copy-id tony@stapp01
Verify the connection:
1
ssh tony@stapp01
Copy SSH Key to Storage Server (ststor01)
1
ssh-copy-id natasha@ststor01
Verify connection:
1
ssh natasha@ststor01
Step 3: Create a New Jenkins Job
- From the Jenkins dashboard, click New Item.
- Enter the job name:
1
database-backup
- Select Freestyle Project.
- Click OK.
Step 4: Configure the Job to Take Database Dump and Copy to Storage
- Scroll to the Build section and click Add build step → Execute shell.
- Add the following shell script:
1
2
3
4
5
6
7
8
9
10
11
# Get current date
DATE=$(date +%F)
# Dump the database from App server
ssh tony@stapp01 "mysqldump -u kodekloud_roy -pasdfgdsd kodekloud_db01 > /tmp/db_$DATE.sql"
# Copy the dump to Storage server
scp tony@stapp01:/tmp/db_$DATE.sql natasha@ststor01:/home/natasha/db_backups/db_$DATE.sql
# Remove temporary dump from App server
ssh tony@stapp01 "rm -f /tmp/db_$DATE.sql"
- Scroll to Build Triggers, check Build periodically, and add the cron schedule:
1
*/10 * * * *
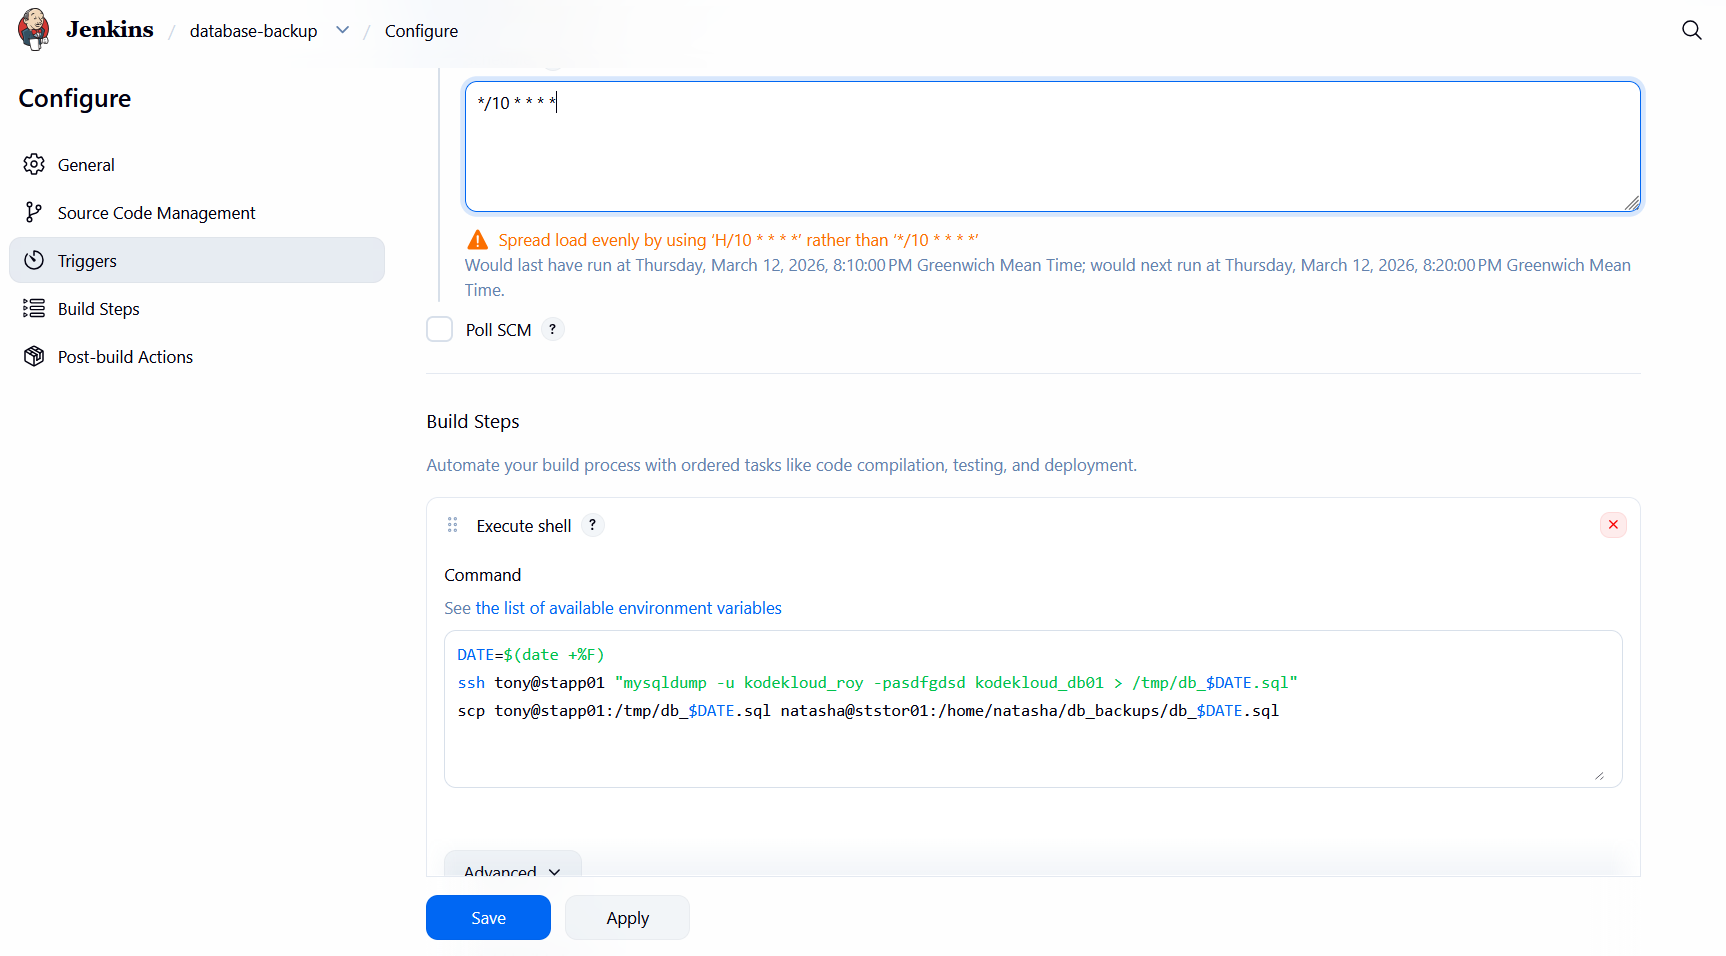
- Click Save.
Step 5: Run and Verify the Job
- Click Build Now to test the job.
- Confirm in the Jenkins console output that the job ran successfully:
1
2
3
4
5
6
7
Started by user admin
Building in workspace /var/lib/jenkins/workspace/database-backup
+ date +%F
+ DATE=2026-03-12
+ ssh tony@stapp01 mysqldump -u kodekloud_roy -pasdfgdsd kodekloud_db01 > /tmp/db_2026-03-12.sql
+ scp tony@stapp01:/tmp/db_2026-03-12.sql natasha@ststor01:/home/natasha/db_backups/db_2026-03-12.sql
Finished: SUCCESS
- Verify on ststor01 that the database dump is present:
1
ls -l /home/natasha/db_backups/